Thursday, January 25, 2007

Mosquito Facts & West Nile Virus Update

Mosquito Facts Mosquito, the name is Spanish for little fly. There are 3000 different kinds of mosquitoes and a worldwide population of 100 trillion!! Most are in tropical climates, but there are mosquitoes in arctic and desert regions. They can fly up to 10 mph, dart between raindrops and even fly backwards. Most live and die close to where they hatch, but some are strong flyers that travel many miles in search of a victim. Only female mosquitoes bite. They require a blood meal in order to develop eggs to make more mosquitoes. Most female mosquitoes lay their eggs on standing water. Stagnant ponds, ditches, and fresh, or salt, water wetlands are favorites, but even a few tablespoons of water in a flower pot or old auto tire will do. The eggs hatch, become swimming larvae, then pupae and finally flying adults. Mosquito larvae are an important source of food for certain fish, birds, bats and other animals. To reduce Mosquito infestation we recommend using Mosquito Bits or Mosquito Dunks. A SkeeterVac is a long term and highly effective solution for eliminating mosquitoes. Skeeter Vac's patent pending scientifically proven technology creates an atmosphere biting mosquitoes can't resist: warmth, water vapor, carbon dioxide and odorants. Then it finishes off the job by trapping and killing those biting pests so your outdoor experiences are safer and more enjoyable. What's being done about Mosquitoes and what you can do In their quest for blood, mosquitoes may bite birds, frogs, snakes, and mammals, including people. Some, called peridomestic mosquitoes, actually live, and breed, around homes just to be near us. Twenty-four hours or so after hatching, a female mosquito flies off in search of a meal. She homes in on body warmth, odor, moisture and the carbon dioxide we exhale. When she bites, the mosquito injects a bit of saliva that slows coagulation so blood flows freely. It's your body's allergic reaction to the saliva that caused the welt and itching sensation. Mosquitoes can also transmit canine heartworm, which is fatal to dogs once contracted. For protection, pet owners can purchase a preventative medicine from their veterinarian. Generally, the trend in the U.S. is away from spraying adult mosquitoes with chemicals. Whenever possible, government health authorities control large tracts of mosquito breeding land by larviciding. They use low toxicity biopesticides like B.T.I.(Bacillius thuringiensis subspecies israelensis), a live bacteria that's deadly to mosquito larvae, harmless to other living things. The mosquito that bit you last night may have hatched in the birdbath right in your own back yard. At home or with school or community groups, you can effectively reduce mosquito problems using common sense and environmentally-conscious methods. Organize a neighborhood cleanup. Its great community project that will eliminate lots of potential mosquito breeding spots and improve the view! Look for places where rainwater collects and stands. Old car tires, drain flower pots, children's wading pools and tree holes. Goldfish and fresh water minnows (Gambusia affinis) will both eat mosquito larvae. Microbe Lift is an ideal supplement to protect pond areas for excessive mosquito hatchlings. Check with your local mosquito control agency about availability and local regulations. Flush birdbaths and fountains weekly. Clean clogged gutters and drains, cover cesspools. To Humans and domestic animals, mosquitoes are a nuisance and a health hazard since mosquitoes can transmit a variety of diseases. Fortunately Yardiac.com is there to help and protect you from the health risk mosquitoes present. When you can't flush or drain stagnant pools, low-lying wet areas, tree holes, unused swimming pools and rain barrels, use a B.T.I. product like Mosquito Bits or Mosquito Dunks.

Controlling Armadillos

Anyone who has had an Armadillo in their yard knows just how much destruction can occur if left unchecked. Armadillos will tear up turf, nest under slabs and eat just about anything around your home. To understand how to best deal with your armadillo problem, you need to know a little about their biology. Armadillos belong to the same family of mammals as the sloth and anteaters. Their body is made of a leathery material generally referred to as "armor". The species most present in North America is the Nine-banded armadillo and can be found throughout the entire southwest and southeast. In fact, this species of armadillo is migrating ever further from Texas - the original state it was first found. In some states, they have established themselves after being released intentionally. Armadillos love to nest in rock piles, around trees or shrubs and under slabs. Their burrows are usually 15 to 25 feet long and cause extreme damage to tree roots. In many cases, this damage leads to the tree dying. These same burrows can lead to flooding when dug around crawl spaces and can undermine patio slabs or walkways. This weakening ultimately leads to the concrete falling apart and breaking. Armadillos are strong diggers and rely on this strength for food and shelter. They are attracted to tasty fruit which may be found in a garden or compost pile. Once they start coming around, expect them to return every night as they are mostly nocturnal. They like to establish "runs" where they will travel every night expecting to find food. These same "runs" can be used against them and will be discussed later in the article. Armadillos also love turf worms and grubs. Lawns which are left untended will often develop beetle grub populations which will certainly attract armadillos from far and wide. Earthworms are another food source they like and either grubs or worms can be found by digging up sod, raking away leaves, moving carefully laid wood chips or bark, or simply digging frantically until such food is found. Either way, the mess they leave is aggravating, damaging and never ending once it begins.Armadillos mate in the fall and have their young around February or March. Almost every litter will have identical quadruplets. These miniature adults are ready to walk, swim and behave much like their parents. By the end of the summer, they, too, will be wreaking havoc in the neighborhood! Armadillo control can be accomplished by either a passive, or aggressive, method. Using both tactics will ultimately provide the best results. Passive techniques use repellents and sprays to deal with the armadillos vast food sources. This approach will provide results. Aggressive techniques involve trapping and provide instant control. However, if some of the passive techniques are not employed, other armadillos will move into the vacant territory once the current armadillo is removed. In most cases, both passive and aggressive armadillo control will yield the best results.

Perennial of the Year 2007!

Nepeta ‘Walker’s Low’ The Perennial Plant Association has awarded the title of Perennial Plant of the Year to Nepeta ‘Walker’s Low’. Introduced in 1988 in Europe, Walker’s Low catmint has become increasingly popular with each passing year due to its lovely blue-violet flowers and its long bloom time, attractive grey-green foliage, ease of propagation, lack of pest or disease problems, and low maintenance requirements.
    • Hardiness - USDA Zones 3 to 8 • Size - 30 to 36 inches tall and wide. Walker’s Low is named for a garden and the name is not related to plant size • Light - Best in full sun, but can tolerate shade in hot climates • Soil - Prefers well drained soil and neutral pH • Uses - Good companion plant for early and late blooming plants. Great for perennial borders, but can be used in herb gardens, rock gardens, as a ground cover, or as a container plant. • Unique Qualities - Will bloom continuously throughout the season if properly pruned. Great for attracting bees, butterflies and other pollinating insects, but is deer and rabbit resistant. Leaves release a wonderful aroma when crushed.

Visit http://www.perennialplant.org/ to learn more about the Perennial Plant Association.

If you are interested in more information about perennials, Yardiac.com offers Andre Viettes Perennial Handbook. Look for more gardening guides, in the future. Also, don't miss out on our great selection of plant care products.

Get Ten Free Trees

Everyone says you can't get anything for free anymore! The National Arbor Day Foundation is sending each person who joins the organization 10 free trees. The membership is just ten dollars! In addition to the trees, you will receive a subscription to the foundation's colorful bi-monthly publication, Arbor Day paraphernalia, and the "Tree Book".

The ten trees are:

  • American Redbud
  • White pine
  • Sugar Maple
  • White Flowering Dogwood
  • Pin Oak
  • Red Oak
  • Red Maple
  • Silver Maple
  • Birch
  • Colorado Blue Spruce

Or choose a mix of trees. See their website, www.arborday.org/ , for more details. To receive the free trees send the $10.00 membership contribution to:

TEN TREES National Arbor Day Foundation 100 Arbor Ave. Nebraska City, NE 68410

At Yardiac.com, we offer a great selection of irrigation products, as well as a healthy selection of fertilizers! Newly planted trees need all of the support that they can get.

Wednesday, January 24, 2007

Drought Defense:Three Smart Moves to Quench Your Garden's Thirst

Plus, beautiful, drought-tolerant, plants to grow, in your garden. 
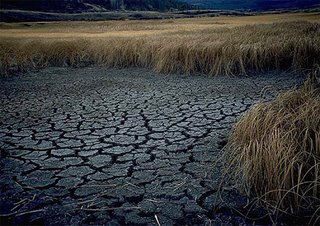
No one, not even a Yardiac, can control rainfall and prevent a drought, but you can make a few smart moves, right now, to ensure that your garden will sail through dry spells looking healthy and vibrant. As an added bonus, you'll lighten your gardening chores at the same time. Yardiac Tip #1: Mulch your gardenTop the garden soil around your plants with a thick blanket of mulch. Mulch helps the soil hold moisture, and it also keeps weeds down. Shredded bark is a good choice for mulch in flower gardens; spoiled hay and compost work well in vegetable gardens. You can also use grass clippings as long as they haven't been chemically treated. Yardiac Tip #2: Water with soaker hoses or drip systemsSoaker hoses are made from recycled tires; turn them on and let them "sweat"! Just wind a soaker hose around the plants in your garden. When you turn the water on it will flow through the microscopic holes in the hose and slowly saturate the soil. For a double dose of drought protection, combine moves #1 and #2: install your soaker hose, then cover it with mulch to prevent moisture from evaporating. Today's drip irrigation systems are much more flexible and improved over the unwieldy, clog-prone models of the past. Drip systems are well suited for use in flower and vegetable beds; you can even use them to keep your containers watered while you're on vacation, or saturate newly planted saplings. Just add an automatic timer, and suddenly your watering chores are over. 
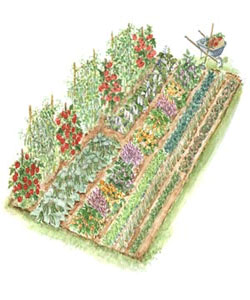
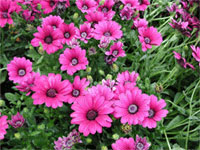
Yardiac Tip #3: Choose Prairie PlantsTrue to their roots, prairie plants (both domestic and wild forms) are proving to be tough, reliable garden performers that require little care to keep them in top form. What's more, these resilient American natives feel right at home wherever they're planted, whether that's a suburban garden in the Midwest or a brownstone in New York City. Plants such as black-eyed Susan and purple coneflower evolved where droughts are commonplace, so they're much more tolerant of dry spells than shrinking violets with ancestral roots in a rainy climates. Here's a brief overview of some fabulous prairie plants for your garden: 
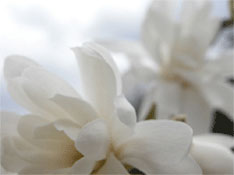
Culver's root, Veronicastrum virginicum, is a four-foot-tall beauty with candelabra-like 
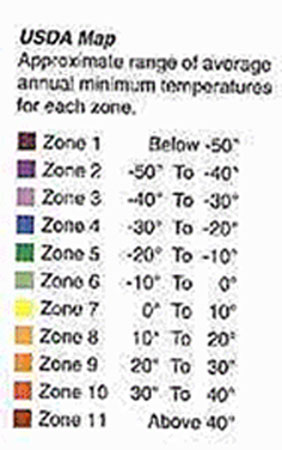
bloom spikes that don't require staking. Culver's root is available in white- and pink-flowering varieties. Hardy from Zones 3-9. Red milkweed, Asclepias incarnata, grows three to five feet tall and produces large, flat seed heads that bloom in pale pink to cherry rose. Butterflies adore them in late summer. Common butterfly weed, Asclepias tuberosa, is another native that butterflies enjoy. Both plants are tolerant of seaside conditions and are hardy from Zones 3-9. Yarrow has fuzzy leaves and bold, flat flower heads. The spectacular, reliable 'Coronation Gold' variety looks as good in a manicured garden as it does in a rustic, wild setting. Hardy from Zones 2-9. 
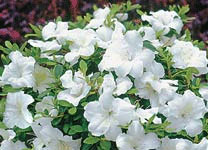
Purple coneflower, Echinacea purpurea, is a popular low-maintenance perennial that thrives even in light shade, and grows up to 40 inches tall. A white form, Echinacea purpurea 'Alba', is just as appealing to bees and butterflies as its purple cousin, but it's shorter and less likely to reseed itself each year. Both are hardy from Zones 3-9. 
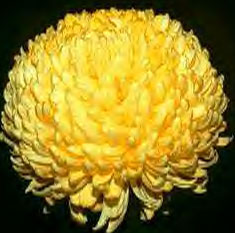
Helen's flower, Helenium autumnale, picks up the slack when other garden flowers are fading. 
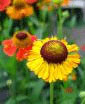
Blooming in shades of yellow, orange, maroon and copper, Helenium is a tough-as-nails native that grows about three feet tall and is an attractive companion plant for asters and chrysanthemums. Hardy from Zones 3-9. Prairie false indigo, Baptisia lactea, is a rugged, spring-blooming perennial that develops upright black stems with white, pea-like flowers. A blue form, Baptisia australis, is also available. Both are extremely pest- and disease-resistant and grow two to four feet tall. Hardy from Zones 3-9. Helianthus is the bright yellow sunflower you've seen growing wild along the roadsides in the Midwest. A top-performing hybrid is the double-flowered Helianthus multiflorus 'Flore-pleno'. This five-foot-tall giant is in nearly constant bloom July through September and makes excellent, long-lasting cut flowers. Hardy from Zones 4-10. 
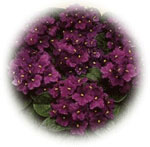
Bee balm or monarda, Monarda didyma is a domestic garden staple that blooms in reds, pinks and purples. The blooms for both wild and domestic varieties are rounded and fringy, resembling fireworks opening and cascading back to earth. Bees, butterflies and hummingbirds love to visit these flowers. Hardy from Zones 3-9. Joe-pye weed, Eupatorium maculatum, grows five feet tall. The striking plant bears large flat reddish-purple flowers from July to September and is much relished by bees and butterflies. Hardy from Zones 2-8. 
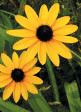
Black-eyed Susan, Rudbeckia hirta, is likely the most popular native flower of all. This never-say-die perennial tolerates all sorts of neglect and keeps on blooming. Black-eyed Susans, including variety 'Goldsturm,' make long-lasting cut flowers, too. Hardy from Zones 3-8
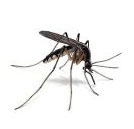
How to Photograph Birds

One of the biggest challenges faced by the bird photographer is getting close enough to the subject to be able to produce a good image. The easiest (though also the most expensive) solution to this problem is to work with a telephoto lens. Most professional bird photographers, in fact, often use a 500mm or 600mm telephoto lens, sometimes coupled with a teleconverter (a device that extends the lens focal length). But for amateur photographers who want to photograph birds without buying a lot of expensive equipment, there are always other methods and options. If you're going after the Andean Condor, you're going to need a telephoto lens to get the shot, said Chuck DeLaney, Dean of NYI, America's oldest and largest photography school. But if you're mainly interested in photographing birds in your region, maybe just in your backyard, there are still plenty of options, like using a blind for getting good photos. One strategy, employed quite cleverly by an NYI graduate, is particularly well-suited for the backyard bird photographer. To capture songbirds (who are notorious for their quick, erratic movements and thus difficult to photograph), she positions her Canon SLR near a feeder, sets the focus, aperture, and shutter speed, then retreats to the porch. She waits there until a bird comes to the feeder, then, when the moment is right, she uses her infrared control to trigger her camera's shutter. Birds approach her feeders and backyard perches because she is out of sight, and, as a result, she's able to get closer shots without using a telephoto lens. For more great suggestions on how to take bird photos, and lots of great photos, see the official Web site of the New York Institute of Photography. (Reprinted with permission from the New York Institute of Photography Web.) Another great source of Bird Photograpy is the North American Birds Photo Gallery.

Do Sundials Actually Work?

The poor reputation of sundials is ill-deserved, and has arisen mostly because we have all accepted "watch time" as an absolute standard, without devoting any thought to the nature of the time it is measuring. They're also a perfect gift! Sundials measure time as it is. Noon is when the when the sun is highest in the sky (when it crosses the meridian). Watches measure time as we would like it to be, with noon tomorrow exactly 24 hours, 0 minutes and 0 seconds away from noon today. But noon on 26 December is actually 24 hours, 0 minutes and 29 seconds away from noon on Christmas Day. And noon on 15th September is only 23 hours, 59 minutes and 39 seconds away from noon on the following day. Mechanical watches obviously cannot be made to run in this way. (Electronic watches could be made to do so, though the manufacturers would probably not find a very large market for them). So Mean Time was invented, an artificial construct in which all days are assumed to be exactly 24 hours long. The sundials seen above church doors are a reminder of a time when sundials were the standard. Until about 200 years ago, public clocks could not be made sufficiently accurate to run for more than a few days without being reset, and the only way of resetting them was from a sundial. Until the railways came, there was no particular reason why people in, say, Bristol should keep the same time as people in London. And, of course, at that time there was no practical way of communicating information about time over a distance. When the telegraph made such communication possible, it became necessary for people living in one area to agree that they would not keep their own local time, but would all keep a time based on the local standard meridian. Bristol is at 2º 35'W of Greenwich, so noon there is just over 10 minutes later than in London. There is still a relic of this change - the clock over the old Corn Exchange in Bristol has two minute hands. One shows Greenwich Mean Time like all the other clocks in England, and the other, 10 minutes behind it, shows Bristol time! Later on, another artificial change was made with Summer Time, which arbitrarily adds one hour to all clock times during the summer. So, in the summer, there are 3 good reasons why your watch will be telling a different time from the sundial. They may be up to 15 minutes different because your watch is assuming that all days are equal in length. Then it will be 4 minutes different for every 1degree you are east or west of your standard meridian. (This can be quite substantial; Vigo in Spain, for example is 8º44'W of Greenwich, but is on Central European Time, for which the standard meridian is 15ºE of Greenwich, so the correction for longitude in Vigo will be 1 hour 34 minutes and 56 seconds). Lastly, it will be exactly 60 minutes different because your watch, if you live in England, has been arbitrarily altered to tell the time in Prague for the duration of the summer! Our sundials are a classic addition to any yard, and make great gifts! Not only do we have a generous selection of sundials, but also a great choice of bases. Be sure to take a look!

Tuesday, January 23, 2007

Make a Stunning Ivy Topiary

Making a topiary is a simple and rewarding project that even someone with the brownest thumb can do. The most difficult part is planning where to display the finished topiary. Having the display location predetermined will help you select the proper shape and style of your topiary form. Upon completing your selection:
  1. Place the form that you will be using in your pot. An eight to ten inch pot should be sufficient, but it all depends on the size of the form and the size of the plant that you will be using.
  2. Fill the pot with soil to about an inch from the rim.
  3. Plant the first of the ivy plugs. You will want to use three to four plugs, depending on their size.
  4. Weave the ivy around the base of the form, and continue winding up the vines. Keep adding plugs and weaving them around the form until the pot is full.
  5. Once you have planted and woven all of the plugs, sprinkle a little time release fertilizer on the surface of the soil.
In a few weeks, your topiary should be filled out and looking great.

Growing African Violets

African Violets, or Saintpaulia, are among the most popular houseplants. They are found in a broad range of flower colors and leaf varieties. African Violets are extremely easy to care for: They grow best under fluorescent lights, or in the diffused light of a north, or east-facing, window. When they refuse to bloom it is usually because of insufficient light. When they receive too much light, their leaves turn yellow. African Violets enjoy temperatures around 70 F during the day, and in the 60s at night. They do best where they have ample humidity, at least 60%. They can be watered from below, or above. Use room temperature water, because cold water will spot the foliage. African Violets are quick and easy to propagate as well. This is a fun way to share a new variety with a friend. These plants require rich potting soil, and specific African Violet fertilizer.

Monday, January 22, 2007

History of the Chrysanthemum

"If you want to be happy for a lifetime, grow Chrysanthemums." (a Chinese philosopher) The chrysanthemum was first cultivated in China as a flowering herb and is described in writings as early as the 15th Century B.C. In fact, their pottery depicted the chrysanthemum much as we know it today. As an herb, it was believed to have the power of life. Legend has it that the boiled roots were used as a headache remedy; young sprouts and petals were eaten in salads; and leaves were brewed for a festive drink. The ancient Chinese name for chrysanthemum is "Chu." The Chinese city of Chu-Hsien (which means Chrysanthemum City) was so named to honor the flower. Around the 8th century A.D., the chrysanthemum appeared in Japan. So taken were the Japanese with this flower that they adopted a single flowered chrysanthemum as the crest and official seal of the Emperor. The chrysanthemum in the crest is a 16-floret variety called "Ichimonjiginu." Family seals for prominent Japanese families also contain some type of chrysanthemum called a Kikimon -"Kiki" means chrysanthemum and "Mon" means crest. In Japan, the Imperial Order of the Chrysanthemum is the highest Order of Chivalry. Japan also has a National Chrysanthemum Day, which is called the Festival of Happiness. The chrysanthemum was first introduced into the Western world during the 17th Century. In 1753, Linnaeus, a Greek, determined the name by which we know the plant today - chrysos meaning gold, and anthemon meaning flower. Linnaeus was the founder of that branch of taxonomy dealing with plants and including the science of classification and identification. Experts say this is probably an accurate description of the ancient species, as it also points out the mum's need for sunlight. The earliest illustrations of mums show them as small, yellow daisy-like flowers. Ancient growers would not recognize modern mums. Although some mums still resemble daisies, others are more showy. Regardless of the flower type, they all belong to the Compositae, or daisy, family. In more recent times, growers within several countries began to propagate chrysanthemums. Hybridizers in England, France, Japan, and the United States have developed a wide range of floral colors, shapes, and sizes. Today, its colors include various shades of pink, purple, red, yellow, bronze or orange, and white. Since the chrysanthemum was first introduced into the United States during colonial times, its popularity has grown such that mums now reign as undisputed "Queen of the Fall Flowers." For many of us, our introduction to the chrysanthemum was a corsage for the girlfriends and mothers at Homecoming football games. Mums remain the most widely grown pot plant in the country and are one of the longest lasting of all cut flowers. This latter attribute, along with their artistic allure, make mums highly favored by floral arrangers. In the United States, the chrysanthemum is the largest commercially produced flower due to its ease of cultivation, capability to bloom on schedule, diversity of bloom forms and colors, and holding quality of the blooms. An interesting contrast to the positive feelings many Americans have of the chrysanthemum (football games, house-warming presents, get-well thoughts), is that in many European countries the chrysanthemum is known as the death flower. In countries such as Belgium and Austria, the chrysanthemum is used almost exclusively as a memorial on graves. There are so many varieties of chrysanthemums today that a system of classification is used to categorize and identify them. The classification is based on the type of florets and their growth pattern. Some chrysanthemum cultivars can be trained into different forms. Bonsai (pronounced bone-sigh) cultivars can be trained, in one year, into miniature forms, such as trees, that will match the character of a lifetime effort on deciduous or evergreen plants or trees. Some cultivars can be trained into a hemispherical form or, with skill and patience, they can be trained to look like a dog, a table and chair, or the human form. Cascading cultivars can be grown either as long pendulous drapes of blooms or trained as large fans, pillars, or trees. As a landscaping plant, the chrysanthemum makes a beautiful Fall display for the home garden. With skill and artistry, many varied effects can be achieved, even when only a small growing area is available. Chrysanthemums can accentuate an entrance way; provide the Fall colors to a season-long growing bed; or dominate a growing area with the many varied shapes, sizes, and colors. Used in this fashion, chrysanthemums provide an outstanding climax to the season before the colds of winter arrive. Longwood Gardens (in Kennett Square, Pennsylvania) and Cypress Gardens (in Cypress Gardens, Florida) are two locations that have annual displays that demonstrate many uses of the versatile and beautiful chrysanthemum. As with all gardening efforts, it is not luck or the so-called green thumb that achieves results, but rather hard work and dirty fingernails. Also, take a look at our selection of fertilizers, hand tools, and gloves, to protect those busy hands! Contributed by A.C.S.

Establishing the Ideal Vegetable Garden

Step1 Choose an area in which will receive 5-7 hours of sunlight per day.

Step 2 Remove grass, weeds debris from the proposed site. This should be done by good old fashion blood, sweat and tears (digging, raking and hoeing). It is a good idea to uses a systemic grass and weed killer such as Round-Up, before cultivating. This will take a few weeks to kill all the vegetation, but it does do a good job, without contaminating the soil.

Step 3 Work the soil to a depth of 10-12" using a shovel or roto-tiller. Step 4 Now its time to improve the soil condition. We recommend using a 2 part mix of of which 1 part consisting of an equal combination of Peat Moss, Perlite, Vermiculite and the other part being the existing soil.

Step 5 Wet the soil for 3 days prior to planting to allow the conditioning to take affect. Do not skip this step.

Step 6 Now its time to plant. We recommend staggering planting times. This will allow you to harvest crops over a longer period of time.

Step 7 Fertilize every two weeks with Jack's Classic Water Soluble Fertilizer

Step 8 It is a good idea to add lime in the fall at the rate of 6- 8 lbs. per 100 sq. ft., to rejuvenate the soil.

Saturday, January 20, 2007

Best Time to Plant Vegetables

Most Yardiacs can't wait to start planting, so they can enjoy the taste of fresh vegetables. However, these plants actually have recommended planting times. The last spring frost is important to gardeners, in order to plan when to set out frost-sensitive annuals, vegetables, and even tropical container plants. Some vegetables are frost tolerant, and can be planted as soon as the ground can be worked. Others are slightly less hardy and should be placed in the ground 2-4 weeks before the average last frost date, which is a specified date calculated for an area after which frost is unlikely to occur. Frost sensitive plants, such as melons, peppers, and tomatoes, should be planted after the last frost. Check with the extension service in your area for this information. Unfortunately, cold weather may still occur after the crop has been planted, and some kinds of protection will be needed to shelter sensitive plants. To retain heat, cover frost sensitive plants just before sundown using nonmetallic containers, or old lightweight blankets, or row covers. Container plants are easy to deal with. Just move them to a garage or other protected areas. Yardiac has a great selection of greenhouses, as well! Very Cold Tolerant Plants -- Plant as soon as ground can be worked, somewhat. Cold Tolerant Plants -- Plant 2-4 weeks before the first average frost free date. Frost sensitive Plants -- Plant after the last frost. Review the Yardiac.com Organic Vegetable Fertilizers, and tell us what you think!

Very Cold Tolerant Somewhat Cold TolerantFrost Sensitive
AsparagusBeets Melons
Horseradish BroccoliPeppers
LeeksCabbage & KohlrabiTomatoes
OnionsCarrotsSweet Corn
Parsnips CauliflowerEggplant
PeasCeleryCucumbers
Spinach CollardsArtichoke
TurnipsLettuce, Kale, EndiveSquash
Shallots Onion Sets

Paint Your Garden With Annuals

Never look at a neighbor's yard in total envy, because their garden beds exploded into a rainbow of red, orange, blue, yellow and purple, while yours had all the color of a black and white photo! Creating that palette of color is easy, easier than one might imagine. All it takes is some time, know-how and a few well-placed annual plants. Here are some suggestions for adding instant color to the yard. Selecting Annuals Annuals are flowers that experience their entire life cycle in one growing season. Essentially, they grow, blossom and die, allowing the homeowner to create a new and varied garden every year. Some of the most popular annuals include zinnias, marigolds, inpatients and rose periwinkles. Zinnias come in a wide variety of colors. Marigolds are known for their bright, gold appearance. Rose periwinkles bloom in a white hue with a flush of pink. Make sure you select the plants that will work with your local weather conditions -- heat, drought, frost, etc. Preparing the Planting Site The next step is to select a planting site. Bear in mind that most annuals thrive best with full exposure to the sun's rays. Now it's time to prepare the soil. The goal is to have soil that is well-drained, full of nutrients and free of weeds. Compacted soil makes it hard for plant roots to spread out, while sandy soil doesn't allow enough water to be absorbed. Using a rake, hoe or tiller, turn the soil over several times. Mixing in organic nutrients will prepare and loosen compacted soil while binding sandy soil. Make sure that all weeds are removed from the bed. This can be accomplished by hand or with an herbicide. Once that's done, apply fertilizer according to the directions on the package. Planting Annuals Some gardeners appreciate the challenge of growing annuals from seed, but the most ideal approach is to utilize transplants. For one reason, it's easier to envision how the bed will ultimately look when using transplants. Secondly, seeds take time to grow, but transplants appeal to the instant gratification lover in all of us. In advance of actually putting plants into the ground, draw a picture of the bed as you intend it to look. Use the drawing as a planting guide, almost as a map. "Zinnias go here. Some marigolds go here and there, and way over there..." When shopping for transplants, seek those with rich green leaves and tight, compact growth. Don't worry about a transplant's height. It will grow as tall as it's supposed to. Also, don't give in to the temptation to buy annuals that are already flowering. They're the quickest to suffer transplant shock, and because they're already blooming, may not last as long. Plants without buds are the way to go, as they'll be less vulnerable to transplant shock and will grow quickly once in the soil. Keeping Weeds at Bay Once annuals are in the ground, one of the greatest threats they can face is an onslaught of weeds. A homeowner who hasn't dealt with this problem before it starts could find himself with ravaged plants and hours spent unnecessarily trying to rectify the situation. All it takes to enjoy a summer of weed-free gardening is a good weed preventer and few extra minutes spent right after the annuals have been planted. A product such as Preen will effectively deter weed growth. Preen comes in an easy-to-use, refillable canister that allows granules to be poured -- much like salt from a shaker. Simply sprinkle Preen evenly around the bed, then gently water the area. Follow the package instructions for maximum effectiveness. A single application will last for three months, at which time Preen can be applied again. Those homeowners who want to make the task of caring for annuals even easier may want to use Preen 'n Green. Preen 'n Green prevents weed growth while providing vital nutrients. It's easy to turn your yard into a work of art. Just think of the garden bed as a canvas and annuals as a selection of colorful paints, and go to it!

Friday, January 19, 2007

Caring for Camellias

Camellias love acidic soil! General practices for growing camellias are similar to those for rhododendrons, azaleas, and hollies. Camellias do not require heavy feeding, so fertilizer should be used sparingly. An acidic fertilizer may be applied in early spring and followed by a second light application in June. Yardiac.com recommends mixing in an organic material called "Holly Tone" to the root zone of your Camellia. Then, feed with a good acid based, water- soluble, fertilizer. Here are some more tips: Planting Careful planting is the single most crucial factor in ensuring success. In northerly areas, where the plants will be near the limit of their cold tolerance, spring planting is best. The site should afford protection in winter from strong winds, and morning sun. When planting, add a generous amount of humus such as compost, leaf mold, or coarse peat, to the soil. Be careful not to plant too deeply; as with azaleas and rhododendrons, the base of the stem should be slightly higher than the surrounding soil. Moisture A two-to four-inch layer of mulch is important to help the soil retain moisture, and to minimize alternate freezing and thawing in winter. During its first season, water a new plant thoroughly once a week, unless there has been at least one inch of rain. If the winter is a dry one, watering may also be necessary during mild spells. Pruning Plants may be pruned to remove weak or dead branches, to control size or leggy growth, or to renew the vigor of older plants. Heavy pruning is best done in spring, before the plants have begun to produce new growth.

Azaleas and Rhododendrons

Azaleas and Rhododendrons are two of the most popular Spring Blooming plants. These hardy creatures will grow abundantly with the minimal but proper treatment. Azaleas are one of the most popular plants in the Acid-Loving family. Below are some tips concerning their care: The first and most critical factor in your gardening success is Soil pH. Some plants thrive in neutral soil while other plants such as Azaleas prefer a more acidic environment. The difference lies in the plant's ability to use nutrients present in the soil. For plants that prefer a more acidic soil, a critical nutrient is iron. Iron is most available in soil with a pH of around 5.5. Without iron these plants will turn yellow and suffer stunted growth. If you have do not know what the PH level of your soil is -- Yardiac.com has a full assortment of soil test kits in stock and ready for sale! Lowering soil pH is not difficult. In new plantings, work-in organic matter such as peat moss or compost. For existing plantings, regular feeding with Holly-Tone will keep soil at an optimum pH while providing all the major, minor, and trace nutrients plants required. How to Feed Azaleas & Rhododendrons Feed Azaleas in the spring with Holly-Tone and Acid Plus water soluble fertilizer. In general, the proper rate of application is one cup of Holly-Tone per foot of branch spread. This rate should be doubled for plants over three feet wide. Do not work the plant food into the soil as these plants have surface root systems that can be disturbed by such activity. It is best to apply the Holly-Tone directly to the soil prior to mulching. If this is not possible, Holly-Tone can be applied on top of mulch at double the standard rate. This will compensate for the loss of nutrients in the mulch layer. Of course always water the plants sufficiently and fertilize with Acid Plus. Fertilization should occur several times in the spring and fall. Do not feed acid lovers in the summer ( June 1st - September 1st). A second half-strength feeding of Holly-Tone is recommended in late fall. This will help harden off new growth, aid in root development, and enable the roots to store food for use in early spring. How to Prune Azaleas & Rhododendrons Azaleas and Rhodo's both begin to form their blooms for the next spring season in the late spring or early summer. Because of this bloom set it is critical that these plants be shaped or pruned immediately after the current year's bloom. Pruning should occur between May and July after all the plants have bloomed. Try to avoid pruning after August 1st because the blossoms are being set for next spring. Planting Azaleas & Rhododendrons When planting, a hole should be made roughly twice as large and twice as deep as the root ball. One third of the soil removed should be replaced with compost, peat moss or other good humus. To this, one cup of Holly-Tone per 2-1/2 gallon bucket of soil should be added and thoroughly mixed. There should be enough of this mixture in the hole to allow the new plant to sit at the same depth it was previously growing. The soil mark on the trunk can be used as a guide. The bottom of the hole should be packed firmly to prevent later settling. Once the plant is placed in the hole and filled half full with the soil mixture, it should be packed firmly, soaked with water, and allowed to settle. After the hole is completely filled, the top two inches should be left loose for easy absorption of water. A slight depression around the plant will also help conserve water. Adding mulch will also help conserve water, slow down evaporation, and control weeds. Often, plants will be purchased in plastic containers. When removing the pot, inspect the root mass. It is not unusual for the roots to have grown in a circular pattern around the inside of the container. If this is noticed, the roots should be disturbed SLIGHTLY to encourage new growth. Simply score the outside of the root mass with a knife to break the circular pattern.

Dahlia Care

Summer Care for Dahlias With blossoms of amazing shapes, sizes, and colors, dahlias contribute bold splashes of color to gardens from midsummer until frost. Their sturdy stems and attractive foliage also make them an exceptional choice for cut flowers. If given full sun with rich, well-drained soil and good air circulation, dahlias are not difficult to grow. A little extra pampering will result in an extra-generous show of flowers. Dahlia varieties that reach more than three feet tall can become top-heavy and topple in the wind. Placing a stake in the hole at planting time is the easiest way to provide support without damaging the tubers. 1. THINNING Once they are in the ground, dahlia tubers usually produce multiple shoots. While you can leave these to grow, thinning will produce flowers of higher quality. Most growers remove all but one to four of these stalks by cutting or breaking the others off before they reach six inches in height. 2. PINCHING In addition to removing excess shoots, pinching (also called stopping or topping) is an important part of early training. After the chosen stalks have grown three or four sets of leaves, pinch out the growing tips of each. This will force the lateral or side shoots at each leaf node to grow, and make the plant bushier. 3. MULCHING, WATERING & FERTILIZING Dahlias like warm soil and will grow most rapidly after soil temperatures have reached 60 degrees Fahrenheit, but will slow or even stop producing flowers when stressed for moisture. Placing a layer of mulch around the plants before the heat of summer dries the soil will conserve moisture and help prevent weeds from growing. Good choices for mulch include shredded leaves, chipped bark, and well-rotted compost. Hand-pull weeds and avoid cultivating the soil, as it is easy to damage the dahlias shallow roots. If rain is lacking, soak the growing plants with at least an inch of water each week, wetting the soil to a depth of one foot. Also, try our Soil Moist! It's great for retaining moisture! Try not to wet the leaves late in the day, because damp leaves can encourage fungus. Dahlias are heavy feeders and benefit from extra fertilizer. In addition to fertilizing at planting time, add nutrients during the growing season by scratching in a time-release fertilizer at midsummer according to the directions. 4. TYING Dahlias that have been thinned to one stalk can be loosely tied to a single stake, using soft twine. For multiple stems, add two more stakes to form a triangular support. Take care to set them well away from the crown to avoid damaging the roots. As the plants grow, loop twine around the stakes at one-foot intervals to support them. 5. DISBUDDING Selective disbudding will produce large flowers with longer stems. The terminal end of each stem will develop three buds. Of these, the central bud will produce the best and largest flower if it is allowed to bloom alone. When the first buds begin to color, use your fingers to pinch out the two side buds. Also remove the small lateral branches growing from the axils of the two sets of leaves directly below the terminal bud to prevent them from forming flowers. Once the terminal bud has flowered, new branches will form down the stem and yield additional flowers. Don't miss Yardiac.com's selection of pruners! Pests and Diseases:Slugs, snails, and earwigs can be trouble to young dahlias and are best controlled by trapping or hand- picking. Sucking pests, such as spider mites, aphids, and leafhoppers, can dramatically stunt growth of dahlias and require close monitoring and swift response with an appropriate pest repellent.Diseases such as powdery mildew can be best controlled with good air circulation. Encourage this by removing the oldest leaves as they become infected. Viruses may stunt plants, or cause leaves to be misshapen or covered with light-colored spots or lines; destroying affected plants will prevent this virus's spread. Yardiac.com also features a great selection of disease control.

Thursday, January 18, 2007

Dividing Hostas

Dividing is a great way to revitalize an overgrown Hosta or to propagate a prized plant. Dividing should be done after the plant has died back and before the ground starts freezing. Start by digging up the plant. Use a square headed spade to dig around the crown of the plant. Lift the Hosta out of the ground and shake any excess soil out of the root ball. Now you want to determine where to make your division. Grab the root ball with both hands and twist back and forth. If the plant shows a natural tendency to want to break apart in a certain spot, that's where you want to make your cut. With very large plants, this may not be possible. Once you have decided where to divide the Hosta, use a sharp knife to cut straight through the root ball. If the plant is very large, two garden forks can be used to separate the divisions. Each division should have 3-5 "eyes" (an example of an "eye" is circled in the picture above) are on it to ensure the resulting plant is healthy and vigorous next season. In addition, the divisions should have no more than two cut sides on them. Try to avoid pie shaped divisions. Plant the divisions as soon as possible. The eyes of the Hosta should be 0.5 to 1 inch below the soil. Mulch around the crown of the plant to a depth of 2-3 inches. Avoid covering the eyes with mulch or they may rot. Tools required to do this simple task: Butcher knife Shovel Pruning shears Find the right tools for dividing your hostas!

Prune Like a Pro!

Pruning is a vital part of plant and tree care. This task can be confusing, so we have developed the following guide to help you prune properly.Three basic tools suffice for most pruning jobs: shears, loppers, and a pruning saw. Keep them sharp for clean cuts, and disinfect after pruning diseased material. 1. Rose Pruning Prune in winter or early spring when plants are still dormant. Prune plants to maintain symmetrical bushes and to encourage strong new growth. Cut back all previous years growth as much as one-third its length. Remove branches that cross through center and remove plants understock. Also prune weak and dead stems as needed. This will also encourage strong new growth. 2. Crepe Myrtle Pruning The best time to prune crepe myrtles is in February. Prune out twiggy stems and any dead wood. Thin out crossing or crowding branches in the plants center. If tree form, prune lower branches. Prune top to maintain symmetry. Each year after flowering, cut 12 to 18 inches off the tips of branches that have bloomed. 3. Holly Pruning Prune in winter or early spring mostly to shape plants. Cut back wayward branches and prune out weak unproductive dead stems as needed. 4. Butterfly Bush Pruning Butterfly bushes bloom in summer on new spring growth. They can be pruned in late winter or early spring. By pruning old blooms you will encourage new flowers. Also prune out old dead and unproductive branches. 5. Hydrangea Pruning Hydrangeas fall into two groups. Some you prune in early spring and others after the flowers fade. Early Spring Pruning Hydrangeas bloom on new growth. These plants are Climbing Hydrangea, Annabelle, Grandiflora, and PeeGees. After-Bloom PruningHydrangeas bloom on last years stems. These include Bigleaf Hydrangeas, Oakleaf Hydrangeas, Lacecaps, SummerBeauty, and Nikko Blue. Pruning should be done when the flower has faded. Cut back the flowering stems to the strongest pair of new shoots. As plants mature, begin to thin out the oldest woody stems. Remove crowded crossing, broken, or dead branches. 6. Clematis Pruning Clematis can be put in three categories: Spring-flowering, summer-flowering , and twice-flowering. Spring-bloomingClematis produce flowers on stems that grew during the previous year. Prune when flowers are done blooming. Cut back the flowers that are now dead. Prune out any old dead stems as well. Summer-bloomingPlants bloom on new growth produced in the spring. Cut back stems before new growth begins. Late autumn or early spring is a good time to prune. Cut back about 12 inches of old growth. Each year the vine will grow larger and stronger. Twice-bloomingPlants first bloom in spring on stems produced the previous year. Late summer or fall will be the next bloom time. In late fall or very early spring, prune lightly to thin the stems. After the spring bloom, prune more heavily for more healthy stems to develop for the next bloom. After a second bloom, prune old flowers away. 7. Fruit Tree Pruning The most common fruit trees are apple, peach, pear and cherry. Apple TreesApple trees should be pruned in late winter or early spring before new growth starts. Always remove all suckers (summer is a great time). Also remove dead and other unproductive branches as needed. Peach TreesPeach trees are fast growing and need to be pruned in winter. Without pruning the peaches will grow farther away from the tree's center. This will put great strain on the branches, causing them to break. In winter, thin out upward-growing branches that cross in tree's center. Pear TreesPrune back in early spring. Always prune dead and unproductive branches as needed. Cherry TreesPrune in winter. Prune out branches that cross in center and dead unproductive branches as needed. 8. Azalea & Rhododendron Pruning They can be pruned in winter or early spring. However pruning at this time will prevent plants from producing many blooms. The best time to prune azaleas and rhododendrons is just after their blooming period in spring. If you prune at this time , no additional pruning will be necessary. 9. Juniper Pruning Junipers need very minimal pruning. They should be pruned to correct their shape, to accent their form, or to limit their size. This should be done during the juniper's growing stages in mid-summer. 10. Flowering Tree Pruning Flowering trees should be pruned after they have finished blooming. Prune as little as possible. Dead branches, branches that cross in the center, and branches that are unproductive should be pruned out. Again, don't forget the three basic tools for most pruning jobs: shears, loppers, and a pruning saw, and keep them sharp for clean cuts. Disinfect after pruning diseased material.

Expertly Itdentifying White Grub Problems

White grubs (sometimes called grub worms) are among the most widespread and destructive insect pests of turf grasses. "White grubs" is the generic term for the larvae of at least 10 different species of beetles in the United States. As larvae, all are generally similar in appearance, habits and the damage they cause, although they mature into different beetles. They damage turf grass by chewing off the roots near the soil surface. To make matters worse, predators such as birds, skunks, raccoons, armadillos and foxes, may dig up infested turf to feed on the grubs, causing more damage. Grubs tend to do most of their damage from late summer to early fall. Shown at left are photos of a typical white grub and an adult Masked Chafer. The Green June Beetle, pictured below, is another adult whose larvae fall into this category. Early symptoms of white grub infestation include gradual thinning, yellowing, wilting in spite of adequate soil moisture and appearance of scattered, irregular dead patches. As damage continues the dead patches join together and increase in size. Turf that is grub-damaged will not be well anchored to the soil; it can be pulled up or rolled back like a carpet, exposing the white larvae. If the damaged turf does not pull up easily, the brown patches usually are from other causes -- dog urine, chemical spills, fertilizer burn, drought, localized dry spot or disease. The presence of moles, flocks of foraging birds or digging by skunks, raccoons or other predators often indicate that grubs are present. Source: Destructive Turf grass Insects by Daniel A. Potter. Photos courtesy of the Texas Agricultural Extension Service.

Mole & Vole Control Can Be Tricky!

Say Goodbye to Moles and Voles Forever! Getting rid of moles and voles can be a difficult task! However by following a few simple steps it can be done. If you are looking for a quick removal of the pesky vagrants, use the Yardiac.com Whole control. Whole Control promotes and restores lawn and garden areas by inhibiting the formation of burrows, tunnels, ridges and holes that may be caused by Armadillos, Moles, Voles, Pocket Gophers, Prairie Dogs & Nutrias. Whole Control contains active ingredients that are natural and biodegradable. The product is not destroyed by rain and may remain effective for up to three months when applied as directed. This concentrate is sprayed directly into the areas where armadillos, moles, voles, gophers, and other burrowing animals are digging.It is not a poison and will not hurt any animals. Whole Control will leave a residual in the ground which tastes awful. As invaders dig, they will come in contact with the bad tasting soil and quickly decide the bad taste is too strong and prompt them to find food elsewhere. Apply Whole Control when the signs of digging, tunneling and burrowing by animals first appear. For year round control apply Spring, Summer & Fall. DO NOT APPLY DIRECTLY TO LAKES, PONDS, STREAMS OR OTHER STANDING WATER. For a more permanent control we recommend using the Yardiac.com Mole and Vole Eradication Program. It requires using all three of the following products, in combination.1) Whole Control Spray & Mole Traps -- Effective immediately2a) Vole Block -- Provides a long term underground barrier stopping future tunneling.2b) Sonic Repeller - Emits a disturbing audio signal forcing rodents to flee the area.3) Milky Spore--Gets rid of the grubs that (mole-vole food) for up to 15 years! Milky Spore is a naturally occurring host specific bacterium (Bacillus popillae-Dutky). This product is lethal to the white grub, a familiar destructive summer-time pest. It targets and discriminately works to attack the white grubs of Japanese Beetles.Milky Spore is not harmful to beneficial insects, birds, bees, pets or man. The product is approved and registered with EPA, Milky Spore will not affect wells, ponds or streams. Vole Bloc is a non-toxic soil additive of coarse particles of expanded natural slate. Vole Bloc is applied as a physical barrier in the soil surrounding the root system and as a mulch on the surface around the stem. The VoleBloc barrier typically discourages underground voles from feeding on the roots of certain landscape plants. The Solar Ground Rodent Repeller by Pestacator uses high-tech sonic sounds to repel burrowing rodents in a clean, humane way. The complex, variable frequency sounds are directed through the tube to penetrate the tunnel systems. Sounds impact rodents' nervous systems; they cannot adapt, so they leave for good. To learn more or to purchase the Yardiac.com Mole & Vole Control program click here.

Protect Those Spring Bulbs From Critters!

Between the squirrels, moles, deer and rabbits, having a successful spring bulb display can be challenging and frustrating. But there are several steps you can take to outwit these critters.Some gardeners have had success with repellents such as mothballs or blood meal. However, the best trick we have found is to dip the bulbs in a product called Tree Guard before planting them. Tree Guard's latex based formula resists water and keeps working for an entire season. A unique latex polymer carries the active ingredient, Bitrex, and holds it to the surface of the plant, resisting rain, and wash-off for up to 100 days is what makes TREE GUARD different. Tree Guard has a foul taste and smell that critters know to stay away from! It really does work. Then, cover the bulbs with a few handfuls of a sharp gravel as a good deterrent because it hurts the squirrels' feet. And if you can't get the squirrels to leave your tulips alone, try planting daffodils. they don't like them. Visit our website to see our full line of critter ridders!

Wednesday, January 17, 2007

Building A Composter!

Composting is a great way to turn waste into nutrients! You don't have to spend lots of money on a rotary composter. Here is a quick and inexpensive way to start composting. This compost bin was constructed using medium gauge galvanized wire fencing. It holds roughly 1 cubic yard of material, which is about the minimum volume needed for efficient composting It is so easy to construct! All you need is medium gauge galvanized wire fencing, wire cutters, and 20-guage utility wire. Unroll the fencing on the ground, and measure an 11 foot length. It may be necessary to weigh down the fencing, to keep it from rolling up again. Use heavy-duty wire cutters to cut the fencing to the proper size. Stand the fencing up on end, and overlap 3"-4" of the material. Tie the ends of the fencing together with 20-gauge utility wire to finish the bin. The total job takes about 15-20 minutes! Check out Yardiac.com's selection of functional, and attractive, composters!!!

Wednesday, January 10, 2007

Benefits of Natural Organics

Organic plant foods outperform other fertilizers in many ways:Method and Rate of Release Most plant foods are water soluble. They go into solution quickly and the nutrients are either taken up by the plants or lost, because of leaching. Natural organics, however, are water insoluble. Their release is dependent upon three factors; moisture, temperature, and soil microbes. This microbial release is a slow process. The soil microbes digest the organic materials, releasing the nutrients. Water is required by these microbes to sustain their life, as well as to keep nutrients flowing into the plants root zone. Temperature is critical because, when soil temperature falls below 52 degrees, these microbes go dormant and no nutrients are released. When this happens, the plant food stays in the soil, to be released when soil temperature again rises. The rate of microbe activity and, therefore, the rate of nutrient release, increases as soil temperature rises; this rate of release -- governed by soil temperature -- mimics the plant's nutrient requirements. In other words, organic nutrients are released as the plants need them. All this means that natural organics break down and feed slowly for an extended period of time. The nutrients are released as the plants need them, rather than all at once. Safer for Your Plants Most simple chemical plant foods have a much higher salt index than natural organics. Over-application of some of these chemical products can burn by causing an over abundance of salts in the soil. This imbalance forces water to move from the plant to the soil, causing dehydration and the eventual death of the plant. Natural organics have a much lower salt index, making them much safer to use. Non-Leaching Because simple chemical plant foods are water soluble, they are often washed or "leached" out of the root zone. However, since natural organics release their nutrients slowly, by microbial activity, leaching is not a problem. Nutrients stay in the root zone for the plants to use. Better Value Plant foods formulated with natural organic ingredients appear to be somewhat higher in cost. However, when you consider that it often takes three or more applications of simple chemical plant foods to equal one application of natural organics, you see that the value of the natural organics is far superior to simple chemical blends. Soil Conditioning By adding humus, and encouraging soil microbes, natural organic plant foods can actually improve the overall soil structure. No other kind of plant food can make this claim. If you are interested in a organic fertilizer for your yard, visit Yardiac.com for our recommendations!