Showing posts with label Landscaping. Show all posts

Wednesday, December 02, 2009

Winterize Your Engines!

WinterizeYardiacs take enormous pride in their "small engine" equipment. After all, most could not do the job without them! Properly storing your equipment will ensure it will be in good condition when you need to use them again next spring. Remove any plant material, or dirt, on the equipment with a scraper or a pressure washer. If you use a pressure washer to clean the equipment, avoid spraying engines with water. Dry the equipment thoroughly and wipe down any bare metal parts with light machine oil. Sharpen Your MowerRemove and sharpen any blades and drain the motor oil. It's important to add a gasoline stabilizer to fuel tanks before putting equipment away. The stabilizer prevents the gas from forming gums and varnishes when stored for several months. These gums and varnishes will clog carburetor jets, foul spark plugs and can cause valve and piston rings to stick. Fill tanks with fresh gas and follow the directions on the bottle of stabilizer. Cover the equipment with plastic sheets or tarps, and store them in a dry place. If they need to be repaired, use this opportunity to take them to a repair shop now before the spring rush. Don't miss the Yardiac.com Patio Furniture Covers section. Yardiac's got you covered!

Tuesday, April 14, 2009

Establishing a Groundcover

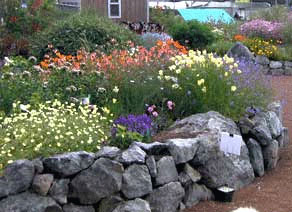
Groundcovers are dependable plants that gardeners everywhere count on to blanket the soil with a fairly uniform canopy of dense foliage. They thus suppress most weed growth from below. Groundcovers offer solutions to a number of landscaping dilemmas. Some flourish in the shade cast by large trees, while others thrive on hot, steep banks. Most species are easier to maintain than lawns, and many are water-thrifty as well. The plants are available in a variety of leaf shapes and textures, with some featuring flowers and even berries. Gardeners in cold-winter areas should plant in spring, so the groundcover has an entire season to get established. Those in areas with hot, dry summers and mild winters may want to wait for fall, when winter rains will help get the plants off to a strong start. Even a groundcover with a reputation for being tough can’t compete or thrive in weedy soil. Use a sharp hoe to cut shallow-rooted annual weeds, or till the soil and rake out plant remains. Carefully dig out any deep-rooted perennial weeds, such as Bermuda grass and dandelions, removing the roots as well as the tops. Small areas of turf can be sliced off in sections with a sharp, flat spade; you’ll need to rent a sod cutter to get rid of larger lawns. Roughly dig over the site, hauling away rocks and other debris. When you’re finished, rake the surface to even it out. On very weedy sites it is a good idea to irrigate at this point and wait a couple of weeks for weed seeds to germinate; the tiny seedlings will be easy to eliminate then, saving you extensive weeding later. To decide which groundcover to plant, consider your climate, and the amount of sun the area will receive. You can also be on the lookout for successful plantings in your neighborhood. Be wary of invasive species that travel quickly beyond their allotted area. If you choose a taller-growing one, keep in mind that it may require shearing every year or so to maintain a leafy, nonwoody appearance.

Wednesday, March 04, 2009

Why is pH So Important

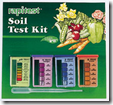
You may be wondering about the importance of pH in your garden, or how it effects your plants.  pH Tester YardiacYou may also be unsure of how to monitor the pH, or what pH is best for your plants.  Well, simply put, pH is a measurement of alkalinity or acidity in your soil.  The scale ranges from 0 to 14.  For vigorous growth, plants require nitrogen(N), phosphorus(P), and potassium(K).  Incidentally, these are the numbers represented across the top of many fertilizers.  The numbers are separated by a hyphen. 

Moving along, these nutrients are readily available for absorption by plant roots when the pH is 6.0-7.0.  An exception to fertilizer Yardiacthe rule is acid-loving plants, like azaleas and rhododendrons, which prefer pH of 5.5-6.0.  Adding lime to the soil makes it more alkaline while adding sulfur makes soil more acidic.  It's est to soil test through your local county extension office for the most accurate reading.  That said, you can find a simple pH tester easily, which is most often quite accurate.  

Saturday, October 25, 2008

Energy Saving Tips on Outdoor Lighting

Outdoor lighting is useful for adding security and charm to your home's exterior. But when overdone, it can be costly to operate. Fortunately, there are several steps that can be taken to reduce your energy consumption when it comes to outdoor lighting. Here are some suggestions:

Replace standard current lighting with low-voltage lighting. Low-voltage lighting kits come with transformers that safely reduce standard household current (120V) to a much lower level (12V) for lighting. This works well for secondary or pathway lighting.

HangingLEDLanternGo a step further by switching to solar powered outdoor lights. These lights are easy to install and are environmentally friendly because they provide free, renewable energy by means of photovoltaic cells that convert streaming daylight into stored electricity. The stored energy is then released at night when the sun is no longer supplying power to it. These are particularly useful in remote areas where utility service is not easily accessed.

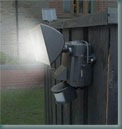
Outdoor lights that are left on all night may unnecessarily waste SolarMotionLightenergy and disturb wildlife. Therefore, reduce the amount of time lights are on, but not being used, by installing motion-activated fixtures or plug-in outdoor timersSolar powered motion sensors and low voltage lighting kits on timers will increase your energy savings even more.

Use tube fluorescent and energy efficient compact fluorescent lights (CFLs) in fixtures not exposed to water or moisture. Although CFLs cost a bit more initially, they pay for themselves by the energy they save over their lifetime, which is significantly longer than incandescent bulbs. Be sure, though, to buy a lamp with a cold weather ballast if you live in a cold climate, since standard CFLs may not work well below 40°F.

Also consider high-intensity discharge (HID) or low-pressure sodium lights. However, both HID lighting and low-pressure sodium lamps require up to ten minutes to start and have to cool before they can restart, so they are not suitable for use with motion detectors. They are most suitable for applications where they stay on for hours at a time. LEDSuperMiniSet

Finally, light emitting diodes (LED) are highly energy efficient and work especially well for holiday lighting.

Friday, February 15, 2008

Learn about Grilling Safely on a Deck

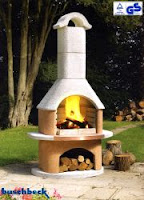
Fireplace grills are made for outdoor use, but what about on a deck. Better yet, what if the deck has a covered roof, but has open walls. These applications can be done as long as you have taken the correct precautions:
1.The deck should be rated for 400 lbs per square foot. 2. Position your grill on a stable and fireproof surface. If using a wooden deck, use some type of protective "flashing" to shield the wood deck from possible sparks or hot embers that could fall from the fire. You could use a grill pad or install some sort of tile.(an indoor fireplace should also be shielded from the floor by some type of hearth, ceramic tile, etc.). 3. Chimney extensions can be ordered to make the fireplace taller, if necessary, to extend through the roof opening. 4.Proper insulation or separation (air space) should be employed between the chimney and the roof opening. Any licensed subcontractor who works on constructing the roof should be qualified to make this determination. The same considerations are made by carpenters building new homes (with indoor fireplaces) literally every day. The chimney does not get hot enough to be a problem unless the fireplace is overheated significantly with a fire that is much too big! With this application you should also consider the following safety tips: 1. Always have a fire extinguisher on hand. 2. Never leave a burning product unattended, especially around children and pets, and make sure the fire is completely extinguished before leaving. 3. Check your local ordinances regarding outdoor wood burning. 4. When lighting or tending to the fire, make sure hair and clothing are away from the flame. 5. Burn only dry, seasoned wood (not treated wood) and make sure the smoke is not a nuisance to your neighbor 6.Keep all portable hearth products away from combustible material, e.g. outdoor furniture, pool towels, side of house, shrubs, etc. 7. Never use lighter fluid or gasoline to ignite your wood-burning product; use fire starters such as fibercones or lighting nuggets. 8. Be sure to make smores!

Friday, December 07, 2007

Planting & Caring for Evergreens

A single specimen evergreen tree provides a stately focal point in your landscape. A screen of them provides a permanent year-round windbreak and can obscure an unwanted view. When deciduous trees are barren during the winter months, evergreen trees provide color.
When choosing the location for any tree, remember that it is just that - a tree. White Pines, Spruce, and Hemlock are charming as your plants, but space that will be necessary in the future should be taken into consideration.
It is important to remember that evergreens do not like 'wet feet'. Plant evergreens in an area with ample drainage.
Planting
Evergreens can be safely planted anytime from March through November in most areas. Spring and Fall are the most ideal planting times. Check your local nursery, to be sure about what time is best for your area.
Upkeep
Water your evergreen tree 2-3 times a week during its first year. Water whenever the soil feels dry. During the next few years, supplemental watering will also be needed, although not as often. Do not forget to water during dry spells. Water thoroughly when you do water, allowing the moisture to penetrate to a 2-3" depth. A light watering encourages the tree roots to grow near the soil surface only. The tree will not survive a hot dry summer with only surface roots.
Fertilizing
Apply a general purpose (10-10-10) or tree fertilizer each Spring or Fall. Always follow the product label and never apply more fertilizer than is recommended.

Wednesday, October 03, 2007

Rubber Mulch

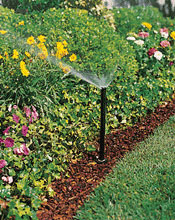
Rubber Mulch offers an exceptional alternative for landscaping and garden mulching purposes. These innovative products have been specially created to provide a long lasting, maintenance free and environmentally friendly way to landscape. After installation, rubber mulch resists fading and decomposition. This green concept is clean, safe and attractive in appearance and is made from 100% recycled materials. Colored landscaping rubber mulch offers the ultimate in rubber landscaping & garden mulch appeal. Our mulch offers consistent shape and our colorization process ensures that the entire mulch piece is completely and uniformly coated.
  • One-time application lasts years without replacement
  • Non toxic and chemically safe for people, pets, and plants
  • Allows water, air, and essential nutrients to be absorbed
  • Discourages the growth of weeds.
  • Our rubber landscaping mulch doesn't rot, create mildew, decompose
  • Prevents the growth of mold, algae or fungus
  • Insects or pests (including termites) are not attracted to the rubber
  • Won't wash away due to extreme rainfall
  • Reduces or eliminates dust problems
  • Excellent insulator for tree and plant root systems
Is Rubber Mulch safe for my children? Yes. Our Rubber Mulch is 99.9% steel free, and completely non toxic. The colorant used meets all the criteria required for use on children's toys and furniture. Furthermore, the US Consumer Product Safety Commission tested Rubber Mulch, and proved that it is an exceptionally shock-absorbing product. This is very important as there are more than 550,000 playground injuries in the emergency room each year!
Is Rubber Mulch is safe for the Environment? Yes. The Environmental Protection Agency (EPA) says that rubber added to the soil is non toxic and safe for the environment. Current test show that leachate from tire samples were 1-3 times less than those proposed for primary drinking water standards. On the contrary, our Rubber Mulch is a recycled product, helping eliminate hazardous tire disposal sites.
Will Rubber Mulch harm my plants?
No. Actually your plants may be doing even better than before. Water and fertilizers pass through easily and Rubber Mulch provides a coating to help retain moisture in the ground. It also acts as a natural insulator to protect your plants in extreme weather conditions.
How long will Rubber Mulch last? The rubber is colored with a unique paint which makes it very difficult to fade or rub off. It is also UV protected; rest assured that the color will last for a very long time.
Is Rubber Mulch more expensive than traditional mulch?
No. Initially it may seem that Rubber Mulch is more expensive than the organic versions, however, organic mulch must be replaced as often as every six weeks causing it to be more costly in the long run.
Rubber Mulch is very versatile!
You can use it in commercial or residential landscaping, municipal or backyard playgrounds, golf courses, flower beds and gardens, walkways, paths, or even around pools, ponds, trees, and shrubs.

Wednesday, January 03, 2007

Interviewing a Landscaper

Hiring a Landscape designer, architect, or contractor can be a frustrating and often confusing task. Yardiac.com has compiled a list of 10 important items to consider when interviewing your prospective installer.
  1. Check to see if your Landscape contractor is Licensed in your area.
  2. Check to see if your Landscape contractor is Insured.
  3. Check to see how many years the contractor has been in business.
  4. Check with your local Dept. of Consumer Affairs, or Better Business Bureau, for complaint against the company.
  5. Be sure your landscape contractor gives you a written estimate, and a contract if the work is to be performed.
  6. Be sure that the contract has a starting and completion date included on the contract.
  7. Inform your landscape contractor of the importance of the starting and completion date.
  8. Be sure that it is noted on the contract that you have a 3-day cancellation agreement.
  9. Be sure to get all changes and extras in writing.
  10. Keep good communications with your contractor.

Get a landscape design for your yard! Yardiac.com offers a great design packages!

Friday, December 29, 2006

Improving Soils

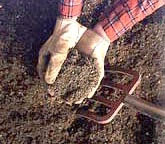
Several (Not so Easy) Steps in Preparing Your Plant Beds After centuries of exploitation, our nation has only a few remaining areas of inherently fertile soils. With very few exceptions, our soils are low in organic matter, low in microbiological activity, and low in the three major nutrients: nitrogen, phosphate, and potash. They are also low in some of the secondary nutrients such as calcium and magnesium, and low in many of the micronutrients. They haven't always been this way, but careless farming, timbering, and pasturing for 250 to 300 years have degraded them considerably. The steps you take to transform your 'dirt' into productive garden soil depend on the type of soil you have and the depth of your pockets. Technicians might quibble over this simplification, but most soils are either sticky clay, gritty sand, or a mixture of the two with some silt--a mixture known as "loam." Modern Way to Prepare Flower and Shrub Bed Soil The old way was to till the soil, remove any grasses, remove sticks and rocks by hand, add lime and fertilizer, bring in and incorporate more soil to build up beds for drainage, and set out flower or shrub plants. Of course the weed seeds exposed by turning the soil and bringing in soil would begin germinating, and a regular routine of hoeing or pulling weeds had to begin. This approach differed little from practices in frontier days when soil was turned with a mattock and fenced with wattle to keep out wild animals. Today there is a more lasting way to prepare soil to increase aeration, improve drainage, decrease weeding, and conserve moisture. After reading the following procedure, you might think, "No way!" but if you improve one flowerbed at a time, you will soon have the nearest thing to a low-maintenance landscape. Devote a summer to getting rid of weeds. Either turn the soil repeatedly to kill emerging weeds or do it the easy way with 3 sprays of a non-selective, post-emergence herbicide, timed to kill new weeds as they emerge. Rake or burn off the dead vegetation. If your soil is clay and slow to drain, add soil amendments after the first tilling or application of herbicide. Haul in an organic soil conditioner such as finely pulverized pine bark to make a layer 3 in. deep over the weed-free bed. Also haul in cracked pea gravel, granite meal, Perma Till(tm) or chicken grit to make another layer 3 in. deep over the bed. Spread dolomitic limestone that is pelletized or ground very fine for quick release. Five pounds limestone per 100 sq. ft. should be enough for starters. Spread 3 pounds triple super phosphate per 100 sq. ft., or 6 pounds of rock phosphate over the same area. Forget bone meal--it takes forever to release. Spread 5 pounds organic fertilizer such as chicken manure per 100 sq. ft. Pelletized chicken manure supplies not only major and secondary nutrients, but micronutrients as well. If your soil is sandy, follow all the steps above, but omit the addition of cracked pea gravel. Mix in the additives to spade depth, about 9 in. The organic soil conditioner and cracked pea gravel will raise the level of the soil in the bed of clay soil and will improve drainage. The organic soil conditioner will improve the moisture-holding capacity and microbiological activity of sandy soil. Haul in and spread pine bark or hardwood bark mulch to a depth of 3 to 5 in. over the raised bed. (Ask for pine or hardwood bark mulch, neither a finely shredded soil conditioner nor coarse nuggets.) Now you are ready to plant. The deep layer of mulch will absorb and retain water and discourage weed seeds from germinating. Shrubs can be planted by raking the mulch aside, spreading out the root system, setting the root ball on top of the soil, and shoveling the mulch back over the roots. You might need to get a few more shovels full of mulch from the pile to make sure the root ball is covered. Annuals can be set into shallow holes dug in the mulch. Perennial seedlings will need bottomless tin can collars to keep the mulch from drifting over their crowns, a potential cause of rotting. Deeply mulched beds do not make good seedbeds for direct-seeding annual flowers. Start them in un-mulched beds and transplant the seedlings into the mulched area. Maintaining Soil Fertility and Depth of MulchOur long summers, high rainfall, and high temperatures conspire to volatilize, or leach nutrients out of the soil, and to turn mulch into compost at a rapid rate. Work in one-half cup of organic fertilizer around every annual plant that is set out. To feed our established perennials, rake the mulch from around the collar, scatter fertilizer at the rate recommended on the package, and pull the mulch back over it. Shrubs are larger plants and can utilize greater amounts of fertilizer. Follow the directions on the package for rates.