Showing posts with label Spring Gardening. Show all posts

Wednesday, January 20, 2010

Protect your Spring Bulbs from Critters!

Flower BulbsBetween the squirrels, moles, deer and rabbits, having a successful spring bulb display can be challenging and frustrating. But there are several steps you can take to outwit these critters. Some gardeners have had success with repellents such as mothballs or blood meal. However, the best trick we have found is to dip the bulbs in a product called Tree Guard before planting them. Tree GuardTree Guard's latex based formula resists water and keeps working for an entire season. A unique latex polymer carries the active ingredient, Bitrex, and holds it to the surface of the plant, resisting rain, and wash-off for up to 100 days is what makes TREE GUARD different. Tree Guard has a foul taste and smell that critters know to stay away from! It really does work. Then, cover the bulbs with a few handfuls of a sharp gravel as a good deterrent because it hurts the squirrels' feet. And if you can't get the squirrels to leave your tulips alone, try planting daffodils. they don't like them. Click Here to Order Tree Guard or to see our full line of critter ridders!

Tuesday, January 05, 2010

Start Planting Seeds Indoors Today

Indoor GrowingGrowing plants from seeds can be exciting. If you decide in late winter or early spring that you want to try this, follow the charts and directions on the seed packets. This can be a time consuming process, because you will have to nurture the sees in an indoor setting or cold frame, but it does give you a head start on the season. You will need starting trays, flats, a special seed starting mix, a mister, lots of light, and proper temperatures. Most people's Hot House Growing Systemwindowsills do not offer sufficient light or heat, and some plants require what is called bottom heating, provided by coils, or a heat mat to encourage germination. Artificial lights, such as those used with houseplant work well with seedlings. Remember to keep the lights just a few inches above your seed trays. The First Step Sowing Your Seeds Fill your pots or flats, with your potting mixture, up to 1/4 inch of the top. Then, level the surface. (It's ideal to water the soil and allow it to drain thoroughly before sowing the seeds.) Use a pencil to make a hole for each seed, keeping in mind that most seeds will need to be planted four times as deep as the width of the seed. For fine seeds, cover them with a fine layer of soil. Planting SeedlingsWhat About Humidity and Moisture Potting soil should be kept evenly moist, but not soggy. Soggy soil will cause the seeds to rot. Use a fine sprayer to water freshly planted seeds or seedlings. Watering from the bottom is ideal. To keep the humidity and moisture levels even, slip your pots and flats into plastic bags. It will also reduce the frequency of watering. Another great idea is a mini greenhouse. It's the perfect way to protect, and nurture, your plants. It will also enable you to regulate the temperature, and limit exposure to the immediate environment. Lighting Some seeds require more light than others, to germinate. Read the label on your seed packet, to guide you. Once germination is complete, all seedlings need lighting to grow into healthy plants. Supplemental light can be helpful. SeedlingsTake Care of Those Seedlings Caring for your seedlings in the weeks following germination is critical to their . Remember, keep the soil moist, but not soggy. Small pots and flats dry quickly, so be sure to check it frequently. If your seedlings are growing in the light of a window, turn them often, to encourage straight stems. The first two leaves you will see on the plant are not true leaves. They are food storage cells, called cotyledons. Once the first true leaves have developed, it's time to start fertilizing. Choose a good organic fertilizer and use a weak solution once a week.

Friday, March 20, 2009

Happy Spring - Gardeners Buck Econonimc Trends!

Happy Spring On this first day of Spring I wanted to report some good news from the Lawn and Garden world! Despite the turbulent economy, things are looking up for gardeners this spring.
Scotts Miracle-Gro has reported year-over-year growth for its most recent quarter. Specifically, in the global consumer segment, “…sales increased 14 percent. The improvement was largely driven by increased pre-season purchases by customers in the U.S. and higher prices." Jim Hagedorn, chairman and CEO of Scotts has a positive outlook for the lawn and garden sector in 2009 stating it is, “a category that has historically fared well in economic downturns."
The National Gardening Association’s (NGA) new survey, The Impact of Home and Community Gardening in America, shows that food gardening in the U.S. will increase in 2009. "Seven million more households plan to grow their own fruits, vegetables, herbs, or berries in 2009 than in 2008 — a 19 percent increase in participation. This anticipated increase is nearly double the 10 percent growth in vegetable gardening from 2007 to 2008 and reflects the number of new food gardeners emerging this year." Read the complete report here.
Happy Spring Susan McCoy, president of Garden Media Group predicts an increased trend toward ‘grow it yourself’ or GIY, particularly among young homeowners. “Americans craving authenticity and fretting over rising prices in gasoline and food has reinvigorated the trend for GIY. It’s a resurgence of gardening for the greater good – for the earth and our wallets.” Read GMG's complete trend report here.
A tight economy encouraging people to stay close to home, concern about the environment, and a resurging interest in home-grown produce are driving the resiliency of the lawn and garden market this spring. Things are looking pretty green for the upcoming lawn and garden season. Enjoy - See What's New!

Monday, October 27, 2008

Pruning Your Mountain Laurel

  One of our customer's had a question:  Can I prune my Mountain Laurel and if so when is the best time?  Also, can the Mountain Laurel handle topping (pruning which involves removing all branches and growths down to a few large branches)?

Mountain Laurel

  The answer is yes!  Mountain Laurel plants rarely need to be pruned, although pinching off the seed heads after blooming time is over seems to promote better flowering for the next season.  Should your Mountain Laurel plants get too tall for your landscape design plan, cut them back almost to ground level (topping).  These tough shrubs can take a severe pruning when necessary.  From stubs just a few inches above the ground new foliage will arise, and your plants will mature into large shrubs once again in about ten years' time.

  Over-grown shrubs, such as hollies, ligustrum, camellia and mountain laurel, can be cut back to bare branches 2 to 4 feet (or lower) from the ground.  The plant should recover in two to three years.  Recovery depends on the health of the plant and cultural practices such as fertilization, mulching, watering and insect/disease control. 

  The best time to prune your Mountain Laurel is in the Late Spring/Early Summer.  Pinch off clusters of spent blossoms.  Remove a few old branches at the ground to induce new growth from roots.

Friday, January 11, 2008

Toad Houses to Brighten Your Garden by Emily Weathers
Garden season is just around the corner, which means it’s time to start thinking of how to make it more exciting than last year. This year, you should start with a toad house. There are several Toad Houses now available that you would have never thought of that are so unique that will defiantly stand out from others! You can get a castle for your prince or a 70’s style house to a Toad Spaceship. Not only are these decorative, but they will help the garden as well. We know not all toads are cute, but they have their ways. Toads consume approximately 110 bugs a day, such as moths, beetles, slugs and other bugs that like to damage your garden. Now that's definitely help to your garden! To spoil the helper toad, you may want to add a garden light, which not only will accent the garden, it will attract moths and other night bugs that will definite interest the toad in a snack. After a long night of snaking away, they need a cozy, moist resting place to hide during those humid summer days.
Once the toad house is chosen, you need to find the perfect location. The toad has needs to be placed under vegetation in a discrete and moist place. If you don’t have a pond you can water this location daily with a watering can to keep it moist. Toads drink by soaking in water and absorbing it through their skin. Another option for a pond would be to make your own pond.
You would need to take a small try, or pie dish and burry I partially in the ground and fill with water. This should be placed near the house so the toad can enjoy a nice soak! Enjoy your Toad House!

Thursday, June 07, 2007

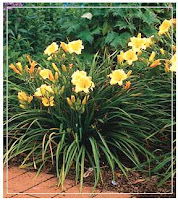
Dividing Daylilies

Daylilies are a wonderful and almost essential part of the summer garden. They provide a long season of colorful blossoms and attractive foliage, and ask little in return. Few perennials are as tough, long-lived, or pest-free. Daylilies do, however, benefit from being dug up and divided every few years, a process their natural toughness allows them to endure with aplomb. A clump of daylilies is formed of one or more fans—small plants made up of fibrous roots, a growing point (crown), and foliage. Each fan can reproduce itself each year, and before long a clump can increase into a sizable mass of plants. After five or six years, this mass becomes overgrown, producing fewer flowers each season. Dividing the clump and replanting newly separated fans rejuvenates the plants and rewards your efforts with a renewed flush of flowers the following summer. Of course, you can divide your daylilies before they become overcrowded. You may want to do so to increase your supply of plants, for example, or to slow down those clumps that are threatening to overpower less robust neighbors in the garden. A large clump of daylilies will yield enough new plants to repopulate the original site, start a new bed, and provide extras to give away to friends. The best time to divide and replant daylilies is after they have finished blooming, in late summer or early fall. This way the transplants will have time to become established before the first hard frost. In areas with short growing seasons, it is safer to wait until spring to divide daylilies; gardeners in mild climates can divide through the winter.
  1. PREPARE A NEW DAYLILY BED Preparing the soil for a new daylily bed before digging the old clump allows you to get the divisions into the ground without delay, before their roots become dried and damaged from exposure to the open air. Remove any weeds from the chosen spot and work the soil to a depth of a foot or so, incorporating several inches of compost, well-rotted manure, or damp peat moss to make the soil more friable and moisture-retentive. Daylily divisions planted in well-prepared soil will begin to grow quickly and become established before the onset of winter.
  2. DIG THE CLUMP Cut back the clump's long outer leaves to about six inches to make it easier to handle. Try not to damage the new inner leaves growing in the center of each fan. With a spading fork, loosen the soil all around the clump. Work around the perimeter several times to free as many of the roots from the soil as possible. Because daylilies develop extensive root systems, it may be necessary to dig down 10 to 12 inches. Don't worry if you accidentally break a few of the longer roses—new ones will grow when the divisions are replanted.

Next, use the fork to pry the entire clump out of the ground. Shake or wash excess soil off the roots so you can see the individual fans.

Thursday, December 28, 2006

Early Spring Lawn Care Checklist

Spring is here and it is time to begin cultivating the 'Best Lawn on the Block'! The best indicator is the 'Early Blooming Forsythia'. Once you see Forsythia beginning to bloom, it is time to get serious about your lawn. Springtime is a lawn's best friend, offering moderate temperatures, and consistent moisture. Unfortunately, spring conditions are also very friendly to our archenemy ---Weeds! Now is the best time to jump-start your lawn with the nutrients while controlling those pesky weeds. Weed Control 101 Grass & weeds are in a constant battle for precious real estate in your yard. Remember that strong healthy grass will always be victorious over the weed. However, undernourished, or moisture depleted grasses, do not stand a chance! That is why it's vitally important to feed and irrigate your lawn. Once established in Spring, crabgrass grows rapidly in hot weather and, chokes out the good grass as it spreads. When it gets a foothold, there's not much - short of hand-pulling the weed - that can be done to stop it. Lawn Care Check List 1) Clean Up - It almost goes with out saying, but it's important to rake up the leaves, sticks, and other debris, that may have accumulated during the winter. 2) Mow your lawn as soon as weather permits. Yardiac.com recommends setting the mowing height slightly lower for the initial cut. This will allow more sunlight to reach the base of your grass enabling earlier 'greening'. 3) After the first cut, treat your lawn with a pre-emergent crabgrass preventer. 4) Feed Your Lawn with a good Lawn fertilizer! Go Get'em Yardiacs!

Wednesday, December 27, 2006

Planting Tulips Like a Pro

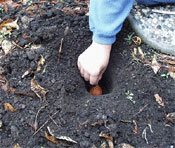
When I first planted tulip bulbs in the front yard, I thought I had done the job once and for all. So I was surprised to see our neighbor, who has been gardening for 40 years, replanting his tulip bed. "Tulip bulbs don't last as long as daffodils; they tend to lose vitality as they age," he explained. To be sure of having a nice display, he replants his tulip bed every five or six years, or whenever he notices that the tulips are declining. Well-prepared plantings tend to have a longer productive life than spot-plantings. The soil will be loose and the drainage better and the bulbs will be less likely to be surrounded by air pockets, which discourage growth. If you've been tucking tulip bulbs in here and there, using a dibber or trowel, you might want to try this planting method. Wait until the soil is cool before putting the bulbs in the ground. For most gardens, that's sometime between mid-October and mid-November. Pick a site with excellent drainage; never plant tulips in a waterlogged spot. Although many cultivars will bloom in light filtered shade, most perform best in full sun. (Bulbs that receive too little sun are not able to store enough energy to bloom a second year.) The blooms will last longer if the planting is sheltered from wind. 1. PREPARE A HOLE It need not be rectangular. A circular, or free form, bed might be preferable for your site. Dig to a depth of 10 to 12 inches, and then thrust your digging fork into the bottom of the hole to aerate the bed a bit more. Next return a couple of inches of the soil you removed to the bottom of the hole so that the bulbs will rest on loose, free-draining soil with no air pockets. Smooth the bottom surface to make it level. If the neighborhood wildlife has gobbled up many of your flower bulbs in the past, consider encircling the hole with a barrier of small-gauge chicken wire or hardware cloth. If the hole is particularly large, you could encircle groups of bulbs within it. Some gardeners line the entire thing, bottom and sides up to soil level, with an open box of half-inch mesh hardware cloth. These wire barriers should be smoothed into place before the first few inches of loose soil is shoveled back into the hole. 2. FIRM THE BULBS INTO PLACE If the bulbs are all planted at the same depth, they'll bloom together. Keep the pointed growing tip of the bulb on top and press the rounded bottom into the loose earth. Use a slight twisting motion to ensure that each bulb is in good contact with the soil. Set tulip bulbs six to eight inches deep. That is, they should rest on a surface six to eight inches below ground level. If planted too deeply, they waste energy working their way up to the light. Bulbs that are too close to the surface, on the other hand, are more likely to be damaged by soil heaving or eaten by rodents, who consider them a delicacy. Also, shallowly planted bulbs tend to divide into many small bulbs, none large enough to bloom, and they may be more vulnerable to Botrytis blight. Space the bulbs about eight inches apart. The planting will be showier if bulbs are grouped rather than strung out in a single line. When planting many bulbs at one time, protect them from prolonged exposure to sunlight, which may induce surface cracks (entry spots for fungi and bacteria). 3. FILL IN THE HOLE Use a nice sandy loam if you have it, and if you have some finished compost, mix it with the soil you use to fill the hole. Tulips have been found to require a good supply of nitrogen, so if you don't add compost, you might mix in dehydrated or thoroughly rotted manure. (Avoid using fresh manure; it may burn the bulbs.) Gardeners also have traditionally added bone meal, an excellent source of phosphorous, to the soil when planting bulbs. If you use a chemical fertilizer, that, too, should be mixed with the soil that you put back into the hole. Shovel the soil in gently at first, so the bulbs don't get jostled out of position. Fill the entire hole with soil, making sure it is in contact with every bulb surface. Finish off by mounding the soil slightly above ground level (it will sink as it settles). 4. WATER IN AND MULCH Watering encourages root growth. Use a sprinkler or soaker hose for gradual penetration to a depth of 10 to 12 inches. If you can manage to do your bulb planting just before a good soaking fall rain, you won't need to water. Mulching helps control weeds and conserve soil moisture; use leaf mold, compost, shredded bark, or other attractive organic materials. One or two inches should be enough. Don't pile much more than that over your bulbs or next spring the stems will have to travel too far to reach the light. Nancy Bubel

Tuesday, February 21, 2006

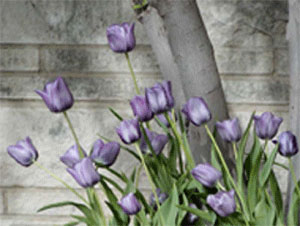
Learn to Plant Perfect Tulips

Tulips When I first planted tulip bulbs in the front yard, I thought I had done the job once and for all. So I was surprised to see our neighbor, who has been gardening for 40 years, replanting his tulip bed. "Tulip bulbs don't last as long as daffodils; they tend to lose vitality as they age," he explained. To be sure of having a nice display, he replants his tulip bed every five or six years, or whenever he notices that the tulips are declining. Well-prepared plantings tend to have a longer productive life than spot-plantings. The soil will be loose and the drainage better and the bulbs will be less likely to be surrounded by air pockets, which discourage growth. If you've been tucking tulip bulbs in here and there, using a dibber or trowel, you might want to try this planting method. Wait until the soil is cool before putting the bulbs in the ground. For most gardens, that's sometime between mid-October and mid-November. Pick a site with excellent drainage; never plant tulips in a waterlogged spot. Although many cultivars will bloom in light filtered shade, most perform best in full sun. (Bulbs that receive too little sun are not able to store enough energy to bloom a second year.) The blooms will last longer if the planting is sheltered from wind. 1. PREPARE A HOLE It need not be rectangular. A circular, or free form, bed might be preferable for your site. Dig to a depth of 10 to 12 inches, and then thrust your digging fork into the bottom of the hole to aerate the bed a bit more. Next return a couple of inches of the soil you removed to the bottom of the hole so that the bulbs will rest on loose, free-draining soil with no air pockets. Smooth the bottom surface to make it level. If the neighborhood wildlife has gobbled up many of your flower bulbs in the past, consider encircling the hole with a barrier of small-gauge chicken wire or hardware cloth. If the hole is particularly large, you could encircle groups of bulbs within it. Some gardeners line the entire thing, bottom and sides up to soil level, with an open box of half-inch mesh hardware cloth. These wire barriers should be smoothed into place before the first few inches of loose soil is shoveled back into the hole. 2. FIRM THE BULBS INTO PLACE Planting Tulips If the bulbs are all planted at the same depth, they'll bloom together. Keep the pointed growing tip of the bulb on top and press the rounded bottom into the loose earth. Use a slight twisting motion to ensure that each bulb is in good contact with the soil. Set tulip bulbs six to eight inches deep. That is, they should rest on a surface six to eight inches below ground level. If planted too deeply, they waste energy working their way up to the light. Bulbs that are too close to the surface, on the other hand, are more likely to be damaged by soil heaving or eaten by rodents, who consider them a delicacy. Also, shallowly planted bulbs tend to divide into many small bulbs, none large enough to bloom, and they may be more vulnerable to Botrytis blight. Space the bulbs about eight inches apart. The planting will be showier if bulbs are grouped rather than strung out in a single line. When planting many bulbs at one time, protect them from prolonged exposure to sunlight, which may induce surface cracks (entry spots for fungi and bacteria). 3. FILL IN THE HOLE Use a nice sandy loam if you have it, and if you have some finished compost, mix it with the soil you use to fill the hole. Tulips have been found to require a good supply of nitrogen, so if you don't add compost, you might mix in dehydrated or thoroughly rotted manure. (Avoid using fresh manure; it may burn the bulbs.) Gardeners also have traditionally added bone meal, an excellent source of phosphorous, to the soil when planting bulbs. If you use a chemical fertilizer, that, too, should be mixed with the soil that you put back into the hole. Shovel the soil in gently at first, so the bulbs don't get jostled out of position. Fill the entire hole with soil, making sure it is in contact with every bulb surface. Finish off by mounding the soil slightly above ground level (it will sink as it settles). 4. WATER IN AND MULCHTulips Watering encourages root growth. Use a sprinkler or soaker hose for gradual penetration to a depth of 10 to 12 inches. If you can manage to do your bulb planting just before a good soaking fall rain, you won't need to water. Mulching helps control weeds and conserve soil moisture; use leaf mold, compost, shredded bark, or other attractive organic materials. One or two inches should be enough. Don't pile much more than that over your bulbs or next spring the stems will have to travel too far to reach the light. Nancy Bubel