 Every year we are faced the same question - How much mulch do I need to buy? For some "bloody" reason nobody ever remembers or guess-timates the amount correctly. Nine years ago, Yardiac developed a mulch calculator (more commonly called a widget these days) to solve this problem.
Yardiac.com's compound calculator takes away all of the guesswork. Mulching is one of the most important ways to maintain healthy landscape plants. The application process is essential the heath and beauty of any outdoor landscape. However the application and expense will frustrate even the most dedicated Yardiac. This year use the Yardiac Mulch and Topsoil Calculator
Every year we are faced the same question - How much mulch do I need to buy? For some "bloody" reason nobody ever remembers or guess-timates the amount correctly. Nine years ago, Yardiac developed a mulch calculator (more commonly called a widget these days) to solve this problem.
Yardiac.com's compound calculator takes away all of the guesswork. Mulching is one of the most important ways to maintain healthy landscape plants. The application process is essential the heath and beauty of any outdoor landscape. However the application and expense will frustrate even the most dedicated Yardiac. This year use the Yardiac Mulch and Topsoil Calculator
Showing posts with label Mulching. Show all posts
Showing posts with label Mulching. Show all posts
Wednesday, August 12, 2009
Topsoil & Mulch Calculator
Every year we are faced the same question - How much mulch do I need to buy? For some "bloody" reason nobody ever remembers or guess-timates the amount correctly. Nine years ago, Yardiac developed a mulch calculator (more commonly called a widget these days) to solve this problem.
Yardiac.com's compound calculator takes away all of the guesswork. Mulching is one of the most important ways to maintain healthy landscape plants. The application process is essential the heath and beauty of any outdoor landscape. However the application and expense will frustrate even the most dedicated Yardiac. This year use the Yardiac Mulch and Topsoil Calculator


Friday, April 10, 2009
How To Apply Green Sand
 Yesterday we discussed the important benefits of Greensand, today we will address application.
Usage # 1: Greensand Apply greensand to your garden to increase root growth of plants. The potassium helps root growth and the additional looseness of the soil will increase the supply of oxygen to the growing roots.
Usage # 2: Apply greensand to enhance soil structure. This can make soil nutrients more available in whatever soil you have.
Usage # 3: Apply greensand in low rainfall areas. This will soften the effects of hard water, acting as a buffer for your plants' roots. It will also help your garden retain more of the water it gets.
Usage # 4: Use greensand to improve the drought tolerance of desert clay soil. It will help the soil retain and use the moisture that is available to it without allowing the heavy clay mud to choke out the roots of the plants.
Usage # 5: Add greensand to container potting soil. It will significantly reduce the need to water.
Greensand Application Rates For Planting
Light Application 5 to 10 lbs. per 100 square feet
Medium Application 15 to 30 lbs. per 100 square feet
Heavy Application 40 to 80 lbs. per 100 square feet
Yesterday we discussed the important benefits of Greensand, today we will address application.
Usage # 1: Greensand Apply greensand to your garden to increase root growth of plants. The potassium helps root growth and the additional looseness of the soil will increase the supply of oxygen to the growing roots.
Usage # 2: Apply greensand to enhance soil structure. This can make soil nutrients more available in whatever soil you have.
Usage # 3: Apply greensand in low rainfall areas. This will soften the effects of hard water, acting as a buffer for your plants' roots. It will also help your garden retain more of the water it gets.
Usage # 4: Use greensand to improve the drought tolerance of desert clay soil. It will help the soil retain and use the moisture that is available to it without allowing the heavy clay mud to choke out the roots of the plants.
Usage # 5: Add greensand to container potting soil. It will significantly reduce the need to water.
Greensand Application Rates For Planting
Light Application 5 to 10 lbs. per 100 square feet
Medium Application 15 to 30 lbs. per 100 square feet
Heavy Application 40 to 80 lbs. per 100 square feet
Friday, April 03, 2009
Is Rubber Mulch Safe & Enviromentally Sound
Is Rubber Mulch safe for my children?
Yes. O ur Rubber Mulch is 99.9% steel free, and completely non toxic. The colorant used meets all the criteria required for use on children's toys and furniture. Furthermore, the US Consumer Product Safety Commission tested Rubber Mulch, and proved that it is an exceptionally shock-absorbing product. This is very important as there are more than 550,000 playground injuries in the emergency room each year!
ur Rubber Mulch is 99.9% steel free, and completely non toxic. The colorant used meets all the criteria required for use on children's toys and furniture. Furthermore, the US Consumer Product Safety Commission tested Rubber Mulch, and proved that it is an exceptionally shock-absorbing product. This is very important as there are more than 550,000 playground injuries in the emergency room each year! Is Rubber Mulch is safe for the Environment?
Yes. The Environmental Protection Agency (EPA) says that rubber added to the soil is non toxic and safe for the environment. Current test show that leachate from tire samples were 1-3 times less than those proposed for primary drinking water standards. On the contrary, our Rubber Mulch is a recycled product, helping eliminate hazardous tire disposal sites.

Will Rubber Mulch harm my plants?
No. Actually your plants may be doing even better than before. Water and fertilizers pass through easily and Rubber Mulch provides a coating to help retain moisture in the ground. It also acts as a natural insulator to protect your plants in extreme weather conditions.
How long will Rubber Mulch last?
The rubber is colored with a unique paint which makes it very difficult to fade or rub off. It is also UV protected; rest assured that the color will last for a very long time.
Is Rubber Mulch more expensive than traditional mulch?
No. Initially it may seem that Rubber Mulch is more expensive than the organic versions , however, organic mulch must be replaced as often as every six weeks causing it to be more costly in the long run.
, however, organic mulch must be replaced as often as every six weeks causing it to be more costly in the long run.Rubber Mulch is very versatile!
You can use it in commercial or residential landscaping, municipal or backyard playgrounds, golf courses, flower beds and gardens, walkways, paths, or even around pools, ponds, trees, and shrubs.
Thursday, April 02, 2009
Rubber Mulch a Good Idea for Certain Areas
 Rubber Mulch offers an exceptional alternative for landscaping and garden mulching purposes. These innovative products have been specially created to provide a long lasting, maintenance free and environmentally friendly way to landscape. After installation, rubber mulch resists fading and decomposition. This green concept is clean, safe and attractive in appearance and is made from 100% recycled materials.
 Colored landscaping rubber mulch offers the ultimate in rubber landscaping & garden mulch appeal. Our mulch offers consistent shape and our colorization process ensures that the entire mulch piece is completely and uniformly coated.
- One-time application lasts years without replacement
- Non toxic and chemically safe for people, pets, and plants
- Allows water, air, and essential nutrients to be absorbed
- Discourages the growth of weeds.
- Our rubber landscaping mulch doesn't rot, create mildew, decompose
- Prevents the growth of mold, algae or fungus
- Insects or pests (including termites) are not attracted to the rubber
- Won't wash away due to extreme rainfall
- Reduces or eliminates dust problems
- Excellent insulator for tree and plant root systems
Wednesday, October 03, 2007
Rubber Mulch
Rubber Mulch offers an exceptional alternative for landscaping and garden mulching purposes. These innovative products have been specially created to provide a long lasting, maintenance free and environmentally friendly way to landscape. After installation, rubber mulch resists fading and decomposition. This green concept is clean, safe and attractive in appearance and is made from 100% recycled materials.
Colored landscaping rubber mulch offers the ultimate in rubber landscaping & garden mulch appeal. Our mulch offers consistent shape and our colorization process ensures that the entire mulch piece is completely and uniformly coated.
- One-time application lasts years without replacement
- Non toxic and chemically safe for people, pets, and plants
- Allows water, air, and essential nutrients to be absorbed
- Discourages the growth of weeds.
- Our rubber landscaping mulch doesn't rot, create mildew, decompose
- Prevents the growth of mold, algae or fungus
- Insects or pests (including termites) are not attracted to the rubber
- Won't wash away due to extreme rainfall
- Reduces or eliminates dust problems
- Excellent insulator for tree and plant root systems
Is Rubber Mulch safe for my children?
Yes. Our Rubber Mulch is 99.9% steel free, and completely non toxic. The colorant used meets all the criteria required for use on children's toys and furniture. Furthermore, the US Consumer Product Safety Commission tested Rubber Mulch, and proved that it is an exceptionally shock-absorbing product. This is very important as there are more than 550,000 playground injuries in the emergency room each year!
ur Rubber Mulch is 99.9% steel free, and completely non toxic. The colorant used meets all the criteria required for use on children's toys and furniture. Furthermore, the US Consumer Product Safety Commission tested Rubber Mulch, and proved that it is an exceptionally shock-absorbing product. This is very important as there are more than 550,000 playground injuries in the emergency room each year! Is Rubber Mulch is safe for the Environment?
Yes. The Environmental Protection Agency (EPA) says that rubber added to the soil is non toxic and safe for the environment. Current test show that leachate from tire samples were 1-3 times less than those proposed for primary drinking water standards. On the contrary, our Rubber Mulch is a recycled product, helping eliminate hazardous tire disposal sites.
Will Rubber Mulch harm my plants?
No. Actually your plants may be doing even better than before. Water and fertilizers pass through easily and Rubber Mulch provides a coating to help retain moisture in the ground. It also acts as a natural insulator to protect your plants in extreme weather conditions.
How long will Rubber Mulch last?
The rubber is colored with a unique paint which makes it very difficult to fade or rub off. It is also UV protected; rest assured that the color will last for a very long time.
Is Rubber Mulch more expensive than traditional mulch?
No. Initially it may seem that Rubber Mulch is more expensive than the organic versions, however, organic mulch must be replaced as often as every six weeks causing it to be more costly in the long run.
, however, organic mulch must be replaced as often as every six weeks causing it to be more costly in the long run.Rubber Mulch is very versatile!
You can use it in commercial or residential landscaping, municipal or backyard playgrounds, golf courses, flower beds and gardens, walkways, paths, or even around pools, ponds, trees, and shrubs.
Thursday, September 20, 2007
Organic Gardening Tips & FAQs
Frequently asked questions
Can you recommend any "vegetarian" fertilizers that do not contain animal by-products?
 There are a number of excellent plant-based fertilizers you can try. These include alfalfa pellets (5-1-2); kelp meal (1.5-.5-2.5); and seaweed liquid (.1-.1-1.0). The numbers in parenthesis after each product name indicate its nitrogen-phosphorus-potassium (N-P-K) ratio.
How can I improve my clay soil?
Soil preparation is very important to a successful garden or landscape. In clay or heavy soil it is advisable to add lots of well-rotted compost to help break up heavy soil particles, introduce microbial activity, add nutrients, and improve drainage. To sustain these positive benefits, you will need to amend your soil regularly throughout the life of the garden. Making your own compost is a good way to keep a supply on hand year-round. You can also improve clay soil by planting cover crops, also known as green manures, in the winter. Alfalfa, buckwheat, and white clover are all cover crops that loosen and add nitrogen to the soil. Rather than working with your existing soil, you might also consider constructing raised beds and filling them with a good-quality, all-purpose potting mix.
Whichever method you try, do not work with clay soil when it is wet as this forces the particles closer together. Compaction restricts proper gas exchange, the percolation of moisture and the normal growth of roots.
Are there any harmful side effects to using newspaper as a mulch?
Any risks from the slight amount of heavy metals present in the ink of daily newspapers are extremely remote. In fact, one environmentalist stated that to have any ill effect at all, you would have to eat twelve complete Sunday newpapers in one sitting! Newspapers are a great way to mulch your garden for weed control. Use a thick layer (no slick inserts) under your mulch and you will eliminate weed problems. Any that
There are a number of excellent plant-based fertilizers you can try. These include alfalfa pellets (5-1-2); kelp meal (1.5-.5-2.5); and seaweed liquid (.1-.1-1.0). The numbers in parenthesis after each product name indicate its nitrogen-phosphorus-potassium (N-P-K) ratio.
How can I improve my clay soil?
Soil preparation is very important to a successful garden or landscape. In clay or heavy soil it is advisable to add lots of well-rotted compost to help break up heavy soil particles, introduce microbial activity, add nutrients, and improve drainage. To sustain these positive benefits, you will need to amend your soil regularly throughout the life of the garden. Making your own compost is a good way to keep a supply on hand year-round. You can also improve clay soil by planting cover crops, also known as green manures, in the winter. Alfalfa, buckwheat, and white clover are all cover crops that loosen and add nitrogen to the soil. Rather than working with your existing soil, you might also consider constructing raised beds and filling them with a good-quality, all-purpose potting mix.
Whichever method you try, do not work with clay soil when it is wet as this forces the particles closer together. Compaction restricts proper gas exchange, the percolation of moisture and the normal growth of roots.
Are there any harmful side effects to using newspaper as a mulch?
Any risks from the slight amount of heavy metals present in the ink of daily newspapers are extremely remote. In fact, one environmentalist stated that to have any ill effect at all, you would have to eat twelve complete Sunday newpapers in one sitting! Newspapers are a great way to mulch your garden for weed control. Use a thick layer (no slick inserts) under your mulch and you will eliminate weed problems. Any that  do appear are very easy to pull. The paper will break down over time, adding organic material to your soil.
The following tips will help you maintain a healthy garden
Ensure that plants are healthy before adding them to your garden beds to avoid introducing pests or disease spores.
Water wisely Avoid overhead watering to prevent disease spores from washing onto healthy foliage. Using drip irrigation equipment not only prevents the spread of disease, but also helps to conserve water. Allow the soil to dry slightly between waterings to prevent fungal infections. Do not work among plants when they are wet to avoid the spread of water-borne diseases.
Remove and destroy severely infected plants or plant parts to avoid spreading diseases to healthy plants. Do not compost infected material. Clean your cutting tools with rubbing alcohol or a weak bleach solution between cuts when pruning diseased foliage.
Space plants widely to allow good air circulation. Crowded plants also tend to be weak and spindly, making them targets for pests and diseases.
Incorporate compost into the soil to introduce beneficial soil organisms and improve drainage.
Fertilize properly Nutrient deficiencies and imbalances make plants more attractive to pests. Overfertilization with nitrogen can cause lush, tender growth that attracts sucking pests such as aphids.
Controlling pests and diseases
do appear are very easy to pull. The paper will break down over time, adding organic material to your soil.
The following tips will help you maintain a healthy garden
Ensure that plants are healthy before adding them to your garden beds to avoid introducing pests or disease spores.
Water wisely Avoid overhead watering to prevent disease spores from washing onto healthy foliage. Using drip irrigation equipment not only prevents the spread of disease, but also helps to conserve water. Allow the soil to dry slightly between waterings to prevent fungal infections. Do not work among plants when they are wet to avoid the spread of water-borne diseases.
Remove and destroy severely infected plants or plant parts to avoid spreading diseases to healthy plants. Do not compost infected material. Clean your cutting tools with rubbing alcohol or a weak bleach solution between cuts when pruning diseased foliage.
Space plants widely to allow good air circulation. Crowded plants also tend to be weak and spindly, making them targets for pests and diseases.
Incorporate compost into the soil to introduce beneficial soil organisms and improve drainage.
Fertilize properly Nutrient deficiencies and imbalances make plants more attractive to pests. Overfertilization with nitrogen can cause lush, tender growth that attracts sucking pests such as aphids.
Controlling pests and diseases Despite your best efforts to prevent pests and diseases, infections and infestations may sometimes occur. The least harmful way to combat these intruders is through physical controls.
Install barriers, such as floating row covers, fences, netting, cutworm collars, and copper barrier tape, to protect your plants from future infestation or infection. Traps and repellents are other low-impact options for foiling insect and animal invaders.
If mechanical methods do not solve the problem, the next option is biological control. There are a number of biological control options available to the home gardener. Attract beneficial insects by creating a diverse ecosystem. Plant small-flowered nectar plants such as alyssum and dill to provide an additional food source for beneficials. Attract pest-eating birds, by placing birdhouses, birdbaths and feeders near your garden.
Bacillus thuringiensis (Bt) is a naturally occurring bacterium that acts as a stomach poison when consumed by certain pests, but it is harmless to beneficial insects.
Milky spore is a bacterial disease that specifically targets Japanese beetle larvae. Beneficial nematodes, microscopic soil-dwelling organisms, parasitize many harmful insect larvae.
The adage "An ounce of prevention is worth a pound of cure" also holds true in the garden. With proper maintenance, you can virtually eliminate pest and disease problems before they start.
Despite your best efforts to prevent pests and diseases, infections and infestations may sometimes occur. The least harmful way to combat these intruders is through physical controls.
Install barriers, such as floating row covers, fences, netting, cutworm collars, and copper barrier tape, to protect your plants from future infestation or infection. Traps and repellents are other low-impact options for foiling insect and animal invaders.
If mechanical methods do not solve the problem, the next option is biological control. There are a number of biological control options available to the home gardener. Attract beneficial insects by creating a diverse ecosystem. Plant small-flowered nectar plants such as alyssum and dill to provide an additional food source for beneficials. Attract pest-eating birds, by placing birdhouses, birdbaths and feeders near your garden.
Bacillus thuringiensis (Bt) is a naturally occurring bacterium that acts as a stomach poison when consumed by certain pests, but it is harmless to beneficial insects.
Milky spore is a bacterial disease that specifically targets Japanese beetle larvae. Beneficial nematodes, microscopic soil-dwelling organisms, parasitize many harmful insect larvae.
The adage "An ounce of prevention is worth a pound of cure" also holds true in the garden. With proper maintenance, you can virtually eliminate pest and disease problems before they start.
There are a number of excellent plant-based fertilizers you can try. These include alfalfa pellets (5-1-2); kelp meal (1.5-.5-2.5); and seaweed liquid (.1-.1-1.0). The numbers in parenthesis after each product name indicate its nitrogen-phosphorus-potassium (N-P-K) ratio.
How can I improve my clay soil?
Soil preparation is very important to a successful garden or landscape. In clay or heavy soil it is advisable to add lots of well-rotted compost to help break up heavy soil particles, introduce microbial activity, add nutrients, and improve drainage. To sustain these positive benefits, you will need to amend your soil regularly throughout the life of the garden. Making your own compost is a good way to keep a supply on hand year-round. You can also improve clay soil by planting cover crops, also known as green manures, in the winter. Alfalfa, buckwheat, and white clover are all cover crops that loosen and add nitrogen to the soil. Rather than working with your existing soil, you might also consider constructing raised beds and filling them with a good-quality, all-purpose potting mix.
Whichever method you try, do not work with clay soil when it is wet as this forces the particles closer together. Compaction restricts proper gas exchange, the percolation of moisture and the normal growth of roots.
Are there any harmful side effects to using newspaper as a mulch?
Any risks from the slight amount of heavy metals present in the ink of daily newspapers are extremely remote. In fact, one environmentalist stated that to have any ill effect at all, you would have to eat twelve complete Sunday newpapers in one sitting! Newspapers are a great way to mulch your garden for weed control. Use a thick layer (no slick inserts) under your mulch and you will eliminate weed problems. Any that do appear are very easy to pull. The paper will break down over time, adding organic material to your soil.
The following tips will help you maintain a healthy garden
Ensure that plants are healthy before adding them to your garden beds to avoid introducing pests or disease spores.
Water wisely Avoid overhead watering to prevent disease spores from washing onto healthy foliage. Using drip irrigation equipment not only prevents the spread of disease, but also helps to conserve water. Allow the soil to dry slightly between waterings to prevent fungal infections. Do not work among plants when they are wet to avoid the spread of water-borne diseases.
Remove and destroy severely infected plants or plant parts to avoid spreading diseases to healthy plants. Do not compost infected material. Clean your cutting tools with rubbing alcohol or a weak bleach solution between cuts when pruning diseased foliage.
Space plants widely to allow good air circulation. Crowded plants also tend to be weak and spindly, making them targets for pests and diseases.
Incorporate compost into the soil to introduce beneficial soil organisms and improve drainage.
Fertilize properly Nutrient deficiencies and imbalances make plants more attractive to pests. Overfertilization with nitrogen can cause lush, tender growth that attracts sucking pests such as aphids.
Controlling pests and diseases
Despite your best efforts to prevent pests and diseases, infections and infestations may sometimes occur. The least harmful way to combat these intruders is through physical controls.
Install barriers, such as floating row covers, fences, netting, cutworm collars, and copper barrier tape, to protect your plants from future infestation or infection. Traps and repellents are other low-impact options for foiling insect and animal invaders.
If mechanical methods do not solve the problem, the next option is biological control. There are a number of biological control options available to the home gardener. Attract beneficial insects by creating a diverse ecosystem. Plant small-flowered nectar plants such as alyssum and dill to provide an additional food source for beneficials. Attract pest-eating birds, by placing birdhouses, birdbaths and feeders near your garden.
Bacillus thuringiensis (Bt) is a naturally occurring bacterium that acts as a stomach poison when consumed by certain pests, but it is harmless to beneficial insects.
Milky spore is a bacterial disease that specifically targets Japanese beetle larvae. Beneficial nematodes, microscopic soil-dwelling organisms, parasitize many harmful insect larvae.
The adage "An ounce of prevention is worth a pound of cure" also holds true in the garden. With proper maintenance, you can virtually eliminate pest and disease problems before they start.
Wednesday, September 19, 2007
First Steps: Organic Gardening
First steps
Now that you've decided to try your hand at organic gardening, you might be wondering how to begin. Here are a few suggestions to get you started:
Learn about gardening and plants. Garden forums, are a great place to start. You can also hone your skills by reading a good gardening book or two. Consider joining a local garden club or  enrolling in a class to learn about gardening while meeting other gardeners in your area.
Plan your garden carefully and keep good records. Learn as much as possible about the types of plants you want to grow and select varieties that are well-suited to your particular growing conditions. Design your garden beforehand to ensure your plants receive the proper spacing and growing conditions. (You can use Yardiac.com's Landscape Vision software to design your garden right on your desktop!) Record your successes and failures in a notebook or journal and refer to these notes when planning next year's garden.
Get to know your soil. Your County Cooperative Extension Service can provide a kit and instructions for having your soil tested (by a professional lab) or you can do it yourself using a soil test kit. Correct any deficiencies with natural soil Click here for information on amending your soil.
Start composting! Recycle garden wastes while improving the soil.
Prevent pest and disease problems before they develop.
Mulch! Mulching helps to control weeds, retain soil moisture, regulate soil temperature, check the spread of disease, protect plants from extreme
enrolling in a class to learn about gardening while meeting other gardeners in your area.
Plan your garden carefully and keep good records. Learn as much as possible about the types of plants you want to grow and select varieties that are well-suited to your particular growing conditions. Design your garden beforehand to ensure your plants receive the proper spacing and growing conditions. (You can use Yardiac.com's Landscape Vision software to design your garden right on your desktop!) Record your successes and failures in a notebook or journal and refer to these notes when planning next year's garden.
Get to know your soil. Your County Cooperative Extension Service can provide a kit and instructions for having your soil tested (by a professional lab) or you can do it yourself using a soil test kit. Correct any deficiencies with natural soil Click here for information on amending your soil.
Start composting! Recycle garden wastes while improving the soil.
Prevent pest and disease problems before they develop.
Mulch! Mulching helps to control weeds, retain soil moisture, regulate soil temperature, check the spread of disease, protect plants from extreme  weather conditions, and more
Amending your soil
Organic matter
There are few things as important to successful organic gardening as adding organic matter to the soil. The term "organic matter" refers to various forms of living or dead plant and animal material. Organic matter is an essential component of healthy soil for a number of reasons:
It loosens the soil structure, improving drainage and allowing better root penetration.
It improves nutrient and water retention.
It increases the activity and populations of soil organisms.
It helps combat pest and disease problems.
It encourages earthworms, which aerate and enrich the soil.
You can add organic material to your soil by digging or tilling it into the top
weather conditions, and more
Amending your soil
Organic matter
There are few things as important to successful organic gardening as adding organic matter to the soil. The term "organic matter" refers to various forms of living or dead plant and animal material. Organic matter is an essential component of healthy soil for a number of reasons:
It loosens the soil structure, improving drainage and allowing better root penetration.
It improves nutrient and water retention.
It increases the activity and populations of soil organisms.
It helps combat pest and disease problems.
It encourages earthworms, which aerate and enrich the soil.
You can add organic material to your soil by digging or tilling it into the top  several inches of the soil or by mulching with it. However, organic matter does not remain in the soil. The natural process of decay gradually converts organic matter to a very stable form called humus. Humus is composed of simpler compounds that are utilized by plants as food. Therefore, to maintain a healthy, humus-rich soil, you must add organic matter to your garden every year.
You can slow the loss of organic matter by cultivating the soil gently, keeping the soil surface mulched during the growing season, and mulching or planting a cover crop during the winter.
Try to maintain 5-6% organic matter in your soil. A good guideline is to add about 1 inch of finished compost or other fine-textured organic matter to your soil each year. Apply a thicker layer -- about 4 inches -- if you use a bulkier material, such as chopped leaves or straw, because there is less organic matter per volume. You may need to add organic matter
several inches of the soil or by mulching with it. However, organic matter does not remain in the soil. The natural process of decay gradually converts organic matter to a very stable form called humus. Humus is composed of simpler compounds that are utilized by plants as food. Therefore, to maintain a healthy, humus-rich soil, you must add organic matter to your garden every year.
You can slow the loss of organic matter by cultivating the soil gently, keeping the soil surface mulched during the growing season, and mulching or planting a cover crop during the winter.
Try to maintain 5-6% organic matter in your soil. A good guideline is to add about 1 inch of finished compost or other fine-textured organic matter to your soil each year. Apply a thicker layer -- about 4 inches -- if you use a bulkier material, such as chopped leaves or straw, because there is less organic matter per volume. You may need to add organic matter  more frequently in the South and West as organic material can break down twice as quickly in hot soils as it does in cooler soils. Take care not to overdo it, particularly with fresh organic matter such as grass clippings, kitchen waste, and green weeds. Adding too much fresh organic matter can overstimulate soil microorganisms -- which can consume a great deal of nitrogen and other plant nutrients, causing temporary declines in soil fertility -- or even burn your plants' roots.
Mineral supplements
There are several organic soil amendments that can correct specific pH and mineral imbalances. In general, you should only use them if a soil test or plant analysis indicates a deficiency. Adding too much of a mineral supplement can create an excess of a particular nutrient that can damage your plants or interfere with the uptake of other nutrients. It is a good idea to do a little research, to learn more about mineral supplements and their recommended uses, before adding anything to your soil.
more frequently in the South and West as organic material can break down twice as quickly in hot soils as it does in cooler soils. Take care not to overdo it, particularly with fresh organic matter such as grass clippings, kitchen waste, and green weeds. Adding too much fresh organic matter can overstimulate soil microorganisms -- which can consume a great deal of nitrogen and other plant nutrients, causing temporary declines in soil fertility -- or even burn your plants' roots.
Mineral supplements
There are several organic soil amendments that can correct specific pH and mineral imbalances. In general, you should only use them if a soil test or plant analysis indicates a deficiency. Adding too much of a mineral supplement can create an excess of a particular nutrient that can damage your plants or interfere with the uptake of other nutrients. It is a good idea to do a little research, to learn more about mineral supplements and their recommended uses, before adding anything to your soil.
enrolling in a class to learn about gardening while meeting other gardeners in your area.
Plan your garden carefully and keep good records. Learn as much as possible about the types of plants you want to grow and select varieties that are well-suited to your particular growing conditions. Design your garden beforehand to ensure your plants receive the proper spacing and growing conditions. (You can use Yardiac.com's Landscape Vision software to design your garden right on your desktop!) Record your successes and failures in a notebook or journal and refer to these notes when planning next year's garden.
Get to know your soil. Your County Cooperative Extension Service can provide a kit and instructions for having your soil tested (by a professional lab) or you can do it yourself using a soil test kit. Correct any deficiencies with natural soil Click here for information on amending your soil.
Start composting! Recycle garden wastes while improving the soil.
Prevent pest and disease problems before they develop.
Mulch! Mulching helps to control weeds, retain soil moisture, regulate soil temperature, check the spread of disease, protect plants from extreme weather conditions, and more
Amending your soil
Organic matter
There are few things as important to successful organic gardening as adding organic matter to the soil. The term "organic matter" refers to various forms of living or dead plant and animal material. Organic matter is an essential component of healthy soil for a number of reasons:
It loosens the soil structure, improving drainage and allowing better root penetration.
It improves nutrient and water retention.
It increases the activity and populations of soil organisms.
It helps combat pest and disease problems.
It encourages earthworms, which aerate and enrich the soil.
You can add organic material to your soil by digging or tilling it into the top several inches of the soil or by mulching with it. However, organic matter does not remain in the soil. The natural process of decay gradually converts organic matter to a very stable form called humus. Humus is composed of simpler compounds that are utilized by plants as food. Therefore, to maintain a healthy, humus-rich soil, you must add organic matter to your garden every year.
You can slow the loss of organic matter by cultivating the soil gently, keeping the soil surface mulched during the growing season, and mulching or planting a cover crop during the winter.
Try to maintain 5-6% organic matter in your soil. A good guideline is to add about 1 inch of finished compost or other fine-textured organic matter to your soil each year. Apply a thicker layer -- about 4 inches -- if you use a bulkier material, such as chopped leaves or straw, because there is less organic matter per volume. You may need to add organic matter more frequently in the South and West as organic material can break down twice as quickly in hot soils as it does in cooler soils. Take care not to overdo it, particularly with fresh organic matter such as grass clippings, kitchen waste, and green weeds. Adding too much fresh organic matter can overstimulate soil microorganisms -- which can consume a great deal of nitrogen and other plant nutrients, causing temporary declines in soil fertility -- or even burn your plants' roots.
Mineral supplements
There are several organic soil amendments that can correct specific pH and mineral imbalances. In general, you should only use them if a soil test or plant analysis indicates a deficiency. Adding too much of a mineral supplement can create an excess of a particular nutrient that can damage your plants or interfere with the uptake of other nutrients. It is a good idea to do a little research, to learn more about mineral supplements and their recommended uses, before adding anything to your soil.
Tuesday, June 05, 2007
Discover the Secret to Successful Composting

The secret to successful composting is achieving the right balance of three critical elements: organic matter, water, and air. By bringing these materials into the proper balance, you speed up the natural process of decay which makes nutrients available to plants. Composting simultaneously achieves two of the fundamental objectives of organic gardening: recycling materials and enriching the soil.
Selecting materials
There are two types of organic matter that must be included in your compost pile: "browns" and "greens". "Brown" materials are high in carbon and "green" materials are high in nitrogen. Examples of 'browns' include twigs and small branches, dead leaves in the fall, old hay or mulch, dry and dead plant materials such as straw, dry brown weeds, and wood chips or sawdust.
"Greens" includes fresh (and often green) plant materials such as green weeds from the garden, kitchen fruit and vegetable scraps, green leaves, grass clippings, and yard waste from dead heading or trimming plants. The greener the material, the higher the nitrogen content. A good mix of browns and greens is the best  nutritional balance.
By including a greater variety of materials included in your compost, you will be more likely to create a nutritionally balanced product. Mineral supplements like rock phosphate and greensand can be added to the pile to tailor your compost to the needs of your plants and to your particular gardening conditions. Although some gardeners use lime to raise the pH of their compost and to help reduce odors, lime can facilitate the release of ammonia into the atmosphere, reducing the nitrogen content of your compost. You can use eggshells, bone meal, or wood ashes to provide the calcium supplied by lime without sacrificing nitrogen. Wood ashes will provide potash as well, but use them in moderation to avoid high pH levels that could interfere with microorganism activity or some plants' ability to absorb nutrients.
nutritional balance.
By including a greater variety of materials included in your compost, you will be more likely to create a nutritionally balanced product. Mineral supplements like rock phosphate and greensand can be added to the pile to tailor your compost to the needs of your plants and to your particular gardening conditions. Although some gardeners use lime to raise the pH of their compost and to help reduce odors, lime can facilitate the release of ammonia into the atmosphere, reducing the nitrogen content of your compost. You can use eggshells, bone meal, or wood ashes to provide the calcium supplied by lime without sacrificing nitrogen. Wood ashes will provide potash as well, but use them in moderation to avoid high pH levels that could interfere with microorganism activity or some plants' ability to absorb nutrients.
nutritional balance.
By including a greater variety of materials included in your compost, you will be more likely to create a nutritionally balanced product. Mineral supplements like rock phosphate and greensand can be added to the pile to tailor your compost to the needs of your plants and to your particular gardening conditions. Although some gardeners use lime to raise the pH of their compost and to help reduce odors, lime can facilitate the release of ammonia into the atmosphere, reducing the nitrogen content of your compost. You can use eggshells, bone meal, or wood ashes to provide the calcium supplied by lime without sacrificing nitrogen. Wood ashes will provide potash as well, but use them in moderation to avoid high pH levels that could interfere with microorganism activity or some plants' ability to absorb nutrients. While anything of living origin can be composted, the following items should NEVER be added to a compost pile:
- Cat and dog manures
- Noxious perennial weeds
- Kitchen scraps containing meat, dairy products, or grease
- Any plants treated with pesticide or herbicide

For thorough decomposition to occur, an adequate supply of air must reach all parts of the pile. The most common aerating technique is to turn the compost pile about once or twice a month. The process of decay can generate a lot of heat, creating temperatures up to 150° F inside a well-aerated and well-constructed compost pile. This high heat is crucial for killing any weed seeds and pathogens (disease-causing organisms) and for accelerating the process of decay. Monitor the temperature of your compost pile with a compost thermometer. Turn the pile again after the temperature has peaked and the pile has begun to cool down.
You can also aerate your compost pile using the following methods:
Use a pallet or other structure to raise the pile to allow air to penetrate from the bottom. You can also put sticks into the pile as you are building it. After building, pull out the sticks and you have ready made air shafts! By poking holes into your pile with a crowbar or garden fork will also provide aeration.
- Shred materials like leaves, hay and grass prior to adding them to the pile. Use materials that can become matted (like paper and grass clippings) sparingly.
- Periodically poke holes in the pile with a garden fork or compost aerator.

Water is also vital to sustain the microorganisms that make composting possible. However, a compost pile that is too wet inferes with aeration, drowns the beneficial organisms, and leaches out nutrients. Properly moistened compost should be about as damp as a wet sponge. Follow these guidelines to maintain the appropriate moisture levels in your compost pile:
- Locate your pile on a well-drained site. Construct a base of gravel, sand, or other coarse material, if necessary, to ensure the pile does not stand in water.
- Sprinkle each layer with water as you construct the pile.
- Check moisture levels every few days; if needed, add moisture whenever you turn the pile.
- Layer wet materials with dry, absorbent materials.
- Turn the pile periodically to release excess moisture.
- Protect your pile from excessively wet or dry weather by enclosing it in a covered bin or topping it with a layer of hay or straw.

- In humid climates, construct your pile so it has a rounded top to repel moisture. In dry climates, create a sunken top to collect water.
Locating your compost pileBefore building your pile, it is important to consider where you will locate your compost pile and how you will construct it. Providing an enclosure for your pile is not essential as long as the pile is at least a cubic yard in volume (3 ft by 3 ft by 3 ft). However, structures have the advantages of protecting your compost from adverse weather and pests, conserving heat, and creating a more attractive appearance. Position your pile or enclosure where it will be protected from drying winds in the winter and hot sun in the summer. In general, the more exposed the location for the pile, the more watering will be necessary to maintain adequate moisture levels.
Building your compost pileThe simplest way to ensure the correct carbon-to-nitrogen ratio is to alternate layers of high-carbon material with layers of high-nitrogen material when constructing your compost pile. In general, a number of thin layers will allow for more efficient decomposition than a few thick layers.
Follow these simple steps to build an efficient, low-maintenance compost pile:
Loosen the soil at the site you have chosen for your compost pile.
- Make a base of coarse material to facilitate aeration and drainage. Water this layer.
- Alternate 3 - 4" layers between Green (high Nitrogen) and Brown (high Carbon) materials. Water.
- Any materials that could mat or putrefy should be mixed with drier materials, like straw or sawdust, and kept in thin layers no more than 1 to 2 inches thick.
- Add a half-inch layer of soil on top of the high-nitrogen layer to inoculate the pile with the appropriate microorganisms. This soil layer will reduce the leaching of mineral nutrients and trap escaping nitrogen gas. Water.
- Continue to repeat the layering process in this fashion until the pile is about 3 feet high. Be sure to water each layer, except for those layers composed of wet materials like kitchen scraps.
- Cap the finished pile with 2-3 inches of soil.

- Turn the pile once or twice a month to aerate it and release excess moisture. Add Compost Bio-Activator before turning to introduce beneficial microorganisms that will keep the decomposition process active.
- Water the pile as needed to maintain appropriate moisture levels.
- Cover the pile with a thick layer of straw in winter to maintain proper moisture and temperature levels.
Wednesday, January 24, 2007
Drought Defense:Three Smart Moves to Quench Your Garden's Thirst
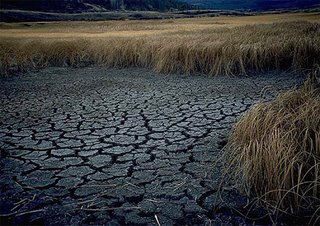 Plus, beautiful, drought-tolerant, plants to grow, in your garden.
No one, not even a Yardiac, can control rainfall and prevent a drought, but you can make a few smart moves, right now, to ensure that your garden will sail through dry spells looking healthy and vibrant. As an added bonus, you'll lighten your gardening chores at the same time.
Yardiac Tip #1: Mulch your gardenTop the garden soil around your plants with a thick blanket of mulch. Mulch helps the soil hold moisture, and it also keeps weeds down. Shredded bark is a good choice for mulch in flower gardens; spoiled hay and compost work well in vegetable gardens. You can also use grass clippings as long as they haven't been chemically treated.
Yardiac Tip #2: Water with soaker hoses or drip systemsSoaker hoses are made from recycled tires; turn them on and let them "sweat"! Just wind a soaker hose around the plants in your garden. When you turn the water on it will flow through the microscopic holes in the hose and slowly saturate the soil. For a double dose of drought protection, combine moves #1 and #2: install your soaker hose, then cover it with mulch to prevent moisture from evaporating.
Today's drip irrigation systems are much more flexible and improved over the unwieldy, clog-prone models of the past. Drip systems are well suited for use in flower and vegetable beds; you can even use them to keep your containers watered while you're on vacation, or saturate newly planted saplings. Just add an automatic timer, and suddenly your watering chores are over.
Yardiac Tip #3: Choose Prairie PlantsTrue to their roots, prairie plants (both domestic and wild forms) are proving to be tough, reliable garden performers that require little care to keep them in top form. What's more, these resilient American natives feel right at home wherever they're planted, whether that's a suburban garden in the Midwest or a brownstone in New York City. Plants such as black-eyed Susan and purple coneflower evolved where droughts are commonplace, so they're much more tolerant of dry spells than shrinking violets with ancestral roots in a rainy climates.
Here's a brief overview of some fabulous prairie plants for your garden:
Plus, beautiful, drought-tolerant, plants to grow, in your garden.
No one, not even a Yardiac, can control rainfall and prevent a drought, but you can make a few smart moves, right now, to ensure that your garden will sail through dry spells looking healthy and vibrant. As an added bonus, you'll lighten your gardening chores at the same time.
Yardiac Tip #1: Mulch your gardenTop the garden soil around your plants with a thick blanket of mulch. Mulch helps the soil hold moisture, and it also keeps weeds down. Shredded bark is a good choice for mulch in flower gardens; spoiled hay and compost work well in vegetable gardens. You can also use grass clippings as long as they haven't been chemically treated.
Yardiac Tip #2: Water with soaker hoses or drip systemsSoaker hoses are made from recycled tires; turn them on and let them "sweat"! Just wind a soaker hose around the plants in your garden. When you turn the water on it will flow through the microscopic holes in the hose and slowly saturate the soil. For a double dose of drought protection, combine moves #1 and #2: install your soaker hose, then cover it with mulch to prevent moisture from evaporating.
Today's drip irrigation systems are much more flexible and improved over the unwieldy, clog-prone models of the past. Drip systems are well suited for use in flower and vegetable beds; you can even use them to keep your containers watered while you're on vacation, or saturate newly planted saplings. Just add an automatic timer, and suddenly your watering chores are over.
Yardiac Tip #3: Choose Prairie PlantsTrue to their roots, prairie plants (both domestic and wild forms) are proving to be tough, reliable garden performers that require little care to keep them in top form. What's more, these resilient American natives feel right at home wherever they're planted, whether that's a suburban garden in the Midwest or a brownstone in New York City. Plants such as black-eyed Susan and purple coneflower evolved where droughts are commonplace, so they're much more tolerant of dry spells than shrinking violets with ancestral roots in a rainy climates.
Here's a brief overview of some fabulous prairie plants for your garden:
 Culver's root, Veronicastrum virginicum, is a four-foot-tall beauty with candelabra-like
bloom spikes that don't require staking. Culver's root is available in white- and pink-flowering varieties. Hardy from Zones 3-9.
Red milkweed, Asclepias incarnata, grows three to five feet tall and produces large, flat seed heads that bloom in pale pink to cherry rose. Butterflies adore them in late summer. Common butterfly weed, Asclepias tuberosa, is another native that butterflies enjoy. Both plants are tolerant of seaside conditions and are hardy from Zones 3-9.
Yarrow has fuzzy leaves and bold, flat flower heads. The spectacular, reliable 'Coronation Gold' variety looks as good in a manicured garden as it does in a rustic, wild setting. Hardy from Zones 2-9.
Purple coneflower, Echinacea purpurea, is a popular low-maintenance perennial that thrives even in light shade, and grows up to 40 inches tall. A white form, Echinacea purpurea 'Alba', is just as appealing to bees and butterflies as its purple cousin, but it's shorter and less likely to reseed itself each year. Both are hardy from Zones 3-9.
Helen's flower, Helenium autumnale, picks up the slack when other garden flowers are fading.
Culver's root, Veronicastrum virginicum, is a four-foot-tall beauty with candelabra-like
bloom spikes that don't require staking. Culver's root is available in white- and pink-flowering varieties. Hardy from Zones 3-9.
Red milkweed, Asclepias incarnata, grows three to five feet tall and produces large, flat seed heads that bloom in pale pink to cherry rose. Butterflies adore them in late summer. Common butterfly weed, Asclepias tuberosa, is another native that butterflies enjoy. Both plants are tolerant of seaside conditions and are hardy from Zones 3-9.
Yarrow has fuzzy leaves and bold, flat flower heads. The spectacular, reliable 'Coronation Gold' variety looks as good in a manicured garden as it does in a rustic, wild setting. Hardy from Zones 2-9.
Purple coneflower, Echinacea purpurea, is a popular low-maintenance perennial that thrives even in light shade, and grows up to 40 inches tall. A white form, Echinacea purpurea 'Alba', is just as appealing to bees and butterflies as its purple cousin, but it's shorter and less likely to reseed itself each year. Both are hardy from Zones 3-9.
Helen's flower, Helenium autumnale, picks up the slack when other garden flowers are fading.
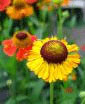 Blooming in shades of yellow, orange, maroon and copper, Helenium is a tough-as-nails native that grows about three feet tall and is an attractive companion plant for asters and chrysanthemums. Hardy from Zones 3-9.
Prairie false indigo, Baptisia lactea, is a rugged, spring-blooming perennial that develops upright black stems with white, pea-like flowers. A blue form, Baptisia australis, is also available. Both are extremely pest- and disease-resistant and grow two to four feet tall. Hardy from Zones 3-9.
Helianthus is the bright yellow sunflower you've seen growing wild along the roadsides in the Midwest. A top-performing hybrid is the double-flowered Helianthus multiflorus 'Flore-pleno'. This five-foot-tall giant is in nearly constant bloom July through September and makes excellent, long-lasting cut flowers. Hardy from Zones 4-10.
Bee balm or monarda, Monarda didyma is a domestic garden staple that blooms in reds, pinks and purples. The blooms for both wild and domestic varieties are rounded and fringy, resembling fireworks opening and cascading back to earth. Bees, butterflies and hummingbirds love to visit these flowers. Hardy from Zones 3-9.
Joe-pye weed, Eupatorium maculatum, grows five feet tall. The striking plant bears large flat reddish-purple flowers from July to September and is much relished by bees and butterflies.
Blooming in shades of yellow, orange, maroon and copper, Helenium is a tough-as-nails native that grows about three feet tall and is an attractive companion plant for asters and chrysanthemums. Hardy from Zones 3-9.
Prairie false indigo, Baptisia lactea, is a rugged, spring-blooming perennial that develops upright black stems with white, pea-like flowers. A blue form, Baptisia australis, is also available. Both are extremely pest- and disease-resistant and grow two to four feet tall. Hardy from Zones 3-9.
Helianthus is the bright yellow sunflower you've seen growing wild along the roadsides in the Midwest. A top-performing hybrid is the double-flowered Helianthus multiflorus 'Flore-pleno'. This five-foot-tall giant is in nearly constant bloom July through September and makes excellent, long-lasting cut flowers. Hardy from Zones 4-10.
Bee balm or monarda, Monarda didyma is a domestic garden staple that blooms in reds, pinks and purples. The blooms for both wild and domestic varieties are rounded and fringy, resembling fireworks opening and cascading back to earth. Bees, butterflies and hummingbirds love to visit these flowers. Hardy from Zones 3-9.
Joe-pye weed, Eupatorium maculatum, grows five feet tall. The striking plant bears large flat reddish-purple flowers from July to September and is much relished by bees and butterflies. 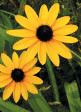 Hardy from Zones 2-8.
Black-eyed Susan, Rudbeckia hirta, is likely the most popular native flower of all. This never-say-die perennial tolerates all sorts of neglect and keeps on blooming. Black-eyed Susans, including variety 'Goldsturm,' make long-lasting cut flowers, too. Hardy from Zones 3-8
Hardy from Zones 2-8.
Black-eyed Susan, Rudbeckia hirta, is likely the most popular native flower of all. This never-say-die perennial tolerates all sorts of neglect and keeps on blooming. Black-eyed Susans, including variety 'Goldsturm,' make long-lasting cut flowers, too. Hardy from Zones 3-8
Friday, December 29, 2006
Improving Soils
Several (Not so Easy) Steps in Preparing Your Plant Beds
After centuries of exploitation, our nation has only a few remaining areas of inherently fertile soils. With very few exceptions, our soils are low in organic matter, low in microbiological activity, and low in the three major nutrients: nitrogen, phosphate, and potash. They are also low in some of the secondary nutrients such as calcium and magnesium, and low in many of the micronutrients. They haven't always been this way, but careless farming, timbering, and pasturing for 250 to 300 years have degraded them considerably.
The steps you take to transform your 'dirt' into productive garden soil depend on the type of soil you have and the depth of your pockets. Technicians might quibble over this simplification, but most soils are either sticky clay, gritty sand, or a mixture of the two with some silt--a mixture known as "loam."
Modern Way to Prepare Flower and Shrub Bed Soil
The old way was to till the soil, remove any grasses, remove sticks and rocks by hand, add lime and fertilizer, bring in and incorporate more soil to build up beds for drainage, and set out flower or shrub plants. Of course the weed seeds exposed by turning the soil and bringing in soil would begin germinating, and 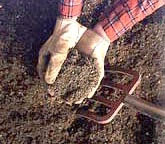 a regular routine of hoeing or pulling weeds had to begin. This approach differed little from practices in frontier days when soil was turned with a mattock and fenced with wattle to keep out wild animals.
Today there is a more lasting way to prepare soil to increase aeration, improve drainage, decrease weeding, and conserve moisture. After reading the following procedure, you might think, "No way!" but if you improve one flowerbed at a time, you will soon have the nearest thing to a low-maintenance landscape.
Devote a summer to getting rid of weeds. Either turn the soil repeatedly to kill emerging weeds or do it the easy way with 3 sprays of a non-selective, post-emergence herbicide, timed to kill new weeds as they emerge. Rake or burn off the dead vegetation.
If your soil is clay and slow to drain, add soil amendments after the first tilling or application of herbicide. Haul in an organic soil conditioner such as finely pulverized pine bark to make a layer 3 in. deep over the weed-free bed. Also haul in cracked pea gravel, granite meal, Perma Till(tm) or chicken grit to make another layer 3 in. deep over the bed. Spread dolomitic limestone that is pelletized or ground very fine for quick release. Five pounds limestone per 100 sq. ft. should be enough for starters. Spread 3 pounds triple super phosphate per 100 sq. ft., or 6 pounds of rock phosphate over the same area. Forget bone meal--it takes forever to release. Spread 5 pounds organic fertilizer such as chicken manure per 100 sq. ft. Pelletized chicken manure supplies not only major and secondary nutrients, but micronutrients as well.
If your soil is sandy, follow all the steps above, but omit the addition of cracked pea gravel. Mix in the additives to spade depth, about 9 in. The organic soil conditioner and cracked pea gravel will raise the level of the soil in the bed of clay soil and will improve drainage. The organic soil conditioner will improve the moisture-holding capacity and microbiological activity of sandy soil. Haul in and spread pine bark or hardwood bark mulch to a depth of 3 to 5 in. over the raised bed. (Ask for pine or hardwood bark mulch, neither a finely shredded soil conditioner nor coarse nuggets.)
a regular routine of hoeing or pulling weeds had to begin. This approach differed little from practices in frontier days when soil was turned with a mattock and fenced with wattle to keep out wild animals.
Today there is a more lasting way to prepare soil to increase aeration, improve drainage, decrease weeding, and conserve moisture. After reading the following procedure, you might think, "No way!" but if you improve one flowerbed at a time, you will soon have the nearest thing to a low-maintenance landscape.
Devote a summer to getting rid of weeds. Either turn the soil repeatedly to kill emerging weeds or do it the easy way with 3 sprays of a non-selective, post-emergence herbicide, timed to kill new weeds as they emerge. Rake or burn off the dead vegetation.
If your soil is clay and slow to drain, add soil amendments after the first tilling or application of herbicide. Haul in an organic soil conditioner such as finely pulverized pine bark to make a layer 3 in. deep over the weed-free bed. Also haul in cracked pea gravel, granite meal, Perma Till(tm) or chicken grit to make another layer 3 in. deep over the bed. Spread dolomitic limestone that is pelletized or ground very fine for quick release. Five pounds limestone per 100 sq. ft. should be enough for starters. Spread 3 pounds triple super phosphate per 100 sq. ft., or 6 pounds of rock phosphate over the same area. Forget bone meal--it takes forever to release. Spread 5 pounds organic fertilizer such as chicken manure per 100 sq. ft. Pelletized chicken manure supplies not only major and secondary nutrients, but micronutrients as well.
If your soil is sandy, follow all the steps above, but omit the addition of cracked pea gravel. Mix in the additives to spade depth, about 9 in. The organic soil conditioner and cracked pea gravel will raise the level of the soil in the bed of clay soil and will improve drainage. The organic soil conditioner will improve the moisture-holding capacity and microbiological activity of sandy soil. Haul in and spread pine bark or hardwood bark mulch to a depth of 3 to 5 in. over the raised bed. (Ask for pine or hardwood bark mulch, neither a finely shredded soil conditioner nor coarse nuggets.)
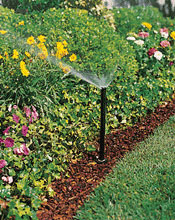 Now you are ready to plant. The deep layer of mulch will absorb and retain water and discourage weed seeds from germinating. Shrubs can be planted by raking the mulch aside, spreading out the root system, setting the root ball on top of the soil, and shoveling the mulch back over the roots. You might need to get a few more shovels full of mulch from the pile to make sure the root ball is covered. Annuals can be set into shallow holes dug in the mulch. Perennial seedlings will need bottomless tin can collars to keep the mulch from drifting over their crowns, a potential cause of rotting.
Deeply mulched beds do not make good seedbeds for direct-seeding annual flowers. Start them in un-mulched beds and transplant the seedlings into the mulched area.
Maintaining Soil Fertility and Depth of MulchOur long summers, high rainfall, and high temperatures conspire to volatilize, or leach nutrients out of the soil, and to turn mulch into compost at a rapid rate. Work in one-half cup of organic fertilizer around every annual plant that is set out. To feed our established perennials, rake the mulch from around the collar, scatter fertilizer at the rate recommended on the package, and pull the mulch back over it. Shrubs are larger plants and can utilize greater amounts of fertilizer. Follow the directions on the package for rates.
Now you are ready to plant. The deep layer of mulch will absorb and retain water and discourage weed seeds from germinating. Shrubs can be planted by raking the mulch aside, spreading out the root system, setting the root ball on top of the soil, and shoveling the mulch back over the roots. You might need to get a few more shovels full of mulch from the pile to make sure the root ball is covered. Annuals can be set into shallow holes dug in the mulch. Perennial seedlings will need bottomless tin can collars to keep the mulch from drifting over their crowns, a potential cause of rotting.
Deeply mulched beds do not make good seedbeds for direct-seeding annual flowers. Start them in un-mulched beds and transplant the seedlings into the mulched area.
Maintaining Soil Fertility and Depth of MulchOur long summers, high rainfall, and high temperatures conspire to volatilize, or leach nutrients out of the soil, and to turn mulch into compost at a rapid rate. Work in one-half cup of organic fertilizer around every annual plant that is set out. To feed our established perennials, rake the mulch from around the collar, scatter fertilizer at the rate recommended on the package, and pull the mulch back over it. Shrubs are larger plants and can utilize greater amounts of fertilizer. Follow the directions on the package for rates.
 a regular routine of hoeing or pulling weeds had to begin. This approach differed little from practices in frontier days when soil was turned with a mattock and fenced with wattle to keep out wild animals.
Today there is a more lasting way to prepare soil to increase aeration, improve drainage, decrease weeding, and conserve moisture. After reading the following procedure, you might think, "No way!" but if you improve one flowerbed at a time, you will soon have the nearest thing to a low-maintenance landscape.
Devote a summer to getting rid of weeds. Either turn the soil repeatedly to kill emerging weeds or do it the easy way with 3 sprays of a non-selective, post-emergence herbicide, timed to kill new weeds as they emerge. Rake or burn off the dead vegetation.
If your soil is clay and slow to drain, add soil amendments after the first tilling or application of herbicide. Haul in an organic soil conditioner such as finely pulverized pine bark to make a layer 3 in. deep over the weed-free bed. Also haul in cracked pea gravel, granite meal, Perma Till(tm) or chicken grit to make another layer 3 in. deep over the bed. Spread dolomitic limestone that is pelletized or ground very fine for quick release. Five pounds limestone per 100 sq. ft. should be enough for starters. Spread 3 pounds triple super phosphate per 100 sq. ft., or 6 pounds of rock phosphate over the same area. Forget bone meal--it takes forever to release. Spread 5 pounds organic fertilizer such as chicken manure per 100 sq. ft. Pelletized chicken manure supplies not only major and secondary nutrients, but micronutrients as well.
If your soil is sandy, follow all the steps above, but omit the addition of cracked pea gravel. Mix in the additives to spade depth, about 9 in. The organic soil conditioner and cracked pea gravel will raise the level of the soil in the bed of clay soil and will improve drainage. The organic soil conditioner will improve the moisture-holding capacity and microbiological activity of sandy soil. Haul in and spread pine bark or hardwood bark mulch to a depth of 3 to 5 in. over the raised bed. (Ask for pine or hardwood bark mulch, neither a finely shredded soil conditioner nor coarse nuggets.)
a regular routine of hoeing or pulling weeds had to begin. This approach differed little from practices in frontier days when soil was turned with a mattock and fenced with wattle to keep out wild animals.
Today there is a more lasting way to prepare soil to increase aeration, improve drainage, decrease weeding, and conserve moisture. After reading the following procedure, you might think, "No way!" but if you improve one flowerbed at a time, you will soon have the nearest thing to a low-maintenance landscape.
Devote a summer to getting rid of weeds. Either turn the soil repeatedly to kill emerging weeds or do it the easy way with 3 sprays of a non-selective, post-emergence herbicide, timed to kill new weeds as they emerge. Rake or burn off the dead vegetation.
If your soil is clay and slow to drain, add soil amendments after the first tilling or application of herbicide. Haul in an organic soil conditioner such as finely pulverized pine bark to make a layer 3 in. deep over the weed-free bed. Also haul in cracked pea gravel, granite meal, Perma Till(tm) or chicken grit to make another layer 3 in. deep over the bed. Spread dolomitic limestone that is pelletized or ground very fine for quick release. Five pounds limestone per 100 sq. ft. should be enough for starters. Spread 3 pounds triple super phosphate per 100 sq. ft., or 6 pounds of rock phosphate over the same area. Forget bone meal--it takes forever to release. Spread 5 pounds organic fertilizer such as chicken manure per 100 sq. ft. Pelletized chicken manure supplies not only major and secondary nutrients, but micronutrients as well.
If your soil is sandy, follow all the steps above, but omit the addition of cracked pea gravel. Mix in the additives to spade depth, about 9 in. The organic soil conditioner and cracked pea gravel will raise the level of the soil in the bed of clay soil and will improve drainage. The organic soil conditioner will improve the moisture-holding capacity and microbiological activity of sandy soil. Haul in and spread pine bark or hardwood bark mulch to a depth of 3 to 5 in. over the raised bed. (Ask for pine or hardwood bark mulch, neither a finely shredded soil conditioner nor coarse nuggets.)
 Now you are ready to plant. The deep layer of mulch will absorb and retain water and discourage weed seeds from germinating. Shrubs can be planted by raking the mulch aside, spreading out the root system, setting the root ball on top of the soil, and shoveling the mulch back over the roots. You might need to get a few more shovels full of mulch from the pile to make sure the root ball is covered. Annuals can be set into shallow holes dug in the mulch. Perennial seedlings will need bottomless tin can collars to keep the mulch from drifting over their crowns, a potential cause of rotting.
Deeply mulched beds do not make good seedbeds for direct-seeding annual flowers. Start them in un-mulched beds and transplant the seedlings into the mulched area.
Maintaining Soil Fertility and Depth of MulchOur long summers, high rainfall, and high temperatures conspire to volatilize, or leach nutrients out of the soil, and to turn mulch into compost at a rapid rate. Work in one-half cup of organic fertilizer around every annual plant that is set out. To feed our established perennials, rake the mulch from around the collar, scatter fertilizer at the rate recommended on the package, and pull the mulch back over it. Shrubs are larger plants and can utilize greater amounts of fertilizer. Follow the directions on the package for rates.
Now you are ready to plant. The deep layer of mulch will absorb and retain water and discourage weed seeds from germinating. Shrubs can be planted by raking the mulch aside, spreading out the root system, setting the root ball on top of the soil, and shoveling the mulch back over the roots. You might need to get a few more shovels full of mulch from the pile to make sure the root ball is covered. Annuals can be set into shallow holes dug in the mulch. Perennial seedlings will need bottomless tin can collars to keep the mulch from drifting over their crowns, a potential cause of rotting.
Deeply mulched beds do not make good seedbeds for direct-seeding annual flowers. Start them in un-mulched beds and transplant the seedlings into the mulched area.
Maintaining Soil Fertility and Depth of MulchOur long summers, high rainfall, and high temperatures conspire to volatilize, or leach nutrients out of the soil, and to turn mulch into compost at a rapid rate. Work in one-half cup of organic fertilizer around every annual plant that is set out. To feed our established perennials, rake the mulch from around the collar, scatter fertilizer at the rate recommended on the package, and pull the mulch back over it. Shrubs are larger plants and can utilize greater amounts of fertilizer. Follow the directions on the package for rates.
Wednesday, June 15, 2005
Azalea & Rhododendron Care
Azaleas and Rhododendrons are two of the most popular Spring Blooming plants. These hardy creatures will grow abundantly with the minimal but proper treatment. Azaleas are one of the most popular plants in the Acid-Loving family. Below are some tips concerning their care:
The first and most critical factor in your gardening success is Soil pH. Some plants thrive in neutral soil while other plants such as Azaleas prefer a more acidic environment. The difference lies in the plant's ability to use nutrients present in the soil. For plants that prefer a more acidic soil, a critical nutrient is iron. Iron is most available in soil with a pH of around 5.5. Without iron these plants will turn yellow and suffer stunted growth.
If you have do not know what the PH level of your soil is -- Yardiac.com has a full assortment of soil test kits in stock and ready for sale!
Lowering soil pH is not difficult. In new plantings, work-in organic matter such as peat moss or compost. For existing plantings, regular feeding with Holly-Tone will keep soil at an optimum pH while providing all the major, minor, and trace nutrients plants required
How to Feed Azaleas & Rhododendrons
Feed Azaleas in the spring with Holly-Tone and Acid Plus water soluble fertilizer. In general, the proper rate of application is one cup of Holly-Tone per foot of branch spread. This rate should be doubled for plants over three feet wide. Do not work the plant food into the soil as these plants have surface root systems that can be disturbed by such activity. It is best to apply the Holly-Tone directly to the soil prior to mulching. If this is not possible, Holly-Tone can be applied on top of mulch at double the standard rate. This will compensate for the loss of nutrients in the mulch layer.
Of course always water the plants sufficiently and fertilize with Acid Plus. Fertilization should occur several times in the spring and fall. Do not feed acid lovers in the summer ( June 1st - September 1st).
A second half-strength feeding of Holly-Tone is recommended in late fall. This will help harden off new growth, aid in root development, and enable the roots to store food for use in early spring.
How to Prune Azaleas & Rhododendrons
Azaleas and Rhodo's both begin to form their blooms for the next spring season in the late spring or early summer. Because of this bloom set it is critical that these plants be shaped or pruned immediately after the current year's bloom. Pruning should occur between May and July after all the plants have bloomed. Try to avoid pruning after August 1st because the blossoms are being set for next spring.
Planting Azaleas & Rhododendrons
When planting, a hole should be made roughly twice as large and twice as deep as the root ball. One third of the soil removed should be replaced with compost, peat moss or other good humus. To this, one cup of Holly-Tone per 2-1/2 gallon bucket of soil should be added and thoroughly mixed. There should be enough of this mixture in the hole to allow the new plant to sit at the same depth it was previously growing. The soil mark on the trunk can be used as a guide. The bottom of the hole should be packed firmly to prevent later settling. Once the plant is placed in the hole and filled half full with the soil mixture, it should be packed firmly, soaked with water, and allowed to settle. After the hole is completely filled, the top two inches should be left loose for easy absorption of water. A slight depression around the plant will also help conserve water. Adding mulch will also help conserve water, slow down evaporation, and control weeds.
Often, plants will be purchased in plastic containers. When removing the pot, inspect the root mass. It is not unusual for the roots to have grown in a circular pattern around the inside of the container. If this is noticed, the roots should be disturbed SLIGHTLY to encourage new growth. Simply score the outside of the root mass with a knife to break the circular pattern.
Click to enter the Garden Center
Subscribe to:
Posts (Atom)


