 San Jose Scale is the most prominent scale insect found in apples. San Jose scales infest branches, shoots, leaves, and fruit. The scales suck plant juices from the trees and inject a toxin. Infested fruit tends to be bumpy, and in the extreme, severely misshaped and stunted. San Jose scale can seriously weaken branches and main scaffold limbs and kill fruiting spurs, thus causing permanent injury and even death to mature trees.
The best time to apply a fruit tree sprayis in the early spring If by this time, there has been no rain, irrigate your orchard. Oil sprays can be phytotoxic to water-stress trees. Before a dormant spray is applied, irrigate your orchard using two- to three- acre inches of water. This will allow you to wet the soil profile 24 to 36 inches. This water is not wasted water since root growth and development starts. Furthermore, if the water that is not used by the roots, it will be stored in the soil profile for use in the early spring.
San Jose Scale is the most prominent scale insect found in apples. San Jose scales infest branches, shoots, leaves, and fruit. The scales suck plant juices from the trees and inject a toxin. Infested fruit tends to be bumpy, and in the extreme, severely misshaped and stunted. San Jose scale can seriously weaken branches and main scaffold limbs and kill fruiting spurs, thus causing permanent injury and even death to mature trees.
The best time to apply a fruit tree sprayis in the early spring If by this time, there has been no rain, irrigate your orchard. Oil sprays can be phytotoxic to water-stress trees. Before a dormant spray is applied, irrigate your orchard using two- to three- acre inches of water. This will allow you to wet the soil profile 24 to 36 inches. This water is not wasted water since root growth and development starts. Furthermore, if the water that is not used by the roots, it will be stored in the soil profile for use in the early spring.
Showing posts with label Tree and Shrub Care. Show all posts
Showing posts with label Tree and Shrub Care. Show all posts
Sunday, April 19, 2009
Protecting Apples from San Jose Scale
San Jose Scale is the most prominent scale insect found in apples. San Jose scales infest branches, shoots, leaves, and fruit. The scales suck plant juices from the trees and inject a toxin. Infested fruit tends to be bumpy, and in the extreme, severely misshaped and stunted. San Jose scale can seriously weaken branches and main scaffold limbs and kill fruiting spurs, thus causing permanent injury and even death to mature trees.
The best time to apply a fruit tree sprayis in the early spring If by this time, there has been no rain, irrigate your orchard. Oil sprays can be phytotoxic to water-stress trees. Before a dormant spray is applied, irrigate your orchard using two- to three- acre inches of water. This will allow you to wet the soil profile 24 to 36 inches. This water is not wasted water since root growth and development starts. Furthermore, if the water that is not used by the roots, it will be stored in the soil profile for use in the early spring.


Wednesday, March 11, 2009
Identify Symptoms of Anthracnose on Fruit & Vegetables
 Symptoms of anthracnose appear first as small, circular, slightly sunken lesions on the surface of ripening fruits. The spots quickly enlarge, become deeply depressed, and develop a water-soaked appearance directly beneath the skin of the fruit. You will see black rings forming in the center of the lesions. Eventually, secondary microorganisms invade the lesions and cause a complete rotting of the fruit.
For control of many diseases on lawns, fruits, vegetables, and ornamentals. Use Mancozeb Fungicide to control anthracnose in tomatoes, and much more. Anthracnose is a frequent problem in the latter part of the growing season on ripening tomato fruit. The disease results in a fruit rot which reduces the quality and yield of tomatoes.
Symptoms of anthracnose appear first as small, circular, slightly sunken lesions on the surface of ripening fruits. The spots quickly enlarge, become deeply depressed, and develop a water-soaked appearance directly beneath the skin of the fruit. You will see black rings forming in the center of the lesions. Eventually, secondary microorganisms invade the lesions and cause a complete rotting of the fruit.
For control of many diseases on lawns, fruits, vegetables, and ornamentals. Use Mancozeb Fungicide to control anthracnose in tomatoes, and much more. Anthracnose is a frequent problem in the latter part of the growing season on ripening tomato fruit. The disease results in a fruit rot which reduces the quality and yield of tomatoes.
Monday, March 09, 2009
Eliminating Peach Leaf Curl
 Peach leaf curl is a fungus disease that, under the right conditions, can cause severe early defoliation and crop loss on nearly all peach and nectarine cultivars. As the name of the disease implies, the most common and striking symptom of leaf curl occurs on the foliage.
Infected leaves are severely deformed and often display a variety of colors ranging from light green and yellow to shades of red and purple. In most areas leaf curl can be controlled with one well-timed fungicide application, either in the autumn after 90% of the leaves have fallen, or in the spring before bud swell.
Peach leaf curl is a fungus disease that, under the right conditions, can cause severe early defoliation and crop loss on nearly all peach and nectarine cultivars. As the name of the disease implies, the most common and striking symptom of leaf curl occurs on the foliage.
Infected leaves are severely deformed and often display a variety of colors ranging from light green and yellow to shades of red and purple. In most areas leaf curl can be controlled with one well-timed fungicide application, either in the autumn after 90% of the leaves have fallen, or in the spring before bud swell.
Wednesday, March 04, 2009
Why is pH So Important
You may be wondering about the importance of pH in your garden, or how it effects your plants. 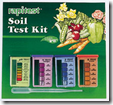 You may also be unsure of how to monitor the pH, or what pH is best for your plants. Well, simply put, pH is a measurement of alkalinity or acidity in your soil. The scale ranges from 0 to 14. For vigorous growth, plants require nitrogen(N), phosphorus(P), and potassium(K). Incidentally, these are the numbers represented across the top of many fertilizers. The numbers are separated by a hyphen.
Moving along, these nutrients are readily available for absorption by plant roots when the pH is 6.0-7.0. An exception to  the rule is acid-loving plants, like azaleas and rhododendrons, which prefer pH of 5.5-6.0. Adding lime to the soil makes it more alkaline while adding sulfur makes soil more acidic. It's est to soil test through your local county extension office for the most accurate reading. That said, you can find a simple pH tester easily, which is most often quite accurate.
Monday, January 26, 2009
Pot That Tree!
Have you ever considered growing a tree in a pot? With just a little effort, it can be done, and it is not as hard as you might think. 
First, make sure that your container has drainage. This is not 

Popular choices for potted trees include Japanese Maple, Juneberry, Cypress, Crape Myrtle, and Purple Leaf Plum, just to name a few.
Share your tree potting advise with your fellow Yardiacs by posting a comment on the blog! We are all ears!
Monday, October 27, 2008
Pruning Your Mountain Laurel
One of our customer's had a question: Can I prune my Mountain Laurel and if so when is the best time? Also, can the Mountain Laurel handle topping (pruning which involves removing all branches and growths down to a few large branches)?

The answer is yes! Mountain Laurel plants rarely need to be pruned, although pinching off the seed heads after blooming time is over seems to promote better flowering for the next season. Should your Mountain Laurel plants get too tall for your landscape design plan, cut them back almost to ground level (topping). These tough shrubs can take a severe pruning when necessary. From stubs just a few inches above the ground new foliage will arise, and your plants will mature into large shrubs once again in about ten years' time.
Over-grown shrubs, such as hollies, ligustrum, camellia and mountain laurel, can be cut back to bare branches 2 to 4 feet (or lower) from the ground. The plant should recover in two to three years. Recovery depends on the health of the plant and cultural practices such as fertilization, mulching, watering and insect/disease control.
The best time to prune your Mountain Laurel is in the Late Spring/Early Summer. Pinch off clusters of spent blossoms. Remove a few old branches at the ground to induce new growth from roots.
Tuesday, March 18, 2008
Identifying the Budworm
The budworm (a type of caterpillar/moth) is commonly found in geraniums, pe tunias, snapdragons, and other flowering plants, as well as trees. They are very small and they tend to take on the color of the bloom or foliage they are infesting. The numerous black droppings they leave behind are one of the telltale signs.
tunias, snapdragons, and other flowering plants, as well as trees. They are very small and they tend to take on the color of the bloom or foliage they are infesting. The numerous black droppings they leave behind are one of the telltale signs. Many gardeners may not know they have a problem until the dam age becomes severe. New foliage of the host is preferred. In the spring, in trees, small larvae mine in needles and later enter the swelling buds. Effects can be devastating to any tree or ornamental.
age becomes severe. New foliage of the host is preferred. In the spring, in trees, small larvae mine in needles and later enter the swelling buds. Effects can be devastating to any tree or ornamental. Controlling the budworm is simple. You can control the budworm by a bi-weekly spraying of the unopened geranium buds, nearby stems and leaves with Orthenex, a systemic insecticide. When spraying petunias cover the entire plant. The spray will protect a plant for about two weeks.
If yo u prefer a natural method, spray the geraniums or petunias thoroughly with Bt,(Bacillus thuringiensis), a bacteria that attacks the worm. As soon as the worm eats the flower, leaf or bud sprayed with Bt it stops eating, but it takes a few days for it to die. Be aware that Bt has little residual effect and must be used frequently and regularly to control the worms. You have to keep a sharp eye for the young worms and spray the plant immediately.
u prefer a natural method, spray the geraniums or petunias thoroughly with Bt,(Bacillus thuringiensis), a bacteria that attacks the worm. As soon as the worm eats the flower, leaf or bud sprayed with Bt it stops eating, but it takes a few days for it to die. Be aware that Bt has little residual effect and must be used frequently and regularly to control the worms. You have to keep a sharp eye for the young worms and spray the plant immediately. Wednesday, March 12, 2008
Azalea Bark Scale
F emale Azalea Bark Scale are approximately 1/8-inch long and covered with a white, waxy egg sac. Eggs are laid in the spring and hatch from late-June to mid-July. These mobile immatures are known as "crawlers". The crawlers like to attach to the bark and feed in crevices and branch forks. This pest overwinters as a nym
 ph (immature). Scales insert their piercing-sucking mouth parts into the plant and feed on the juices. A large population will cause leaf discoloration, some die back and an overall unthrifty plant appearance. These scales excrete a sticky, sweet liquid called "honeydew" which promotes the growth of black sooty mold fungus on contaminated surfaces. Beneficial insects often control this pest. When the scales become noticeable, treat with Bayer Advanced AC&R, for effective control.
emale Azalea Bark Scale are approximately 1/8-inch long and covered with a white, waxy egg sac. Eggs are laid in the spring and hatch from late-June to mid-July. These mobile immatures are known as "crawlers". The crawlers like to attach to the bark and feed in crevices and branch forks. This pest overwinters as a nymph (immature). Scales insert their piercing-sucking mouth parts into the plant and feed on the juices. A large population will cause leaf discoloration, some die back and an overall unthrifty plant appearance. These scales excrete a sticky, sweet liquid called "honeydew" which promotes the growth of black sooty mold fungus on contaminated surfaces. Beneficial insects often control this pest. When the scales become noticeable, treat with Bayer Advanced AC&R, for effective control.
Monday, February 04, 2008
Best Time to Plant Evergreens
There is some debate on the best time to plant Evergreens. Some sources say early March. O thers suggest Fall planting. Read the instructions that come with your plant, or talk to your nurserymen, to be sure.
After you ascertain the appropriate planting time for your cultivar, you can start the fun part. -Planting! This guide can really be used for planting trees of any kind.
First, dig the hole. Be sure is large enough to place 8-10" of soil beneath and on all sides of the root ball.
Next, mix 50% existing soil with 50% soil conditioner, such as Rich Earth Soil Conditioner.  Add enough of the soil mix to the hole so that the root ball can be one quarter inch higher than the ground level.
Remove any plastic container from the root ball. If your tree is balled in burlap, set the tree on the soil mix base and cut the burlap loose from the root ball. The burlap can remain in the hole. Finish adding the soil mix to make a mound around the tree.
Soak the tree and add more soil mix if necessary. Next, mulch to a depth of three inches. Then, stake the tree. Use tree protectors, around the tree, so you don't cut into the tru nk. You will want the stakes to be about 2x2. The height will depend on the height of the tree you are planting.
Be sure to water your tree. Be sure to water your tree. (This is not a typo.) New trees need lots of water. The number one reason for tree planting failure is under watering. Tree Gators can make this a lot easier. Some people will use five gallon pails, with small holes drilled in the bottom. This will allow you to water the tree slowly, giving the roots time to absorb the water. Otherwise, most of your water will run away. The mulch will hold in the moisture, as well.
Thursday, January 31, 2008
More on Planting & Caring for Evergreens
Look for these common Evergreen pests. If you look closely at your Evergreens, you can save a lot of money. Evergreens can becostly to replace, and if you catch any of these pests before it is too late, you can save your green.
Aphids are small plant lice. Aphics may be green or black. They suck the sap out of leaves and stems. To control, spray Orthene or a similar product, Mid-Summer to prevent infes tation, or when insects appear. Another good solution is to introduce & encourage ladybugs. They eat aphids. An easy, and fun, way to do this is by erecting a ladybug house near the garden.
Bagworm are esily identified by the 1-2 inch bags that they build on the tree limbs. Hand pick and burn them. Use Orthene, Isotox, or Malathion if insect is still visibly eating.
Spidermites are microscopic insects that suck sap from needles. Their webs are very visible. Spray with Isotox, Orthene, or Malathion as soon as infestation is noticed.
Borer is a general term, for a varied species. Most borers are larvae of beetles or clear-winged moths. Pin-point holes in tree trunks. Branches  will turn yellow and die. best time to control borers is when adult are laying eggs on or under bark. Pheromone traps, available for some borer species, help determine if adults are present. Trunk sprays can be effective when borers are in the early larvae stage before they enter the tree.
As with any treatment plan, look carfully at your pest. Determine exactly what you are working with. Cautiously read the entire label of any product that you use. Be sure that what you are using is safe for your plant. Know the name of the plant you are treating. Many products will treat a multitude of pests, and plants. Some will treat insects, and disease, at the same time.
Thursday, January 24, 2008
Is it Crape Myrtle or Crepe Myrtle
Among gardeners, nurseries, retailers, and bloggers, there seems to be some division on how to spell our beloved Crape Myrtle. It is Crepe or Crape? I did a little research, to see what information is available, on the subject.
 I found that the plant is commonly spelled in MORE than two ways. You may have seen any of the following: crape myrtle, crapemyrtle, crepemyrtles and crepe myrtles.
I found that the plant is commonly spelled in MORE than two ways. You may have seen any of the following: crape myrtle, crapemyrtle, crepemyrtles and crepe myrtles.
The scientific name is lagerstroemia crape myrtle. The traditional Southern spelling is "Crepe Myrtle" (because the delicate flowers resemble crepe paper). However, across the US, it is more commonly found as "Crape Myrtle". In Europe and Australia and other countries they use the Scientific Name, Lagerstroemia Crape Myrtle. Wikipedia insists that the correct spelling is Crape-myrtle. Most universities who post articles about the plant refer to it as Crape Myrtle, also. In addition, the American Horticultural Society Encyclopedia uses the spelling, "Crape Myrtle". Conversely, Southern Living books and magazines prefer, "Crepe Myrtle".
In researching the subject, I also visited several garden forums, to see what other gardeners think. "Crape", is said to be the traditional English spelling, according to one reader. Another sites its French origin.
Now is your chance to weigh in, on the subject. We would love to hear your opinion. Which do you prefer, Crepe, or Crape, and why?
Wednesday, January 23, 2008
More on Pruning Crape Myrtles
The Crape Myrtle is a Sun worshipper. It performs like a pro in sunny, hot areas. When planting, be sure to give them a larg e area to spread. When given an ideal location, they will put on a spectacular show of color, an plumage, almost year round.
To help your Crape Myrtle gain a particular shape, start at the base. Remove all but three to five shoots. As the tree matures, remove lower, lateral branches one-third to halfway up the height of the tree. Remove branches that are crossing or rubbing against each other and shoots growing into the center of the canopy. Make your cuts to a side branch or close to the trunk. Head back wayward and unbranched limbs. As it grows tal ler, remove lower branches as needed. Remove any future growth from the ground to retain the desired tree shape. This basal sprouting may occur whether the tree is being pruned or not. Pull these out when succulent instead of pruning them.
You will notice some seed heads forming, in late Winter, or early Spring, and may have the urge to pluck them. This is not necessary. It will benefit, nor harm the tree to do so.
When you are faced with a much older tree that is in need of maintenance, you will basically do the same thing. Limb up, to remove obstruction of doors, or windows. If the Crape Myrtle is too close to a structure, consider removing one of the major trunks. Avo id cutting the top out, or 'topping', an aging tree.
To maintain the height of a Crape Myrtle, prune it moderately, by moving all twiggy growth back to lower growing side branches. This will unify the tree.
Corrective pruning is useful to promote a healthy tree. If you see a problem area, or dead branch, remove it immediately. All other times, simply prune by removing lateral branches, small twigs, or obstructing branches.
Tuesday, January 22, 2008
Crape Myrtle Pruning
Crape Myrtles bloom all summer long (around 120 days), which makes them perfect for land scaping. They are best suited for zones 6-11, and perform in a stellar way in hot, sunny climates. In the fall, Crape Myrtles boast bold color, and rustic peeling bark. Additionally, their natural form, is aesthetically pleasing. Who could ask for more?!
The question is how to care for the Crape Myrtle, to promote these very desirable features.
Light pruning is all that is necessary. Research indicates that  flowering occurs with new growth. As for the timing, pruning in late Winter, or early Spring will give you the best results. This will stimulate regrowth, and in turn, blooming. If you will give the flowers a light pruning, once the they begin to fade, in Summer, you will have another explosion of blooms.
You will notice that some gardeners squarely cut the off the top, believing it encourages flowering the following Season. The only reason that your Crape Myrtle may require heavy pruning is if you require it to c onform to a particular size or shape. Heavy pruning will not harm the Crape Myrtle, in any case.
If you are in the market for a Crape Myrtle, consider your landscaping, before you make an investment. There are many cultivars available. Choose one that suits your landscaping needs best. For example, you may choose a dwarf, a semi-dwarf, or a color variation. This will give you the benefit of light maintenance, and will allow the Crape Myrtle to showcase itself.
Share your Crape Myrtle stories, with the Yardiac.com Open Blog readers!Friday, December 07, 2007
Planting & Caring for Evergreens
A single specimen evergreen tree provides a stately focal point in your landscape. A screen of them provides a permanent year-round windbreak and can obscure an unwanted view. When deciduous trees are barren during the winter months, evergreen trees provide color.
 When choosing the location for any tree, remember that it is just that - a tree. White Pines, Spruce, and Hemlock are charming as your plants, but space that will be necessary in the future should be taken into consideration.
When choosing the location for any tree, remember that it is just that - a tree. White Pines, Spruce, and Hemlock are charming as your plants, but space that will be necessary in the future should be taken into consideration.It is important to remember that evergreens do not like 'wet feet'. Plant evergreens in an area with ample drainage.
Planting
Evergreens can be safely planted anytime from March through November in most areas. Spring and Fall are the most ideal planting times. Check your local nursery, to be sure about what time is best for your area.
Upkeep

Water your evergreen tree 2-3 times a week during its first year. Water whenever the soil feels dry. During the next few years, supplemental watering will also be needed, although not as often. Do not forget to water during dry spells. Water thoroughly when you do water, allowing the moisture to penetrate to a 2-3" depth. A light watering encourages the tree roots to grow near the soil surface only. The tree will not survive a hot dry summer with only surface roots.
Fertilizing
Apply a general purpose (10-10-10) or tree fertilizer each Spring or Fall. Always follow the product label and never apply more fertilizer than is recommended.
Thursday, December 06, 2007
Water Saving Techniques
Recycle Water
Reuse the water you use for cooking food such as corn and pasta. Do not use salter water, though as salt will damage the plants. let the water cool before pouring it on the plants.
Reuse your pet's drinking water.
You can use the water that you bathe in and the water that you wash dishes with to water the plants. The soap will not harm the plants.
Water from a dehumidifier can also be used to water plants.
Set out containers to catch any rainwater. Also, divert water coming down the rain spout towards a tree or shrubs.
Practice Effective Watering Habits
Do not water with an oscillating sprinkler. They waste water and often only water the foliage and do not allow the water to penetrate to the roots.
Do not spray plants with your thumb over the end of the hose for the same reason listed above.
Water SLOWLY and deeply. It is best to water plants by placing a hose at the base of the plant and running the water at a slow trickle. It is better to water plants less often, with more water, than to water daily with just a shallow watering. Some hoses have a smaller diameter, which allows for healthier watering techniques.
Soaker hoses are great and use substantially less water than any  other watering practice. However, most people do not let them run long enough; they should run for at least six hours.
other watering practice. However, most people do not let them run long enough; they should run for at least six hours. It is best to water early in the morning. The plants will use the water to survive the heat of the day and less water will be wasted through evaporation.
Another great water conservation tool is a portable drip-irrigation system, such as the TreeGator. There is virtually zero water loss! It is very simple, and easy, to use. Just place the bag on the tree, or shrub, fill with water, and forget it.
Tuesday, October 16, 2007
Pruning A Large Tree Limb
The best time to remove a limb from a tree is winter, except in the cases of maples, birches, and other trees that produce copious sap. For such trees summer is a better time (in subtropical climates the  end of the dry season is preferred). If you can easily reach the limb with a ladder, there is no reason not to tackle the job yourself. However, if you’re thinking about climbing up into the branches to remove a limb, don’t. This is a dangerous task best left to professionals who have the proper training and equipment.
end of the dry season is preferred). If you can easily reach the limb with a ladder, there is no reason not to tackle the job yourself. However, if you’re thinking about climbing up into the branches to remove a limb, don’t. This is a dangerous task best left to professionals who have the proper training and equipment.
You can ensure your own safety by following a few precautions. Be certain your ladder rests on a firm base; if the ground is soft, set the ladder on some planks. Lash taller ladders to the tree and have someone hold the base of the ladder while you work. But keep other spectators away. And note where the limb will fall, making sure its drop won’t injure people or plants. If its fall might damage a valued shrub, say, tie a rope around it, pass the rope over another limb higher in the tree, and lower the cut limb slowly to the ground.
There are many reasons why you may need to remove a sizable limb from one of your trees. The limb may be damaged, diseased, or dead. It may be rubbing against another branch. Or it may just displease you; the tree would look better, you decide, without that particular branch.
Any limb with a diameter greater than one inch should be sawed. For limbs up to two inches in diameter or even slightly larger, and for limbs growing close to another, a narrow, curved pruning saw is the ideal tool and is easy to use, as it cuts by a pulling rather than a pushing action. For cutting larger limbs, a straight pruning saw with teeth on both sides of the blade can be used. But handier for most amateurs (because it can be used for jobs other than pruning ) is a bow saw, which has a detachable blade mounted on a C-shaped frame. In any case, do not use a chain saw, which is far too perilous for someone balancing on a ladder.
) is a bow saw, which has a detachable blade mounted on a C-shaped frame. In any case, do not use a chain saw, which is far too perilous for someone balancing on a ladder.Now, another way to trim your trees, is with a pruning system. You eliminate the use of ladders, which makes it a lot safer. Fred Marvin pruners are used by professionals, everywhere, but they are also available to homeowners. They are lightweight, and easy to use. They are made of high-grade steel to permit several resharpenings, for a lasting and durable pruner. You can use use longer poles, to reach higher limbs. You can use special pruner heads, for trickier pruning.
Thursday, October 11, 2007
Protect Your Foilage This Fall
Well, it is that time of year, again. The Fall is here. Winter is on its way, and food will soon be getting scarce, in the forest. That means that the deer, rabbits, and other creatures will be emerging, in search of food. The trees and shrubs that you have worked so hard to grow will be tempting the tastebuds of the woodland  creatures. It is hard to protect your foliage, when animals are hungry.

creatures. It is hard to protect your foliage, when animals are hungry.
The best way to protect your yard is to use more than one method, at the same time. You may opt for a scent and taste repellent, together.
For example, Tree Guard is a very effective taste repellent. It contains Bitrex. If you are unfamiliar with Bitrex, you may be interested to know that it was developed in the 1950s, and is commonly found in an array of household cleaners, and other items, to discourage children, or pets, from ingesting poisonous contents. It is not dangerous at all, in itself. It is just extremely bitter, and it is hard to get rid of. For use in the garden, you will find that you are training target animals to find another grazing area. Tree Guard is not the least expensive taste repeller, but it is likely the most effective. In addition, you will not find yourself reapplying every other week. It will continue to be effective for the entire season. There is onw drawback; You cannot use it on vegetables, or fruit. It will effect the taste.

If you use a scent repeller in conjunction, you may want to try a urine product. It is a non-toxic method, that tells the target animal that a very dangerous predator is in the area. This is effective because animals are born with an instinctive fear of their predators. It is a technique that has been used for hundreds of years. Urine products are easy to use. Just place 30-day dispensers or scent darts every ten to twelve feet around a perimeter. (All urines are collected naturally from domesticallyraised animals on farms that are controlled by appropriate state and federal agencies.)
Now you are all set, to greet the Fall. Put up your corn patch family. Harvest the pumpkins. Get ready for the festivities to come, and put your foliage in the back of your mind!
We love to hear from YOU!! Share your animal tips, stories, or Fall decorating ideas!
Wednesday, September 12, 2007
Pamper Your Trees
Here's a neat idea! Turn your trees, into potted plants. It is a great way to spruce up a  lawn of any size or shape.
The TreePot is available in different sizes to fit various sized tree trunks which allows room for tree growth. A shelf inside will hold up to ten inches of potting soil. You are not limited to tree trunks. You can use the Treepot with mailbox posts, lamp posts, power line posts, etc.
The TreePot design keeps the soil from coming in contact with the tree and protects your tree from weed-eaters. You can keep your flowers in an elevated planter, isolated in rich nutritious soil. This is much better than planting directly under the tree. As any experienced Gardener knows, the tree will steal all of the moisture, and nutrients.
Another great thing about the Treepot is that it is made of Cedar, which contains natural oils that will resist rotting, and cracking, in the harshest of weather conditions.
In addition, they are fully paintable! Your imagination is the limit!
lawn of any size or shape.
The TreePot is available in different sizes to fit various sized tree trunks which allows room for tree growth. A shelf inside will hold up to ten inches of potting soil. You are not limited to tree trunks. You can use the Treepot with mailbox posts, lamp posts, power line posts, etc.
The TreePot design keeps the soil from coming in contact with the tree and protects your tree from weed-eaters. You can keep your flowers in an elevated planter, isolated in rich nutritious soil. This is much better than planting directly under the tree. As any experienced Gardener knows, the tree will steal all of the moisture, and nutrients.
Another great thing about the Treepot is that it is made of Cedar, which contains natural oils that will resist rotting, and cracking, in the harshest of weather conditions.
In addition, they are fully paintable! Your imagination is the limit!  Using a TreePot is easy as Pie! All you have to do is level off the ground, connect the base, and inside shelf sections, using a screwdriver, and you're off!
You will need to find a fertilizing potted plant soil mix, pick out your favorite flowers, and you're off!
Using a TreePot is easy as Pie! All you have to do is level off the ground, connect the base, and inside shelf sections, using a screwdriver, and you're off!
You will need to find a fertilizing potted plant soil mix, pick out your favorite flowers, and you're off!
lawn of any size or shape.
The TreePot is available in different sizes to fit various sized tree trunks which allows room for tree growth. A shelf inside will hold up to ten inches of potting soil. You are not limited to tree trunks. You can use the Treepot with mailbox posts, lamp posts, power line posts, etc.
The TreePot design keeps the soil from coming in contact with the tree and protects your tree from weed-eaters. You can keep your flowers in an elevated planter, isolated in rich nutritious soil. This is much better than planting directly under the tree. As any experienced Gardener knows, the tree will steal all of the moisture, and nutrients.
Another great thing about the Treepot is that it is made of Cedar, which contains natural oils that will resist rotting, and cracking, in the harshest of weather conditions.
In addition, they are fully paintable! Your imagination is the limit!
Using a TreePot is easy as Pie! All you have to do is level off the ground, connect the base, and inside shelf sections, using a screwdriver, and you're off!
You will need to find a fertilizing potted plant soil mix, pick out your favorite flowers, and you're off!
Tuesday, February 27, 2007
Wisteria Tree Care

Any drastic pruning is best carried out in the spring, immediately after flowering. Plants are very tolerant of even the most drastic pruning and will re-grow even if cut right back to the base.
Pruning the vine down to a desirable length should not be a problem!
Wisteria can be a climbing plant, twining in an anti-clockwise direction, around the stems of other plants. This species has a symbiotic relationship with certain soil bacteria, these bacteria form nodules on the roots and fix atmospheric nitrogen. Some of this nitrogen is utilized by the growing plant but some can also be used by other plants growing nearby.

Wisteria trees prefer a good loamy soil in a sunny south or southwest facing position, sheltered from cold winds and from early morning sun on frosty mornings. Plants can become chlorotic on alkaline soils. A soil that is too rich results in excessive foliage at the expense of flowering. Plants can take a few years to settle down after planting out. Too much shade or too rich a soil are normally the culprits, and some form of root restriction can be beneficial.
Wednesday, February 21, 2007
Planting and Feeding Shade, Fruit and Ornamental Trees
The tree you plant today is a lifetime investment. Healthy trees increase property value and beautify your surroundings. If planned, planted, and cared for properly, you can enjoy your new tree for years.
Selecting a Tree 
Inspect the tree thoroughly before buying. Be certain there is sufficient root mass. Also, inspect the trunk looking for signs of mechanical damage or poorly-healed pruning scars. Finally, be certain the tree has a desirable form with strong, well-spaced branches. Your local nursery or garden center can help you to select a quality tree that will provide years of enjoyment.
Planting
Be certain that the tree you are planting is appropriate in size and shape for the desired location, taking into account the size it will reach at maturity. When planting, the nurseryman's advice is: "It's better to put a $100 tree in a $200 hole than to put a $200 tree in a $100 hole." Dig the hole at least three times the size of the root mass. Discard one third of the soil from the hole and replace with peat moss or compost. Add Tree-Tone to the new soil mix and blend well (application rates are on the bag and vary according to the size of the tree). Using the soil mark on the trunk as a guide, set the tree in the hole so that it will be at the same depth that it was prior to being unearthed. Refill the hole half way and water to settle the soil. Replace the balance of the soil, water, and pack firmly.
 It is sometimes desirable to brace the newly planted tree with stakes and guide wires. Your local garden center will be able to supply the necessary tools to do this.
It is sometimes desirable to brace the newly planted tree with stakes and guide wires. Your local garden center will be able to supply the necessary tools to do this.
Feeding
Tree-Tone by Espoma is a complete plant food. It contains all major, minor, and trace nutrients your trees require for best growth. Small trees can be fed simply by spreading the Tree-Tone on the ground as wide as the branch spread. Larger trees are best fed by placing the Tree-Tone underground near the roots. Make a series of holes under the branch spread, starting one third of the distance out from the trunk and extending a like distance beyond the branch line. Holes should be 2 to 3 inches in diameter, 2 to 3 feet apart, and 12 to 18 inches deep. They can be made with an iron bar or with an auger. Divide the Tree-Tone evenly among the holes, refill with soil, and water thoroughly.
Subscribe to:
Posts (Atom)


