Showing posts with label Rose Care. Show all posts

Thursday, February 26, 2009

February Pruning Tips

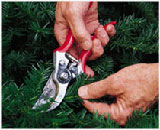
Most pruning of deciduous plants occurs in the dormant winter season. For best results, learn the growth habits of plants. For woody plants, remove dead, diseased, or damaged wood first. Then prune for shape, size, or fruit production. Remove suckers and water sprouts from flowering and fruiting trees. Prune plants that form flowers on wood grown the same season in late winter before buds swell. Prune most roses in late winter or early spring. Prune those that bloom once a year after blooming. In severe climates, cut back only wood that has died over winter. Prune only dead wood on climbers for the first two or three years. Prune old, shrub, and species roses lightly to shape them and remove dead wood. Shape hedges with the top slightly narrower than the base so light can reach lower leaves. Three basic tools suffice for most pruning jobs: shears, loppers, and a pruning saw. Keep them sharp for clean cuts; disinfect after pruning diseased material. Don't forget to stock up on gloves, one of the secondary, but very important, tools of pruning!! Yardiac.com has a great selection, for the most discriminating gardener.

Monday, November 19, 2007

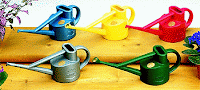
Haws Watering Cans

The Haws Professional watering can is the most sought after watering can, ever. It all began in the 1880's with a civil servant, John Haws. Unsatisfied with the French style watering can that dominted the industry, he set out to design the perfect watering can. -One that is perfectly balanced, and easy to carry. His patented style has remained virtually unchanged, since 1885.
The design that sets any Haws can apart from the vast sea of watering cans is the handle. John Haws designed a lid, or 'breast' for the watering can, and a neck to carry the separate spout and back handles. The body, base, handle, and spout support are all very distinctive features, as well.
After a metal Haws watering can is formed, and hand welded, it is set outdoors, to collect rust. The pits of the rusting process allow the galvanization to adhere to the can. All metal Haws watering cans endure this process. After they collect just the right amount of rust, they are bathed in molten zinc, which galvanizes them. It is certainly the most effective means of weatherproofing them. After that, they are off to be painted, polished, and sealed with the Haws insignia.
Since it's origination, changes are limited to material, finish, and size. There are small variances regarding the rose, as well. There is one for everyone. They are the 'Must Have' for any serious gardener.

Friday, October 12, 2007

Winterizing Roses

While wild roses and other native species are assuredly programmed to endure the wide temperature swings of their areas, hybrid teas are for the most part descended from plants of frost-free or moderate regions. They are thus naturally vulnerable to the onslaught of cold. Deep freezing breaks their cell walls and dries out their canes; overnight they turn black and are gone. So the prudent gardener must protect them. The amount of protection a hybrid tea rose needs depends on the climate. In general, roses grown in USDA Zones 8 to 10 need no special precautions, while those in Zones 6 and 7 will probably require covering and those in 5 and below most surely will. Another guideline: If your temperatures stay below 20 degrees Fahrenheit for considerable periods of time without a predictable snow blanket to shield plants, protect your roses. Still another: If the ground freezes solid for most of the winter and temperatures are likely to drop below 10 degrees, again without consistent snow cover, your hybrid teas will need covering. If very low temperatures are infrequent and heavy rains keep the ground wet, the bushes are better left uncovered, as wetness encourages fungus diseases and other ills. Although specially made plastic coverings can be purchased, the time-honored (and perhaps simplest) method of protecting hybrid tea bushes is to pile up dirt around the base of the bush. The process is known as hilling and is done just before the ground is likely to freeze solid. The hill should reach a height of six or eight inches if you are in a moderate zone, but at least 12 inches in colder areas (Zones 6 and colder). The soil conducts heat up from the ground (which even if frozen will be warmer than air whipped by icy blasts) to the crown and lower reaches of the bush; if that much of the bush survives the winter, the rest (even though blackened) can be pruned away in the spring and the bush will swiftly put out new growth to replace it. As with most plants, the best guarantee of a rosebush’s survival through the winter is good care in the summer, particularly pest control. A vigorous bush will withstand cold’s rigors far more readily than a weakened one. On the other hand, take care not to stimulate your roses unduly as autumn approaches lest they put out new growth that will not be tough enough: cease fertilizing by summer’s end, and stop deadheading spent blossoms at about the same time. PRUNE BACK A couple of weeks after the first frost in your area, but before deep freezing sets in, prune your rosebushes roughly to eliminate any dead or weak shoots or any that show signs of disease. Trim long canes by half and shorter ones by about a third. The aim is to reduce each bush’s overall bulk so that it can be most efficiently protected. Don’t worry about such fine points as the location of buds; that can be addressed in the spring when you do precise pruning. At the same time, to help keep your bushes from drying out in the winter wind (dryness is if anything more of a threat to them than cold), spray them with an antidesiccant not long after you have pruned them. By sealing in moisture, the antidesiccant minimizes the damage that can come from cycles of freezing, thawing, and refreezing in midwinter. BRING DIRT FROM ELSEWHERE In late November or early December, or whenever you sense that the ground is about to freeze, bring dirt from elsewhere in the garden and pile it around the base of your plants to the desired height. Lean, sandy soil is better than a humusy mix. Do not obtain it from between the plants, as that risks exposing roots and crowns to freezing and so defeats the purpose of hilling. Pat the mound firmly to make sure it encloses the canes snugly.

Thursday, July 12, 2007

A Garden Symphony

If a garden were a symphony, gray and silver foliage plants would be the rests--the spaces of silence that help frame the music. Amid the cacophony of color, these lovely foliage plants are a refreshing change of tempo. The spots of silence they create in the garden help accentuate the brilliant blooms and vibrant hues of their neighbors. Foliage Among the Flowers For centuries, gardeners have relied on gray and silver foliage plants in their flower borders. For example, the famous English gardener, Vita Sackville-West's "White Garden" at Sissinghurst, England is probably one of the best examples of how silver and gray plants can be used effectively. In her border, she used a variety of white-blooming perennials, such as delphinium, roses, verbena, and lupines punctuated with mounds of silver foliage plants such as artemesia, Allium senescens, and Salvia argentea. In his book, Gardening at Sissinghurst, Tony Lord describes this garden as "the most renowned of all of Sissinghurst's component areas, the White Garden is an essay in the use of flowers and foliage among a feast of fragrances. Our attention is focused primarily on these while colour, provided by the subtle interplay of leaves in shades of green, is relegated to a secondary role." The white garden is a favorite among gardeners who, during the workweek, visit their garden only at dusk. The white flowers and silver foliage extend the view, and look simply celestial in the drenching of light from a full moon. Subtle Softness Silver and gray-leafed plants are often furry or woolly and absorb light rather than reflect it as glossy, green leaves do. The visual effect created is a more muted look wherever these plants are placed. The foliage of 'Silver Carpet' lamb's ears (stachys) are a visual as well as tactile treat. No one that encounters their velvety green-gray leaves can help but lean down to rub them between their fingers. Because lamb's ears evoke this intimate response, they are an ideal plant for edgings or borders. Lamb's ears thrive in a sunny spot and do best in well-drained soil. Visual Referees Gray and silver foliage plants provide a visual break between large masses of competing colors. You can also use low-growing silver-leafed plants to edge a bold border, to help keep the color in bounds. For example, plant 'Munsted' or 'Hidcote' lavender beneath roses--the glossy foliage and bright blooms of the classic rose shine next to a spray of dusty lavender leaves. Or, use lavender along a path to light the way--lavender lines the paths of some of the greatest gardens on earth.

Wednesday, February 21, 2007

Roses are Red

Many people believe that roses are a great deal of work but this does not need to be the case. The rose gardener can enjoy abundant blooms by simply following some basic instructions.

Site Selection Roses require at least six hours of direct sunshine daily. Be certain to avoid roof overhangs and the roots of large trees that will compete with your roses for water and nutrients.

Planting the Rose Always plant your roses in a soil rich in organic matter. For best results dig a hole three times the size of the root mass and twice as deep. Discard one third of the existing soil and add additional organic matter such as composted manure and/or peat moss. Add one cup of Rose-Tone to the improved soil mixture and mix thoroughly. Refill the soil in the hole to the point that the new rose plant's bud union will be slightly below finished grade (1/2 inch). Be certain to spread the roots throughout the entire hole and backfill with improved soil until the hole is 3/4 full. Water well and allow to drain to settle the new soil. Add the balance of the soil mixture and water again for final settling. Add two inches of mulch to finish the planting.

Feeding Roses require regular feeding for optimum results. Rose-Tone by Espoma is a complex blend of organic ingredients that feed slowly to provide all major, minor, and trace elements roses need to thrive. Begin feeding with Rose-Tone in the spring when the bush first leafs out. Continue your Rose-Tone applications once each month. Discontinue feeding in the late summer.

Watering Few growers can rely on rainfall to maintain their roses. Water two to three times each week preferably with a soaker hose. At each watering you want the soil to be thoroughly soaked to a depth of at least 12 inches. Try not to allow water to splash onto the foliage as this can cause disease problems.

Pests and Diseases The best defense against pests and diseases is properly caring for your roses. If you do encounter problems, consult the experts for assistance.

Pruning Almost all roses require pruning for optimum performance. In the spring, Hybrid Teas, Floribundas, and Grandifloras roses should be cut back dramatically leaving only the four strongest canes approximately 8" to 12" long. Throughout the season prune to remove weak, diseased, or crossing shoots or canes.

Thursday, January 18, 2007

Prune Like a Pro!

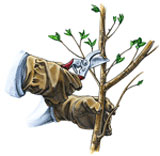
Pruning is a vital part of plant and tree care. This task can be confusing, so we have developed the following guide to help you prune properly.Three basic tools suffice for most pruning jobs: shears, loppers, and a pruning saw. Keep them sharp for clean cuts, and disinfect after pruning diseased material. 1. Rose Pruning Prune in winter or early spring when plants are still dormant. Prune plants to maintain symmetrical bushes and to encourage strong new growth. Cut back all previous years growth as much as one-third its length. Remove branches that cross through center and remove plants understock. Also prune weak and dead stems as needed. This will also encourage strong new growth. 2. Crepe Myrtle Pruning The best time to prune crepe myrtles is in February. Prune out twiggy stems and any dead wood. Thin out crossing or crowding branches in the plants center. If tree form, prune lower branches. Prune top to maintain symmetry. Each year after flowering, cut 12 to 18 inches off the tips of branches that have bloomed. 3. Holly Pruning Prune in winter or early spring mostly to shape plants. Cut back wayward branches and prune out weak unproductive dead stems as needed. 4. Butterfly Bush Pruning Butterfly bushes bloom in summer on new spring growth. They can be pruned in late winter or early spring. By pruning old blooms you will encourage new flowers. Also prune out old dead and unproductive branches. 5. Hydrangea Pruning Hydrangeas fall into two groups. Some you prune in early spring and others after the flowers fade. Early Spring Pruning Hydrangeas bloom on new growth. These plants are Climbing Hydrangea, Annabelle, Grandiflora, and PeeGees. After-Bloom PruningHydrangeas bloom on last years stems. These include Bigleaf Hydrangeas, Oakleaf Hydrangeas, Lacecaps, SummerBeauty, and Nikko Blue. Pruning should be done when the flower has faded. Cut back the flowering stems to the strongest pair of new shoots. As plants mature, begin to thin out the oldest woody stems. Remove crowded crossing, broken, or dead branches. 6. Clematis Pruning Clematis can be put in three categories: Spring-flowering, summer-flowering , and twice-flowering. Spring-bloomingClematis produce flowers on stems that grew during the previous year. Prune when flowers are done blooming. Cut back the flowers that are now dead. Prune out any old dead stems as well. Summer-bloomingPlants bloom on new growth produced in the spring. Cut back stems before new growth begins. Late autumn or early spring is a good time to prune. Cut back about 12 inches of old growth. Each year the vine will grow larger and stronger. Twice-bloomingPlants first bloom in spring on stems produced the previous year. Late summer or fall will be the next bloom time. In late fall or very early spring, prune lightly to thin the stems. After the spring bloom, prune more heavily for more healthy stems to develop for the next bloom. After a second bloom, prune old flowers away. 7. Fruit Tree Pruning The most common fruit trees are apple, peach, pear and cherry. Apple TreesApple trees should be pruned in late winter or early spring before new growth starts. Always remove all suckers (summer is a great time). Also remove dead and other unproductive branches as needed. Peach TreesPeach trees are fast growing and need to be pruned in winter. Without pruning the peaches will grow farther away from the tree's center. This will put great strain on the branches, causing them to break. In winter, thin out upward-growing branches that cross in tree's center. Pear TreesPrune back in early spring. Always prune dead and unproductive branches as needed. Cherry TreesPrune in winter. Prune out branches that cross in center and dead unproductive branches as needed. 8. Azalea & Rhododendron Pruning They can be pruned in winter or early spring. However pruning at this time will prevent plants from producing many blooms. The best time to prune azaleas and rhododendrons is just after their blooming period in spring. If you prune at this time , no additional pruning will be necessary. 9. Juniper Pruning Junipers need very minimal pruning. They should be pruned to correct their shape, to accent their form, or to limit their size. This should be done during the juniper's growing stages in mid-summer. 10. Flowering Tree Pruning Flowering trees should be pruned after they have finished blooming. Prune as little as possible. Dead branches, branches that cross in the center, and branches that are unproductive should be pruned out. Again, don't forget the three basic tools for most pruning jobs: shears, loppers, and a pruning saw, and keep them sharp for clean cuts. Disinfect after pruning diseased material.

Tuesday, February 28, 2006

Prune Like a Pro

PruningPruning is a vital part of plant and tree care. This task can be confusing, so we have developed the following guide to help you prune properly. Three basic tools suffice for most pruning jobs: shears, loppers, and a pruning saw. Keep them sharp for clean cuts, and disinfect after pruning diseased material. We sharpen lots of knives around here, and the Accusharp is the best method we have found. 1. Rose Pruning Prune in winter or early spring when plants are still dormant. Prune plants to maintain symmetrical bushes and to encourage strong new growth. Cut back all previous years growth as much as one-third its length. Remove branches that cross through center and remove plants understock. Also prune weak and dead stems as needed. This will also encourage strong new growth. 2. Crepe Myrtle Pruning The best time to prune crepe myrtles is in February. Prune out twiggy stems and any dead wood. Thin out crossing or crowding branches in the plants center. If tree form, prune lower branches. Prune top to maintain symmetry. Each year after flowering, cut 12 to 18 inches off the tips of branches that have bloomed. 3. Holly Pruning Prune in winter or early spring mostly to shape plants. Cut back wayward branches and prune out weak unproductive dead stems as needed. 4. Butterfly Bush Pruning Butterfly Bush Pruning Butterfly bushes bloom in summer on new spring growth. They can be pruned in late winter or early spring. By pruning old blooms you will encourage new flowers. Also prune out old dead and unproductive branches. 5. Hydrangea Pruning Hydrangeas fall into two groups. Some you prune in early spring and others after the flowers fade. Early Spring PruningHydrangeas bloom on new growth. These plants are Climbing Hydrangea, Annabelle, Grandiflora, and PeeGees. After-Bloom PruningHydrangeas bloom on last years stems. These include Bigleaf Hydrangeas, Oakleaf Hydrangeas, Lacecaps, SummerBeauty, and Nikko Blue. Pruning should be done when the flower has faded. Cut back the flowering stems to the strongest pair of new shoots. As plants mature, begin to thin out the oldest woody stems. Remove crowded crossing, broken, or dead branches. 6. Pruning ClemantisClematis Pruning Clematis can be put in three categories: Spring-flowering, summer-flowering , and twice-flowering. Spring-bloomingClematis produce flowers on stems that grew during the previous year. Prune when flowers are done blooming. Cut back the flowers that are now dead. Prune out any old dead stems as well. Summer-bloomingPlants bloom on new growth produced in the spring. Cut back stems before new growth begins. Late autumn or early spring is a good time to prune. Cut back about 12 inches of old growth. Each year the vine will grow larger and stronger. Twice-bloomingPlants first bloom in spring on stems produced the previous year. Late summer or fall will be the next bloom time. In late fall or very early spring, prune lightly to thin the stems. After the spring bloom, prune more heavily for more healthy stems to develop for the next bloom. After a second bloom, prune old flowers away. 7. Fruit Tree Pruning The most common fruit trees are apple, peach, pear and cherry. Apple TreesApple trees should be pruned in late winter or early spring before new growth starts. Always remove all suckers (summer is a great time). Also remove dead and other unproductive branches as needed. Peach TreesPeach trees are fast growing and need to be pruned in winter. Without pruning the peaches will grow farther away from the tree's center. This will put great strain on the branches, causing them to break. In winter, thin out upward-growing branches that cross in tree's center. Pear TreesPrune back in early spring. Always prune dead and unproductive branches as needed. Cherry TreesPrune in winter. Prune out branches that cross in center and dead unproductive branches as needed. 8. Pruning Trees Azalea & Rhododendron Pruning They can be pruned in winter or early spring. However pruning at this time will prevent plants from producing many blooms. The best time to prune azaleas and rhododendrons is just after their blooming period in spring. If you prune at this time , no additional pruning will be necessary. 9. Juniper Pruning Junipers need very minimal pruning. They should be pruned to correct their shape, to accent their form, or to limit their size. This should be done during the juniper's growing stages in mid-summer. 10. Flowering Tree Pruning Flowering trees should be pruned after they have finished blooming. Prune as little as possible. Dead branches, branches that cross in the center, and branches that are unproductive should be pruned out. Again, don't forget the three basic tools for most pruning jobs: shears, loppers, and a pruning saw, and keep them sharp for clean cuts. Disinfect after pruning diseased material.