Showing posts with label Pots and Planters. Show all posts

Tuesday, January 19, 2010

Capital Garden - Superior Design

Our fiberglass planters are designed to look like meticulously handcrafted pottery. Light-weight, durable and maintenance free, perfect and practical for modern life. The high strength material uses fibers of glass as a reinforcing agent in polymers. Lightweight, yet sturdy, these fiberglass planters will weather the elements with ease. The high strength material uses fibers of glass as a reinforcing agent in polymers or plastics. Their real benefit lies in the surface to weight ratio, in other words, they are lightweight and durable. They will easily contain the necessary potting soil without fear of cracking, splitting or warping. A serious long term alternative to terracotta and lead (and even some other metals) the Stuart Collection is ideal for use inside and out. Tough, light weight, completely frost proof and non-corrosive, your Stuart Window Box requires little or no maintenance. To take care of normal cleaning, use a warm soapy water and rinse. These window boxes take much less maintenance that terracotta or metals.

Monday, October 05, 2009

Water Retention For Coconut Fiber Planters

Keeping Hanging Planters Moist Many Yardiac’s tell us how much they love their coco-fiber hanging planters but hate how much water is wasted through the material. The coconut inability to hold excess water does prevent root rot and healthy flowers, however you will waste water. In order to prevent this problem we have been lining our hanging baskets with a thin plastic liner with holes punched through (a kitchen waste liner will do). This allows more water to be retained by the plants roots while still providing adequate draining. Recentely we discovered a better product called Soil Moist Mats. The easy to apply product is designed to reduce plant waterings by 50%. Soil Moist Mats absorb similar to a sponge and hold it in the plant container. Non-toxic crystals are woven into the degradable cloth material. As the soil begins to dry, the mat slowly releases stored water to the soil and the plant's roots over an extended period of time. They reduce plant waterings with less worry and save time and labor. The mats last for several seasons in the soil and are environmentally friendly. The easy to apply mat is ideal for containers, hanging baskets and potted plants for both indoor and outdoor applications.

Tuesday, April 21, 2009

An Easy Way to Move Large Planters

At the garden center or warehouse Large Pots can be moved with the forklift, however at home or on a jobsite that is usually not an option. Many planters are too heavy to ever move and once placed into a location they will never be moved. Recently we discovered a rather practical tool aptly named The Pot Lifter that solves this problem. Here is how it works: Yardiac Potlifter

Wednesday, April 15, 2009

Lighweight & Durable Fiberglass Pottery

Chipendale Planters All true Yardiac's have a passion for natural beauty! Sometimes, however, innovation and replication can be just as beautiful. If you've ever attempted to move a concrete urn, a teak planter, or a large terra cotta pot you will appreciate this blog. Yardiac is proud to introduce our "exclusive assortment" of lightweight and durable pottery crafted by Capital Garden Products. Capital Garden PlantersFor over twenty years Capital Garden's skilled designers and craftsmen have produced decorative fibreglass plant containers that even the keenest eye cannot distinguish from the original materials. Capital Garden's romantic replicas of classic Mediterranean, Greek and European designs come in a variety of styles ranging from troughs, planters, urns, window boxes, pedestals, water tanks and wall fountains. Chipendale PlantersAvailable in a several authentic finishes, maintenance free, tough, lightweight, completely frost-proof and non-corrosive fibreglass garden products are a serious long term alternative to terracotta and lead. Available in weathered bronze, terracotta, lead, aluminum, stone and rust finishes, Capital Garden’s decorative fibreglass plant containers are designed to last for up to 30 years. Browse Capital Garden sProducts at Yardiac.com

Friday, March 27, 2009

Throw an Eco Potting Party

Eco PotsForget the standard, stuffy dinner party you were hosting on Saturday night. Instead, treat your guests to an event that’s fresher, more fun and – best of all – environmentally friendly: Invite them to a “Potting Party!” You supply the backyard and a selection of planting containers. Your guests bring potting soil and seeds. While the burgers sizzle on the grill, everybody’s busy planning and planting a gorgeous new mini-garden to take home when the party’s over. Eco PotsYardiac brings fashion and function to the party with our collection of Eco-Friendly Pottery. Designed to replace wood, plastic or clay containers, these pots are made from byproducts of renewable sustainable materials such as rice straw, wheat straw, bamboo and reeds. Eco-Friendly Pottery withstands years of rain, humidity, heat, freezing and thawing. What's more, these pots are so resilient and environmentally friendly, you can even plant them. And three attractive organic color selections (Chocolate, Goldenrod and Moss) mean you can be both environmentally conscious and style conscious. Best of all, once their useful life is over, you can toss Eco-Friendly Pottery in good conscience, knowing these containers will quickly break down into nutrient-rich organic matter in the landfill.

Wednesday, March 25, 2009

Strawberry Jars - Not Just For Strawberries Anymore

Planting in a Strawberry JarStrawberry jars are nothing more than planters with small planting pockets along the sides. These were originally used for growing strawberries, but they aren't just for strawberries anymore. Nowadays strawberry jars are used for growing nearly any kind of plant imaginable, herbs, bulbs, flowers, and vegetables to tropical foliage plants, succulents, and vines. With an assortment of plants, some potting soil, and imagination, you can create a striking addition for the garden.

Create a portable herb garden in a jar, filling each pocket of the strawberry planter with an herb of your choice such as parsley, thyme, rosemary, basil, marjoram, oregano, and sage. Create a breathtaking fragrant garden with your favorite aromatic plants like heliotrope, sweet alyssum, lemon verbena, and even miniature roses. There are also many succulent plants and flowers that can be successfully grown in strawberry planters. Some of these include hens and chicks, cacti, sedums, petunias, impatiens, geraniums, begonias, and lobelia. Foliage plants can be added as well to create a more natural appearance. Choose numerous varieties to add texture and contrast to the strawberry planter garden. Trailing plants, such as ivy or sweet potato vine, also look great placed within the pockets of strawberry jars.

The only requirement for using plants other than strawberries is to check their growing conditions to ensure they are compatible. For instance, plants that require the same amount of sun, water, and soil should be grouped together. When you begin selecting plants for the strawberry jar, choose plants that fit your desired theme as well as those that grow well in containers. The number of plants will depend on the number of planting pockets in your strawberry jar. Choose one plant for each pocket and at least three or four plants for the top. Since watering leaches nutrients in the soil, you should also fertilize your plants. Strawberry pots can be a fun way to garden. Consider planting themed gardens such as an herb garden, a foliage garden, or a succulent garden.

Strawberry jars are available in different styles and materials such as plastic, terra cotta, and ceramic. Plastic strawberry jars are lightweight, making them more prone to tipping over; however, they are probably the least expensive. Terra cotta jars are the most popular and very attractive, yet because of its porous qualities, these types require more watering. Ceramic strawberry jars are more decorative, heavier, and retain water well. The type you choose should complement your garden style and theme.

Planting in a Strawberry JarOnce you have obtained your desired plants, you are ready to begin gardening in the strawberry jar. Take the frozen bottled water and carefully punch holes throughout the entire bottle. This can be easily achieved using a screwdriver and hammer, or an ice pick if you have one. Place a flat rock in the bottom of the strawberry jar and add some potting soil up to the lowest planting pocket. Carefully tuck the plants into the lower pockets. Place the bottled water firmly into the soil and begin adding soil until reaching the next row of planting pockets, placing the plants into their designated pockets. Continue filling the strawberry jar with soil, repeating the steps until all pockets are filled with plants. The top of the bottle should be peaking out through the top of the strawberry jar. Place the remaining plants around the neck of the bottle. Once the water begins thawing out, it will slowly seep through the holes, keeping your plants moist and happy. Use the top opening of the bottle to replace water as needed.

Gardening with strawberry jars is not only easy but also fun. They are well suited for any garden, especially small ones such as patios. Strawberry jars can be used for growing various plants or even tranquil fountains. Nothing adds beauty to the garden quite like the versatile strawberry jar.

Friday, February 27, 2009

Cool Season Containers

If you think container gardening is just for the spring and summer, think again.  Cool season container gardening is just as fun.  You can achieve the same level of beauty and variety as in the warmer weather. 

cool season containersChoose a container large enough to accommodate several plants, one equipped with the necessary drainage.  If the planter you like doesn't have drainage, you can most always drill it yourself, with a household electric drill.  Use a lightweight container instead of the traditional terra-cotta or stone for winter gardening.  A good lightweight planter will not be made of foam.  It will have UV inhibitors, and usually a warranty.  Some will offer as much as a ten year warranty against fading, cracking, etc, in any US climate.  They will require a little more of an initial investment, but if you are planning on long term usage, that is certainly the way to go. 

Select a potting mix that includes controlled release fertilizer, or add it to the mix yourself.  You can cool season containers2supplement with an additional water soluble fertilizer every few weeks or so.  Just remember to read the instructions before you use. 

In selecting plants, use the 'thriller-spiller-filler' approach.  The thriller will be your stunning center piece.  The spiller will waterfall over the edge of the pot, and the filler is for everything in between.  Be sure to choose plants that grown in a common moisture range. 

Don't forget water needs.  You do not have to water daily, like in the summer, but supplemental irrigation will be required, depending on the plants' needs.  

Wednesday, August 13, 2008

Jiggering, the Lost Art of Clay Ware Making

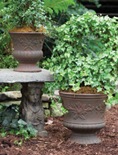
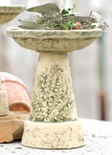
Have you ever wondered hBurley Clay Plantersow clay wares are made?  Many Burley Clay products are made by jiggering.  This process is used to create several of the larger items, such as birdbaths, pedestals and planters.

Jiggering can be described as a 'lost art'.  In this process, the jiggerman places a plaster mold inside a spinning steel drum. Then clay is added inside the mold.  As the clay begins to dry, the plaster mold draws the water away from the clay, releasing the clay from the mold.  The ware is then removed from the mold and the rough edges are trimmed.  This acquired skill requires years of apprenticeship and isBurley Clay BirdBath usually passed down to family members who have worked in area potteries for generations. Artisans hand-decorate all of Burley Clay products, creating pottery that is in great demand throughout the United States and Canada.

Burley Clay Products is proud to offer beautiful, American-made products.

Wednesday, January 16, 2008

Soil Savvy

Healthy outdoor container plantings start with the proper soil mix. If you try using garden soil, you get a heavy planter that dries out quickly. Commercial potting soil blends are more expensive but will offer a better container mix. Or, if you prefer to blend your own, you can create a homemade mixture that’s lightweight and absorbs moisture but drains well. Remember, container plants require more regular watering and fertilizing than garden plants.

Recipe for Potting Soil

1 part compost

1 part composted manure

1 part vermiculite

1 part peat moss (or substitute such as ground pine bark)

1 part perlite, sand or fine gravel (for additional drainage and plants that prefer very well drained soil)

These gardening projects are brought to you by Novelty Manufacturing, Lancaster, PA, manufacturer of quality container gardening products.

Tuesday, December 04, 2007

Fun With Terrariums

Terrariums were originally invented to transport living plants from far away places when voyages took months or even years. Terrariums were carried by Captain Cook on his voyages around the world and by Captain Bligh on the voyage of the Bounty. Today''s terrariums are mostly decorative in nature, but they still allow you to have a garden which can be maintained for long periods of time with a minimum amount of attention.
Having a terrarium of your own is easy. The first step is to choose a container for your terrarium. Most terrariums are planted in containers without drainage holes. Glass bubble bowls, bottles, fish tanks, and brandy snifters are commonly used for containers.
Line the bottom of the container with one-half inch of charcoal. This will help to keep the soil fresh and sweet smelling. Next add one and one-half inches of professional, soilless potting soil. Be sure to moisten the soil first and then put it into the container.
Now you are ready to add the plants. Remove most of the soil from the roots and then plant the plants using your hands or a spoon.
After the plants are in place, a final mulch or ground carpeting of florist's sheet moss will complete the scene. If there is space in your terrarium, you can add shallow container of water to serve as a pond.
Use a mister of clear water to settle the roots and remove the soil particles from the leaves and sides of the container. Be careful not to add too much water or you'll have a floating garden!
Terrariums do best in bright, indirect light. Sun shining directly on the glass for more than an hour is likely to steam-cook the plant.
If the soil appears dry, if no moisture droplets form on the inside, or if the plants appear lackluster and droopy, add a little water.
Keep the plants well groomed and remove yellowing leaves before the have the opportunity to rot. Watch for any disease or fungus. Once rot, or disease, gets started it may move quickly to healthy leaves and shoots.
Terrariums make great gifts!

Monday, October 01, 2007

Choosing an Appropriate Planter

There are so many planters to choose from, in the stores, today. It can be very confusing. Often, I am tempted to go for the cheapest pretty planter that I can find. Sometimes is pays off; Sometimes it does not.
The best investment you can make is in a well made planter that suits your needs. In order to make that determination, you need to know a little about what is out there. After all, not only do you have local options, but you also have Online options.
So, let's get started. First, pick out your plants, and learn a little about their needs. Are you going to need to bring them in, during the winter? If you are, a two hundred pound cement planter is not going to be ideal, unless the Hulk lives nearby. Will your plant of choice need drainage? Most plants do. Will your plant need sun, shade, or a little of both? How much soil will you need, to grow a healthy plant? There are other possibilities, but these are the most influential, for our purposes.
When you have decided on a good size, you will need to think about the material. The material will have bearing on the weight of the planter. As I said before, if you are going to need to move the planter inside for the winter, or relocate it for a different season, you will want to choose a planter that is lightweight. Here, we have several options, which I will go over, one by one.
Terra-Cotta
Terra-cotta planters have a very classic beauty, whether painted, and glazed, or left natural. The natural terra-cotta planters just remind me of my Grandmother's garden. They give an old world feel, to anyone's patio. As for painted, or glazed, there are some very artistic designs, if you look for them. You will need to bring them in, when it gets cold. They are a natural pot, and will give way, to cracking, in the winter. However, many people feel that their benefits supersede their drawbacks. For instance, terra-cotta is an earth-based medium which allows air and water to pass freely; this promotes healthy roots. You will need to water regularly. For the highest quality terra-cotta, look for an even toned, reddish brown hue, and thick walls.
Resin Planters
For terra-cotta lovers, who are not interested in the maintenance of terra-cotta, lets look at the resin. Resin, or Polyethylene, is a very lightweight and durable plastic. It can be left outdoors year round, in any climate zone, and the good ones will have UV inhibitors, and come with a ten year, or more warranty. Resin will fully retain water, unless drilled, for drainage. Resin can come in just about any shape, size, or color. It can have the look of just about any other material, including stone, terra-cotta, and more. There is a stigma about plastic planters, but if you see a high-end resin planter bursting with plumage, you will instantly forget your inhibitions.
Fiberglass Planters
They say, Nothing like the real thing, but they have never seen fiberglass. Fiberglass offers resistance to weathering and sharp detail. Fiberglass, when compared to its concrete counterparts, is lightweight, and offers impeccable textures. It can give the look, and feeling of cast stone, terra-cotta, or metal. It utilizes fiberglass strands, which lend strength to the material, allowing clearer details, and textures. The only real downside to fiberglass is that they are a little vulnerable to flaking or chipping, when met with a blow.
Metals
Metal planters can give you a very streamline, and modern look. At the same time, if you choose a rusted finish, you can get a completely different feel. They are generally offered in a wide variety of styles, and finishes. They are usually made from sheet metal, and are lightweight, making them easy to move. One thing to bear in mind: rusting. It's going to happen. Like any metal outdoor decor, if you seal it every couple of years, with a clear coating, it will last much longer. Some manufacturers are now coating metal pots with a UV resistant sealant that reflects the sun's rays and protects the metal from rust.
Cast Stone
If you are looking for old world class, look no further. Cast stone offers weather resistance, durability, and sheer beauty. They are a little heavier than some of the other options that we discussed, but still lighter than what you will find in a concrete statuary outlet. They can limit you in the color department, but they are typically offered in a range of earth tones, that will compliment any patio.
Now you should feel armed with some useful information, that may make your decision making process a little more productive. There are still more planter options, not discussed here. Don't be afraid to share your experiences with us!

Wednesday, September 26, 2007

Repotting an Orchid

Give your orchid the care it craves, and you’ll soon have a healthy plant that’s ready for repotting. The process is simple—you don’t need to be a professional green thumb to confidently tackle this task. A great help, for any gardening project, is an outdoor sink. It really simplifies clean up. The time to repot your orchid is after flowering, when new roots have emerged but haven’t grown longer than half an inch. Water orchids before repotting. Step 1: Tap the container to gently remove the orchid. Remove all growing medium from around the roots. A gentle stream of water can help to wash it away. Step 2: Pinch off any dead or dying roots. Healthy roots are white and firm; diseased roots are dark brown to black. Orchids flower best when grown in tight quarters, so repot into a container that accommodates roots without breaking or bending them. Step 3: Use foam packing peanuts to block drainage holes in the container. Soak fir bark overnight so splinters and dust settle out. In the morning, just use the floating pieces of bark to pot the orchid. Step 4: Place phalaenopsis and dendrobium orchids so that the base of the bottom leaf is right at the surface of the bark; insert new growth of oncidium and odontoglossum orchids one-half inch into the bark. Fill in around the roots with potting medium and gently tamp down to secure the plant. Water orchids sparingly until new roots emerge and grow into the bark. Note: When potting epiphytes, such as phalaenopsis, cattleya, dendrobium, epidendrum, miltonias, and brassias, use orchid potting bark. Orchid potting mix should only be used for terrestrial orchids such as plieone, cypripedium, paphiopetalum, other lady slipper types, bletillas, and bromeliads. Some orchid mixes and other potting mixes contain peat, which causes epiphytes to eventually rot. Additional considerations Containers: Selecting the appropriate container and the proper potting medium are even more important than the right timing and should be well thought out in advance before attempting to repot. The types of containers used for orchid growing are divided into two basic types: those that are porous and those that are not. Terra cotta or clay pots are of the porous type. They allow air to pass through the container and dry the potting mixture more quickly. Porous containers should be used in situations where the humidity is high and by those who tend to overwater their plants. Resin, which is impenetrable, retains moisture and is therefore recommended when humidity is low and for those who water less frequently. Choose a container that is slightly larger than the previous pot or reuse the same container after replenishing or replacing the existing potting medium. Do not plant directly into decorative containers, but rather use them as "slip covers" to hide less attractive pots. Potting medium: The potting mixture will be determined by the type of orchid and by the size or diameter of the roots. When using a bark medium, choose a coarse mix for orchids with thick, fleshy roots and a fine medium for those with smaller, fine roots. Make sure that the package of fir bark you purchase states that it is suitable for orchid growing. Soak the product in a bucket of water overnight to remove any mulch dust and to premoisten the medium before filling the containers. Bark is a decomposing medium and should be replaced every year or every other year before it can decay and cause root rot.

Wednesday, September 12, 2007

Pamper Your Trees

Here's a neat idea! Turn your trees, into potted plants. It is a great way to spruce up a lawn of any size or shape. The TreePot is available in different sizes to fit various sized tree trunks which allows room for tree growth. A shelf inside will hold up to ten inches of potting soil. You are not limited to tree trunks. You can use the Treepot with mailbox posts, lamp posts, power line posts, etc. The TreePot design keeps the soil from coming in contact with the tree and protects your tree from weed-eaters. You can keep your flowers in an elevated planter, isolated in rich nutritious soil. This is much better than planting directly under the tree. As any experienced Gardener knows, the tree will steal all of the moisture, and nutrients. Another great thing about the Treepot is that it is made of Cedar, which contains natural oils that will resist rotting, and cracking, in the harshest of weather conditions. In addition, they are fully paintable! Your imagination is the limit! Using a TreePot is easy as Pie! All you have to do is level off the ground, connect the base, and inside shelf sections, using a screwdriver, and you're off! You will need to find a fertilizing potted plant soil mix, pick out your favorite flowers, and you're off!

Tuesday, September 04, 2007

Making a Moss-Lined Basket

Hanging plants survive in plastic baskets, but they flourish in old-fashioned wire baskets lined with sphagnum moss. This technique was popular among Victorian gardeners, who knew that a moss basket’s permeable skin guarantees perfect drainage while allowing air to reach the plant’s roots. The moss also acts as a reservoir, absorbing excess water and releasing it back into the soil as needed. Even the water that evaporates from the moss’s outer surface is not wasted. By boosting the humidity around the plants’ foliage, the evaporation protects the greenery against the desertlike aridity of winter’s hot, stuffy, indoor atmosphere. Another great way to preserve moisture, is Soil Moist. It stores over 200 times its weight in tap water, and then releases a steady supply of water as your plants need it. Soil Moist acts as a reservoir, even during periods of drought, the stored water is released to the plant. Soil Moist polymer is non-toxic, safe and economical to use. In addition, it will last for several seasons. Such a homemade container does require a bit more work. The most persuasive argument in favor of an old-fashioned basket is aesthetic beauty. When I potted up a basket of spearmint for the kitchen recently, I planted not only in the top but also through the side walls. A couple of weeks’ growth was all that was needed to turn that basket into an unbroken sphere of sweetly aromatic foliage. SELECT AND PREPARE THE PLANTS Though I chose spearmint for my most recent basket, there are any number of foliage and flowering plants that adapt well to the treatment. Use rooted cuttings, since these smaller specimens are easier to insinuate through the basket’s walls. Commonly, cuttings are grown three or four together in a two-and-a-half- inch pot. Water well, and allow the cuttings an hour or two to fill with moisture. Then slip each root ball from its container, and separate the plants by cutting their roots apart with a knife.

Monday, March 05, 2007

Add a Touch of Class with a set of Urns

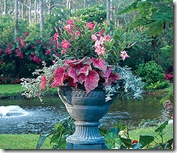
The hottest container - the urn - is truly a classic. Urns come to us from ancient Greece and Rome, where container gardening is said to have originated.

Urns harmonize easily with plants, and weather well. They look simply elegant when empty, and only improve with age.

Many of today's urns feature the look of cast iron or carved stone, but they're actually lightweight, weather-resistant reproductions of classic beauties. The bigger the better, when choosing an urn.

Fill it with a lightweight potting mix. Then, plant a variety of specimens, including a vertical grower such as an ornamental grass, surrounded by trailers.

Most people like to use a set, to frame the entrance of their home, or office.