Showing posts with label growing information. Show all posts

Monday, March 16, 2009

Determining Proper Sunlight for Planting

Plant Sunlight IndicatorHave you ever been strolling through the garden center and find the perfect plant(s) only to read the sunlight requirements and not be certain if the plant will thrive in the location you had envisioned? This has happened to all of us - the best way to avoid the situation is to do a little planning.

Planting the right plants for the growing conditions is essential.  There are three intensities of sunlight that suit plants: full sun, partial sun, and shade. Generally, the lower the light, the slower the plant grows. Indoors, light requirements can be SunStick Plant Light Indicator supplemented with artificial light, but this is not an option outdoors, so it is important to choose plants carefully for the existing light conditions of your garden space and plant groupings that share the same light requirements.   If a plant is sun-loving, it will not do well in a shady location and a plant that thrives in shade cannot adjust to full sunlight conditions

So how do you do this - we found an effective and inexpensive way to solve this problem it is called the SunStick Starter Plant Meter.  It measures the amount of sunlight a given area receives in one day. Simply attach a Sunshine Meter to a Stem, plant it in the ground in the morning and return at the end of the day.   We have tested the sunstick against an expensive light meters and they work. The downside is you can only use these meters once (sort of like a pregnancy test) so remember to check the meter at the end of the day.  Make sure the surronding trees have full leaves to ensure an accurate test.  For some of our testing we placed in a flower pot to elevate the meter.  A three pack costs around $10.00 at Yardiac.com

Monday, March 02, 2009

Understanding Plant Nutrition

Eighteen elements are considered essential for plant growth. Carbon, hydrogen, and oxygen are primarily supplied by air and water. Plant roots absorb the remaining 15 elements from the surrounding soil. These elements are divided into three groups based on their relative abundance in plants: Primary Nutrients (or Major Nutrients), Secondary Nutrients (or Minor Nutrients), and Trace Nutrients (or Micronutrients). Although the Major Nutrients are needed in the greatest quantities, a deficiency of any one nutrient can prevent plant growth, or reduce it to unsatisfactory levels. Even though some soils may already contain these nutrients, they may not be in a form available for plant growth. The best way to ensure that all of the nutrients are available in the soil is through regular applications of plant foods. Table 1 provides more information on each nutrient, its deficiency symptoms, and possible plant foods to cure the deficiency.
PrimaryNutrients Function Deficiency Symptoms *Solutions

Nitrogen

Vigorous growth & dark greencolor

Light green leaves; stuntedgrowth

Dried Blood, Garden Manure, Cottonseed Meal,Ammonium Sulfate, Urea

Phosphorus

Root development &flowering

Smaller yields of seeds & fruit; purplishleaves, stems & branches;

Rock Phosphate, Bone Meal, SingleSuperphosphate, Triple Superphosphate

Potassium

Overall hardiness & diseaseresistance

Reduced yields; Spotted or curled leaves;Weak root system

Sulfate of Potash, Sulfate of PotashMagnesia, Muriate of Potash, Greensand

SecondaryNutrientsFunctionDeficiencySymptoms*Solutions

Calcium

Plant vigor; Aids in uptake of nutrients

Deformed terminal leaves; Poor root growth

Garden Lime, Garden Gypsum

Magnesium

Essential part of chlorophyll

Yellowing of older leaves

Garden Lime, Sulfate of Potash Magnesia

Sulfur

Dark green color; Seed production

Yellow leaves; Stunted, spindly plants

Garden Sulfur, Sulfate of Potash, Gypsum

TraceNutrientsFunctionDeficiencySymptoms*Solutions

Boron

Increases flowering & fruit development

Terminal buds die; Less flowers & fruit develop

Garden Manure, Bone Meal

Chlorine

Helps control water loss & moisture stress

Plants wilt; yellow leaves

Muriate of Potash, Garden Manure, Greensand

Cobalt

Improves growth & transpiration

Reduced growth and yellowing of foliage

Greensand, Kelp, Cottonseed Meal

Copper

Helps produce chlorophyll

Yellow, wilted leaves; Lack of flowering

Garden Manure, Greensand

Iron

Promotes dark green leaves

Yellow leaves

Greensand, Garden Manure, Cottonseed Meal

Manganese

Helps produce chlorophyll

Intervenous chlorosis in younger leaves

Garden Manure, Greensand

Molybdenum

Essential in some enzyme systems

Pale green, rolled or cupped leaves

Greensand, Lime (makes it more available)

Sodium

Aids water regulation & photosynthesis

Plants wilt

Kelp, Garden Manure, Bone Meal, Greensand

Zinc

Enzyme & growth hormone production

Yellow leaves, Rosetted (clustered) leaves

Garden Manure, Greensand, Cottonseed Meal

Wednesday, August 06, 2008

Tomato Tips

TomatoTomato Growth Crackses are the most popular garden plant in America.  Not surprisingly, many people have endless questions about tomato growing.  Recently, the most commonly asked question I have heard is regarding tomato cracking, and how to prevent that. 

Tomatoes crack when environmental conditions (drought followed by heavy rain or watering) encourage rapid growth during ripening. Some cracks may be deep, allowing decay organisms to enter the fruit and cause fruit rot.  The best method of prevention is to maintain even soil moisture with regular watering and mulch. Some varieties are crack-tolerant, such as: Early Girl, Roma, Heinz 1439, First Lady, Ball’s Beefsteak and Rutgers. 

Sunscald is another condition that occurs when tomatoes are exposed to the direct rays of the sun during hot weatherTomato Leaf Curl. It is most common on green fruit. It too forms cracks along the top of the fruit.  Decay causing fungi frequently invade the damaged tissue.  When you see sunscald, the the best thing to do is cover exposed fruits. If you curb pruning, allowing more leaves to grow over top of the fruit, the plant will take care of this, on it's own.  Controlling leaf diseases will help, also.

Leaf Roll is another hot topic among tomato growers.  Leaf roll may be caused by high temperatures, prolonged periods of wet soil conditions, and drought. It Tomato Sunscaldmay also occur when tomatoes are pruned severely . The symptom is mostly on older leaves, with an upward curling of the leaflets, but may progress to affect up to 75 percent of the foliage. The rolled leaves may feel leathery and stiff. Often the condition of leaf roll occurs once the plants are under the stress of a heavy fruit set. Some varieties are more prone to leaf roll than others.  Prevention and treatment strategies include  planting on well-drained soil and be irrigating during periods of drought.  The good thing is leaf roll is not life threatening, for the plant.

If you have suggestions for tomato growing, please post them here!  Sometimes the best solutions are the simplest.

Monday, February 04, 2008

Best Time to Plant Evergreens

There is some debate on the best time to plant Evergreens. Some sources say early March. Others suggest Fall planting. Read the instructions that come with your plant, or talk to your nurserymen, to be sure.

After you ascertain the appropriate planting time for your cultivar, you can start the fun part. -Planting! This guide can really be used for planting trees of any kind.

First, dig the hole. Be sure is large enough to place 8-10" of soil beneath and on all sides of the root ball.

Next, mix 50% existing soil with 50% soil conditioner, such as Rich Earth Soil Conditioner. Add enough of the soil mix to the hole so that the root ball can be one quarter inch higher than the ground level.

Remove any plastic container from the root ball. If your tree is balled in burlap, set the tree on the soil mix base and cut the burlap loose from the root ball. The burlap can remain in the hole. Finish adding the soil mix to make a mound around the tree.

Soak the tree and add more soil mix if necessary. Next, mulch to a depth of three inches. Then, stake the tree. Use tree protectors, around the tree, so you don't cut into the trunk. You will want the stakes to be about 2x2. The height will depend on the height of the tree you are planting.

Be sure to water your tree. Be sure to water your tree. (This is not a typo.) New trees need lots of water. The number one reason for tree planting failure is under watering. Tree Gators can make this a lot easier. Some people will use five gallon pails, with small holes drilled in the bottom. This will allow you to water the tree slowly, giving the roots time to absorb the water. Otherwise, most of your water will run away. The mulch will hold in the moisture, as well.

Thursday, January 31, 2008

More on Planting & Caring for Evergreens

Look for these common Evergreen pests. If you look closely at your Evergreens, you can save a lot of money. Evergreens can becostly to replace, and if you catch any of these pests before it is too late, you can save your green.

Aphids are small plant lice. Aphics may be green or black. They suck the sap out of leaves and stems. To control, spray Orthene or a similar product, Mid-Summer to prevent infestation, or when insects appear. Another good solution is to introduce & encourage ladybugs. They eat aphids. An easy, and fun, way to do this is by erecting a ladybug house near the garden.

Bagworm are esily identified by the 1-2 inch bags that they build on the tree limbs. Hand pick and burn them. Use Orthene, Isotox, or Malathion if insect is still visibly eating.

Spidermites are microscopic insects that suck sap from needles. Their webs are very visible. Spray with Isotox, Orthene, or Malathion as soon as infestation is noticed.

Borer is a general term, for a varied species. Most borers are larvae of beetles or clear-winged moths. Pin-point holes in tree trunks. Branches will turn yellow and die. best time to control borers is when adult are laying eggs on or under bark. Pheromone traps, available for some borer species, help determine if adults are present. Trunk sprays can be effective when borers are in the early larvae stage before they enter the tree.

As with any treatment plan, look carfully at your pest. Determine exactly what you are working with. Cautiously read the entire label of any product that you use. Be sure that what you are using is safe for your plant. Know the name of the plant you are treating. Many products will treat a multitude of pests, and plants. Some will treat insects, and disease, at the same time.

Monday, January 28, 2008

Get Your Children Excited About Gardening

The enthusiasm that children display for flower and vegetable growing is hard to match! Here are a few projects that are fun and easy for children.
Bean Fort
Construct a frame made of chicken wire and wood. Make it large enough for children to hide in. It will become their own special place. Plant pole bean seeds around the perimeter and allow them to grow over the frame. Mystery Garden
Mix together different types of seeds. Plant them in the garden and see what comes up! Identifying the plants teaches children about plant structures and characteristics.
Initial Garden
Let the children spell out their initials or a message with lettuce seeds. Hint: use twine, to mark your letters clearly.
Scarecrow
Don't forget that every garden needs a scarecrow. Kids love to build scarecrows using old clothes and a wooden frame.
If space is limited, allow children to grow plants in window boxes or other containers. There are patio tomatoes that grow beautifully in pots. Sunflower plants give a lot of return for a small investment. They are sturdy, fascinatingly tall and product mammoth flowers that can be saved and put outside in winter for the birds. Another fun idea is growing tomatoes, upside down!
Many experiments can be done in the garden. See how plants react to growing in the shade instead of the sun. Try growing a tomato with and another without fertilizer. Which one will get larger? Look for, or house, beneficial garden partners, such as ladybugs, praying mantis, frogs, etc.
If you are particular about the appearance of your vegetable garden, give the children a spot of their own where they can be messy if they want. Let them learn what will happen if they don't plant in a straight row, or if they let the weeds get out of hand.
Enjoy growing together with children. Let them experience the love you have for gardening. It will be a pleasure they'll have with them for the rest of their lives!
Please share your fun gardening tidbits! We would love to hear your stories!

Wednesday, September 26, 2007

Repotting an Orchid

Give your orchid the care it craves, and you’ll soon have a healthy plant that’s ready for repotting. The process is simple—you don’t need to be a professional green thumb to confidently tackle this task. A great help, for any gardening project, is an outdoor sink. It really simplifies clean up. The time to repot your orchid is after flowering, when new roots have emerged but haven’t grown longer than half an inch. Water orchids before repotting. Step 1: Tap the container to gently remove the orchid. Remove all growing medium from around the roots. A gentle stream of water can help to wash it away. Step 2: Pinch off any dead or dying roots. Healthy roots are white and firm; diseased roots are dark brown to black. Orchids flower best when grown in tight quarters, so repot into a container that accommodates roots without breaking or bending them. Step 3: Use foam packing peanuts to block drainage holes in the container. Soak fir bark overnight so splinters and dust settle out. In the morning, just use the floating pieces of bark to pot the orchid. Step 4: Place phalaenopsis and dendrobium orchids so that the base of the bottom leaf is right at the surface of the bark; insert new growth of oncidium and odontoglossum orchids one-half inch into the bark. Fill in around the roots with potting medium and gently tamp down to secure the plant. Water orchids sparingly until new roots emerge and grow into the bark. Note: When potting epiphytes, such as phalaenopsis, cattleya, dendrobium, epidendrum, miltonias, and brassias, use orchid potting bark. Orchid potting mix should only be used for terrestrial orchids such as plieone, cypripedium, paphiopetalum, other lady slipper types, bletillas, and bromeliads. Some orchid mixes and other potting mixes contain peat, which causes epiphytes to eventually rot. Additional considerations Containers: Selecting the appropriate container and the proper potting medium are even more important than the right timing and should be well thought out in advance before attempting to repot. The types of containers used for orchid growing are divided into two basic types: those that are porous and those that are not. Terra cotta or clay pots are of the porous type. They allow air to pass through the container and dry the potting mixture more quickly. Porous containers should be used in situations where the humidity is high and by those who tend to overwater their plants. Resin, which is impenetrable, retains moisture and is therefore recommended when humidity is low and for those who water less frequently. Choose a container that is slightly larger than the previous pot or reuse the same container after replenishing or replacing the existing potting medium. Do not plant directly into decorative containers, but rather use them as "slip covers" to hide less attractive pots. Potting medium: The potting mixture will be determined by the type of orchid and by the size or diameter of the roots. When using a bark medium, choose a coarse mix for orchids with thick, fleshy roots and a fine medium for those with smaller, fine roots. Make sure that the package of fir bark you purchase states that it is suitable for orchid growing. Soak the product in a bucket of water overnight to remove any mulch dust and to premoisten the medium before filling the containers. Bark is a decomposing medium and should be replaced every year or every other year before it can decay and cause root rot.

Friday, September 21, 2007

Grow Orchids Like a Pro

Don't be intimidated by growing orchids. These regal plants are one of the most rewarding and easy to grow houseplants. Also, most of them bloom during winter or early spring, just when all of us are eager to see some warm, tropical colors. Two of the easiest kinds to grow are Oncidiums and the Dendrobium phalaenopsis hybrids. One of the more appealing features of orchids is that given reasonable care, they will continue to grow bigger and better every year. As they develop more divisions, they will produce blossom spikes. A fully developed, 10 year old orchid is a spectacular sight to see. Even before it reaches this size, it can be divided and shared with friends. Orchid care tips Each variety of orchid that you grow will require slight differences in its environment, but they will all respond to the same basic care instructions. Light Orchids require bright light and should optimally be placed in a southern or southeastern window. For those with limited window space, artificial light may be supplemented. Group your orchids together in the window or under the light but allow them "elbow" room so that the light is evenly distributed on the leaf surface of each plant. Healthy, happy orchids are bright green; deep green color on the leaves indicates that light levels are insufficient for the plant to bloom. Areas with poor lighting may be intensified by surrounding the plants with reflective materials. For better light absorption, keep the leaf surfaces clean by wiping them occasionally with a damp cloth. Humidity Orchids require 50-70% humidity in the growing environment. If the air is dry where you live, you may increase the humidity by placing the containers on trays of pebbles filled with water or by misting the plants and the surrounding air in the mornings. Avoid using chemically softened water to mist or water the orchids. Air circulation Air movement is also of the utmost importance. Fans should be placed in the room to circulate the air. Periodically move the fans to different locations in the room to simulate the changing of winds in the natural world. Heating and air conditioning vents are not considered simulated winds and should not be directed at the growing orchids. Water Water on a regular basis, but allow the plants to dry out somewhat between waterings. Either rain or tap water may be used, but make sure that the water is room temperature. The easiest way to water is to either plunge the container into a bucket of water or to place the container under a running faucet, flushing out dust and other foreign particles while drenching the soil. Remember to water the container and not the foliage or the flowers. Most importantly, avoid overwatering. Fertilizer Use an evenly balanced fertilizer (10-10-10 or 20-20-20) or any liquid houseplant fertilizer diluted to half-strength to feed orchids that are grown in a soil mix. Use a high-nitrogen fertilizer if you are growing orchids in a bark mix. Bark is a decomposing material and requires a higher nitrogen formula to assist in the breakdown process. Fish emulsion is a natural, organic fertilizer that may be used to feed the orchids in place of the complete formulas. Dilute the fertilizer and apply it to the orchids more frequently than recommended. Once the leaves mature, the plants will enter a more dormant like phase and will require less food and water. You may resume the regular feeding and watering once growth resumes and new shoots or flowers appear. Temperature Orchids grow in varying temperatures depending on their natural environment. Those that grow in lower elevations will prefer warmer temperatures than those that normally grow at higher altitudes. The home environment may range in temperature from 50-90 degrees, with adjustments made in between. Whatever their normal daytime temperature needs may be, most orchids will benefit from a 10-15 degree drop in temperatures during the evening to mimic nature. Lower the thermostat, open a window, or allow the orchid to live outdoors during the late summer and early fall to experience the natural temperature fluctuations of the late summer night air.

Thursday, July 12, 2007

A Garden Symphony

If a garden were a symphony, gray and silver foliage plants would be the rests--the spaces of silence that help frame the music. Amid the cacophony of color, these lovely foliage plants are a refreshing change of tempo. The spots of silence they create in the garden help accentuate the brilliant blooms and vibrant hues of their neighbors. Foliage Among the Flowers For centuries, gardeners have relied on gray and silver foliage plants in their flower borders. For example, the famous English gardener, Vita Sackville-West's "White Garden" at Sissinghurst, England is probably one of the best examples of how silver and gray plants can be used effectively. In her border, she used a variety of white-blooming perennials, such as delphinium, roses, verbena, and lupines punctuated with mounds of silver foliage plants such as artemesia, Allium senescens, and Salvia argentea. In his book, Gardening at Sissinghurst, Tony Lord describes this garden as "the most renowned of all of Sissinghurst's component areas, the White Garden is an essay in the use of flowers and foliage among a feast of fragrances. Our attention is focused primarily on these while colour, provided by the subtle interplay of leaves in shades of green, is relegated to a secondary role." The white garden is a favorite among gardeners who, during the workweek, visit their garden only at dusk. The white flowers and silver foliage extend the view, and look simply celestial in the drenching of light from a full moon. Subtle Softness Silver and gray-leafed plants are often furry or woolly and absorb light rather than reflect it as glossy, green leaves do. The visual effect created is a more muted look wherever these plants are placed. The foliage of 'Silver Carpet' lamb's ears (stachys) are a visual as well as tactile treat. No one that encounters their velvety green-gray leaves can help but lean down to rub them between their fingers. Because lamb's ears evoke this intimate response, they are an ideal plant for edgings or borders. Lamb's ears thrive in a sunny spot and do best in well-drained soil. Visual Referees Gray and silver foliage plants provide a visual break between large masses of competing colors. You can also use low-growing silver-leafed plants to edge a bold border, to help keep the color in bounds. For example, plant 'Munsted' or 'Hidcote' lavender beneath roses--the glossy foliage and bright blooms of the classic rose shine next to a spray of dusty lavender leaves. Or, use lavender along a path to light the way--lavender lines the paths of some of the greatest gardens on earth.

Thursday, June 07, 2007

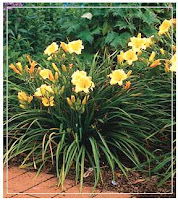
Dividing Daylilies

Daylilies are a wonderful and almost essential part of the summer garden. They provide a long season of colorful blossoms and attractive foliage, and ask little in return. Few perennials are as tough, long-lived, or pest-free. Daylilies do, however, benefit from being dug up and divided every few years, a process their natural toughness allows them to endure with aplomb. A clump of daylilies is formed of one or more fans—small plants made up of fibrous roots, a growing point (crown), and foliage. Each fan can reproduce itself each year, and before long a clump can increase into a sizable mass of plants. After five or six years, this mass becomes overgrown, producing fewer flowers each season. Dividing the clump and replanting newly separated fans rejuvenates the plants and rewards your efforts with a renewed flush of flowers the following summer. Of course, you can divide your daylilies before they become overcrowded. You may want to do so to increase your supply of plants, for example, or to slow down those clumps that are threatening to overpower less robust neighbors in the garden. A large clump of daylilies will yield enough new plants to repopulate the original site, start a new bed, and provide extras to give away to friends. The best time to divide and replant daylilies is after they have finished blooming, in late summer or early fall. This way the transplants will have time to become established before the first hard frost. In areas with short growing seasons, it is safer to wait until spring to divide daylilies; gardeners in mild climates can divide through the winter.
  1. PREPARE A NEW DAYLILY BED Preparing the soil for a new daylily bed before digging the old clump allows you to get the divisions into the ground without delay, before their roots become dried and damaged from exposure to the open air. Remove any weeds from the chosen spot and work the soil to a depth of a foot or so, incorporating several inches of compost, well-rotted manure, or damp peat moss to make the soil more friable and moisture-retentive. Daylily divisions planted in well-prepared soil will begin to grow quickly and become established before the onset of winter.
  2. DIG THE CLUMP Cut back the clump's long outer leaves to about six inches to make it easier to handle. Try not to damage the new inner leaves growing in the center of each fan. With a spading fork, loosen the soil all around the clump. Work around the perimeter several times to free as many of the roots from the soil as possible. Because daylilies develop extensive root systems, it may be necessary to dig down 10 to 12 inches. Don't worry if you accidentally break a few of the longer roses—new ones will grow when the divisions are replanted.

Next, use the fork to pry the entire clump out of the ground. Shake or wash excess soil off the roots so you can see the individual fans.

Wednesday, June 06, 2007

Dividing Daffodils

Over the years, a single daffodil bulb can produce many offsets. While small-flowered or species daffodils, such as Narcissus bulbocodium, N. asturiensis, and N. obvallaris, will continue to flower well even when congested, large-flowered cultivars will suffer as they become crowded, and bear fewer, smaller, or no blossoms after three or four years. Dividing the clumps of bulbs will relieve overcrowding while giving you a supply of new daffodils to brighten future plantings.
  1. Plan to dig your daffodils in summer just after the foliage ripens and dies down. The location of the bulbs will be apparent because you will still be able to see where the foliage enters the ground. A flat-tined garden fork will make short work of unearthing large clumps of bulbs and is less likely to damage the bulbs than a spade. Insert the tines in the soil several inches away from the bulbs so as not to spear them and carefully pry out a clump of bulbs.
  2. Because bruised bulbs may rot, handle the bulbs gently. Use your fingers to brush off excess soil. Many of the bulbs will separate naturally as you remove the soil, while others may remain connected at the bottom or basal plate. Carefully break apart those that are loosely connected, leaving the offsets that are firmly attached to the mother bulb. Discard any bulbs that are damaged, soft, or rotten.

  3. Daffodil bulbs can be planted immediately or stored for fall planting. If you opt for storage, it is a good idea to cure the bulbs so that they will harden and keep better. To do so, set an old window screen on two boxes or sawhorses out of the rain in a shady spot with good air circulation. Gently lay the bulbs on the screen in a single layer. After a few days of curing, put the bulbs into paper bags and place them in a dark, cool, and well-ventilated location for storage

Wednesday, May 16, 2007

All About Annuals

Annual flowers provide a rewarding and simple way to achieve color in a landscape. For a modest price, they can instantly enhance the beauty of your grounds. With correct conditions, many annuals can last from just after the last spring frost until the first autumn frost. Every year, you can plant different annuals and experience a charming new look with different colors, sizes, beauty and form.

You can locate annuals in a variety of different places. Often, they are planted in a bed of their own or mixed with summer bulbs and perennials. Gardeners use annual beds and borders not only to add aesthetic value, but also to highlight or camouflage areas that are bare. When bulbs fade, but before perennials are at their peak, annuals fill those empty spaces perfectly. With increased interest in cut flowers inside the home, old-fashioned cutting gardens -- comprised mostly of annuals -- are becoming more and more popular!

You can also position annuals just about anywhere you want to add color, including outdoor window boxes, containers and hanging baskets. Container planting is an effective way to bring color into your landscape.

Whether for beds, borders, cutting or containers, you can create an eye-pleasing palette of color with annuals. Enjoy!

Choosing a site

Soil requirements Most annuals prefer slightly acid to neutral soil with a pH of 5.5 to 7.0. To check your pH, perform a soil test or contact your local County Extension Service. You can use lime to raise pH or add sulfur to lower pH. Your annuals will perform best in nutrient-rich, well-draining soil that crumbles easily.

You can improve wet, poorly drained clay soils, and dry, sandy soils by incorporating organic matter, such as compost or well-rotted manure, into the soil. After the first year, add more compost to the bed before planting. If you cannot work the soil, such as in a mixed border, top-dress the area with compost after setting in your annuals.

Light requirements Most annuals perform best in full sun (6 to 8 hours); however, some prefer shade or partial shade. Make sure to provide your annuals with their required light conditions.

Location and spacing requirements The location of your planting area depends upon the effect you want to achieve. You may want to plan the planting bed first so you can effectively create your colorful world with varying shapes and sizes. Be sure to check the a planting guide, or search for your plant online, to determine proper plant spacing when planning your annual garden.

Planting your annuals

Preparing the site The first step to successful growing is proper soil preparation. Prepare your growing area the previous fall or just prior to planting your annuals in the spring.

Prior to planting, remove all grass, weeds, stones and other debris from the flower bed.

Incorporate organic matter into the top few inches of the soil using a spade or tiller. Adding organic matter such as peat moss, leaf mold or well-rotted garden compost improves moisture retention and drainage. Fertilize with a slow-release, all-purpose fertilizer at this time as well.

Mix well with a garden fork until uniform and then level off.

When to plant annuals

The second step to successful growing of annuals is proper planting. Remember, many annuals are not tolerant of frost (though some are). For precise information about frost dates in your area, contact your local cooperative extension service. You can plant in the ground or in containers.

Your plants will suffer much less trauma if transplanted in the evening or on an overcast day. Avoid the heat of the midday sun.

Planting your annuals in the garden bed

Prepare the soil, if you haven't done so already.

Water the area well. Ideally, your garden bed should be watered the day before planting so soil is moist but not muddy. However, if the soil is dry, add water to the hole before planting the transplant. Mark the bed with small stakes or sticks based on specified planting distances. Lightly water your plants in their containers. Moist plants are easier to remove from containers without disturbing the root ball. Carefully release your plant from its container. Gently squeeze the container and slide the plant out onto your palm. Keep the root ball intact to avoid damage. Dig a planting hole with a trowel. The hole should be slightly (about 1½ times) larger than the root ball. Set the plant in place at the same level at which it was growing in its shipping container. Carefully firm the soil around the roots. Do not compact the soil. Water the soil well and fertilize with a starter fertilizer. Keep the foliage dry during watering. Add a 2-3 inch layer of mulch to reduce weeds, conserve moisture and keep the roots cool.

Planting your annuals in containers

Select a container large enough to hold the medium and the plants. It must also have good drainage holes. Fill the new container with potting soil. Fill to about 1-2 inches from the top of the container. Lightly water your plants in their shipping containers. Moist plants are easier to remove from containers without disturbing the root ball. Place the annual at the same soil depth as it was in its original container. For a fuller effect, plant annuals closer together than you would in the ground. Fill the excess space with more potting soil. Water immediately. Allow the water to drain, and add more soil if necessary. Water daily for the first week, then as necessary. Containers tend to dry out quickly; check the soil daily and water to keep the soil moist, but not soggy. Hot sun and strong wind will dry the soil even more quickly; mulch can help keep the plant moist. Fertilize with a soluble plant food according to label directions.

Place your container in a location suitable for your annual selections. Most containerized annuals need to receive at least six hours of direct sun, good air circulation, and shelter from strong winds. For sun requirements, check with your local nursury. You will find many books on the subject, as well. Rotate the container occasionally to make sure your plants grow symmetrically. Annual care tips

Watering Water well after planting and then water frequently until your plants are established and new growth has started. Annuals need about one inch of water a week. Generally, deep, infrequent watering is better than frequent, light applications. Soaker hoses and drip irrigation work best. If you are using an overhead sprinkler, water as early in the day as possible so foliage will dry off before night. Make sure to water more frequently during windy, dry periods. Make sure the soil isn't soggy or overly wet.

Fertilizing Most annuals do not require high levels of fertilizer. We suggest a slow-release fertilizer to furnish adequate nutrients. Mix this in when preparing the soil. Additional fertilizer may be necessary to jump start those annuals suffering from a summer slump.

Staking Top-heavy or tall annuals may require staking. Loosely tie your plant to a sturdy stake with plant ties or old panty hose. Avoid pinching or damaging the stem. Also, consider placing garden stakes adjacent to those plants that lean over when they mature. Stake early in the season so plants camouflage the support.

Pruning For most annuals, pinch off ("deadhead") faded flowers to prevent plants from setting seed and to encourage additional blooms.

Mulching After planting, add a 2-to 3-inch layer of mulch to reduce weeds, conserve moisture, and keep the roots cool. Organic choices include bark chips, pine needles, and shredded leaves. In the following year, you can incorporate mulch into the soil before planting. Occasionally, weeds may appear even though you applied mulch; be sure to remove weeds as soon as possible so they do not compete for water and nutrients. Remove weeds carefully (by hand, if possible), especially when the annuals are young, so you do not disturb their roots. As your annuals grow and fill in, weeding will become less time-consuming.

Reseeding Some annuals will reseed from one year to the next. The seedlings may not be identical to the parent; they can differ in flower color and can be less vigorous. For maximum effect, replant with fresh annuals each year. For those seedlings that are desired, thin to their appropriate plant spacing when plants are small to allow them to reach their maximum potential.

Garden clean-up Some gardeners prefer to remove annuals in the fall when the foliage fades and after frost has blackened the tops. You can compost your pulled annuals to reduce insect and disease problems next season. In some areas of the country, annual beds are replanted with different selections in the fall for yet another season of beautiful blooms.

Thursday, March 15, 2007

Dividing Bearded Irises

Bearded irises are prized perennials that give us showy, fragrant flowers every spring. They usually bloom reliably for three or four years after initial planting but produce fewer and fewer blossoms in succeeding years. This is because their rhizomes (fleshy, thick underground stems that function as storage organs and give rise to both roots and leaves) increase each season until they eventually become overcrowded and starved for nutrients. Dividing the clump and replanting individual rhizomes in freshly prepared soil gives the plants a new lease on life, allowing them to gather the energy to produce abundant blossoms once again. And if borers are a problem in your area, your plants will gain renewed strength to resist their attacks.

In cold-winter areas, divide bearded irises in mid- to late summer, so the new plants will have plenty of time to become established before freezing weather arrives. Gardeners in milder climates can safely delay this project until September or even October, which will allow the divisions to settle in more comfortably after the heat of summer.

1. DIG UP THE CLUMP If the soil is dry, water the bed thoroughly a day or so before digging. When you have more than one variety scheduled for division, it is wise to deal with each in turn and to label each clump to avoid mix-ups. Use a spading fork to loosen the soil around and under the clump, taking care not to cut into the rhizomes growing near the edge. Lift the entire clump out of the ground and shake off or wash away any soil clinging to the rhizomes and roots.

2. MAKE DIVISIONS The clump will consist of older, spongy rhizomes with lighter-colored young ones growing from their sides. Cut the young rhizomes away from the older segments with a sharp knife. Discard the older pieces and any parts that are undersize or diseased.

In some areas of the country, bearded irises may be infested with borers, pinkish-colored larvae (or grubs) with brown heads. These creatures tunnel into and devour rhizome tissues, leaving a wound open to infection by bacterial soft rot. Extract and kill any borers you find, and cut away all damaged tissue.

To reduce moisture loss, trim the leaves to about a third of their original height. Each division should consist of a vigorous, firm rhizome and a fan of healthy leaves.

To help prevent infection, soak the rhizomes for about half an hour in a 10 percent solution of household bleach, followed by a dusting of powdered sulfur. Then lay the trimmed plants in a shady place for several hours to allow the cut ends to dry and heal.

Tuesday, February 27, 2007

Wisteria Tree Care

Any drastic pruning is best carried out in the spring, immediately after flowering. Plants are very tolerant of even the most drastic pruning and will re-grow even if cut right back to the base.

Pruning the vine down to a desirable length should not be a problem!

Wisteria can be a climbing plant, twining in an anti-clockwise direction, around the stems of other plants. This species has a symbiotic relationship with certain soil bacteria, these bacteria form nodules on the roots and fix atmospheric nitrogen. Some of this nitrogen is utilized by the growing plant but some can also be used by other plants growing nearby.

Wisteria trees prefer a good loamy soil in a sunny south or southwest facing position, sheltered from cold winds and from early morning sun on frosty mornings. Plants can become chlorotic on alkaline soils. A soil that is too rich results in excessive foliage at the expense of flowering. Plants can take a few years to settle down after planting out. Too much shade or too rich a soil are normally the culprits, and some form of root restriction can be beneficial.

Wednesday, February 21, 2007

Growing Tomatoes You Can be Proud of

Preparation Tomatoes should be planted in full sun when all danger of frost is passed. You can start the plants from seed indoors approximately 5 to 7 weeks prior to planting or you can purchase established plants from the garden center. Starting with established plants will allow you to pick fruit earlier and longer. If starting from seed, use a lite soil or specific seed starting mix. In either case look for disease-resistant varieties. Prior to planting, turn the soil over and add organic materials such as compost or peat moss. This is also a good time to add Tomato-tone; incorporate the Tomato-tone into the top 4 inches of the soil bed. It is common for started plants to become leggy or stretched prior to transplanting. For best results, plant these leggy plants deep so that only one third of the plant and all foliage is above the soil.

Staking Most gardeners prefer to stake their tomatoes in order to conserve space and to avoid fruit rotting on the ground. Choose sturdy 7 to 8 foot stakes at least 2 inches square. Tie the plants to the stake with a soft twine or strips of cloth to avoid damaging the stems. You can also purchase wire tomato cages that allow plants to grow inside from your local garden center.

Feeding Tomato-tone by Espoma is a complex blend of natural ingredients that provides all major, minor, and trace nutrients your tomatoes require. Because the nutrients in Tomato-tone release slowly, it is very safe to use. Mix two tablespoons in the soil prior to planting. Feed your tomatoes twice each month with two tablespoons of Tomato-tone. There is no need to supplement with water soluble plant foods, because an over abundance of Nitrogen will encourage the plant to overproduce foliage at the expense of the fruit you want.

Watering Tomatoes cannot produce good, abundant fruit in dry conditions. Water 2 to 3 times each week to ensure that your plants are not forced to endure drought conditions.

Common Problems Blossom End Rot is sometimes seen in plants that have been grown in dry conditions. This disease can also be caused by a minor nutrient deficiency. Water your plants regularly and feed with Tomato-tone by Espoma to insure all nutrient requirements are met. Cracking occurs when the plant is watered after a prolonged dry spell. To avoid cracking, keep plants well-watered. Pests can sometimes be a problem. If you notice pests, there are many, varying of safe solutions, to your problem.

Thursday, January 25, 2007

Perennial of the Year 2007!

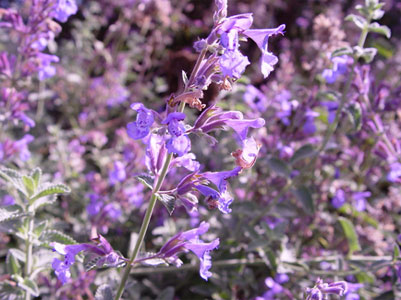
Nepeta ‘Walker’s Low’ The Perennial Plant Association has awarded the title of Perennial Plant of the Year to Nepeta ‘Walker’s Low’. Introduced in 1988 in Europe, Walker’s Low catmint has become increasingly popular with each passing year due to its lovely blue-violet flowers and its long bloom time, attractive grey-green foliage, ease of propagation, lack of pest or disease problems, and low maintenance requirements.
    • Hardiness - USDA Zones 3 to 8 • Size - 30 to 36 inches tall and wide. Walker’s Low is named for a garden and the name is not related to plant size • Light - Best in full sun, but can tolerate shade in hot climates • Soil - Prefers well drained soil and neutral pH • Uses - Good companion plant for early and late blooming plants. Great for perennial borders, but can be used in herb gardens, rock gardens, as a ground cover, or as a container plant. • Unique Qualities - Will bloom continuously throughout the season if properly pruned. Great for attracting bees, butterflies and other pollinating insects, but is deer and rabbit resistant. Leaves release a wonderful aroma when crushed.

Visit http://www.perennialplant.org/ to learn more about the Perennial Plant Association.

If you are interested in more information about perennials, Yardiac.com offers Andre Viettes Perennial Handbook. Look for more gardening guides, in the future. Also, don't miss out on our great selection of plant care products.

Monday, January 22, 2007

History of the Chrysanthemum

"If you want to be happy for a lifetime, grow Chrysanthemums." (a Chinese philosopher) The chrysanthemum was first cultivated in China as a flowering herb and is described in writings as early as the 15th Century B.C. In fact, their pottery depicted the chrysanthemum much as we know it today. As an herb, it was believed to have the power of life. Legend has it that the boiled roots were used as a headache remedy; young sprouts and petals were eaten in salads; and leaves were brewed for a festive drink. The ancient Chinese name for chrysanthemum is "Chu." The Chinese city of Chu-Hsien (which means Chrysanthemum City) was so named to honor the flower. Around the 8th century A.D., the chrysanthemum appeared in Japan. So taken were the Japanese with this flower that they adopted a single flowered chrysanthemum as the crest and official seal of the Emperor. The chrysanthemum in the crest is a 16-floret variety called "Ichimonjiginu." Family seals for prominent Japanese families also contain some type of chrysanthemum called a Kikimon -"Kiki" means chrysanthemum and "Mon" means crest. In Japan, the Imperial Order of the Chrysanthemum is the highest Order of Chivalry. Japan also has a National Chrysanthemum Day, which is called the Festival of Happiness. The chrysanthemum was first introduced into the Western world during the 17th Century. In 1753, Linnaeus, a Greek, determined the name by which we know the plant today - chrysos meaning gold, and anthemon meaning flower. Linnaeus was the founder of that branch of taxonomy dealing with plants and including the science of classification and identification. Experts say this is probably an accurate description of the ancient species, as it also points out the mum's need for sunlight. The earliest illustrations of mums show them as small, yellow daisy-like flowers. Ancient growers would not recognize modern mums. Although some mums still resemble daisies, others are more showy. Regardless of the flower type, they all belong to the Compositae, or daisy, family. In more recent times, growers within several countries began to propagate chrysanthemums. Hybridizers in England, France, Japan, and the United States have developed a wide range of floral colors, shapes, and sizes. Today, its colors include various shades of pink, purple, red, yellow, bronze or orange, and white. Since the chrysanthemum was first introduced into the United States during colonial times, its popularity has grown such that mums now reign as undisputed "Queen of the Fall Flowers." For many of us, our introduction to the chrysanthemum was a corsage for the girlfriends and mothers at Homecoming football games. Mums remain the most widely grown pot plant in the country and are one of the longest lasting of all cut flowers. This latter attribute, along with their artistic allure, make mums highly favored by floral arrangers. In the United States, the chrysanthemum is the largest commercially produced flower due to its ease of cultivation, capability to bloom on schedule, diversity of bloom forms and colors, and holding quality of the blooms. An interesting contrast to the positive feelings many Americans have of the chrysanthemum (football games, house-warming presents, get-well thoughts), is that in many European countries the chrysanthemum is known as the death flower. In countries such as Belgium and Austria, the chrysanthemum is used almost exclusively as a memorial on graves. There are so many varieties of chrysanthemums today that a system of classification is used to categorize and identify them. The classification is based on the type of florets and their growth pattern. Some chrysanthemum cultivars can be trained into different forms. Bonsai (pronounced bone-sigh) cultivars can be trained, in one year, into miniature forms, such as trees, that will match the character of a lifetime effort on deciduous or evergreen plants or trees. Some cultivars can be trained into a hemispherical form or, with skill and patience, they can be trained to look like a dog, a table and chair, or the human form. Cascading cultivars can be grown either as long pendulous drapes of blooms or trained as large fans, pillars, or trees. As a landscaping plant, the chrysanthemum makes a beautiful Fall display for the home garden. With skill and artistry, many varied effects can be achieved, even when only a small growing area is available. Chrysanthemums can accentuate an entrance way; provide the Fall colors to a season-long growing bed; or dominate a growing area with the many varied shapes, sizes, and colors. Used in this fashion, chrysanthemums provide an outstanding climax to the season before the colds of winter arrive. Longwood Gardens (in Kennett Square, Pennsylvania) and Cypress Gardens (in Cypress Gardens, Florida) are two locations that have annual displays that demonstrate many uses of the versatile and beautiful chrysanthemum. As with all gardening efforts, it is not luck or the so-called green thumb that achieves results, but rather hard work and dirty fingernails. Also, take a look at our selection of fertilizers, hand tools, and gloves, to protect those busy hands! Contributed by A.C.S.

Saturday, January 20, 2007

Paint Your Garden With Annuals

Never look at a neighbor's yard in total envy, because their garden beds exploded into a rainbow of red, orange, blue, yellow and purple, while yours had all the color of a black and white photo! Creating that palette of color is easy, easier than one might imagine. All it takes is some time, know-how and a few well-placed annual plants. Here are some suggestions for adding instant color to the yard. Selecting Annuals Annuals are flowers that experience their entire life cycle in one growing season. Essentially, they grow, blossom and die, allowing the homeowner to create a new and varied garden every year. Some of the most popular annuals include zinnias, marigolds, inpatients and rose periwinkles. Zinnias come in a wide variety of colors. Marigolds are known for their bright, gold appearance. Rose periwinkles bloom in a white hue with a flush of pink. Make sure you select the plants that will work with your local weather conditions -- heat, drought, frost, etc. Preparing the Planting Site The next step is to select a planting site. Bear in mind that most annuals thrive best with full exposure to the sun's rays. Now it's time to prepare the soil. The goal is to have soil that is well-drained, full of nutrients and free of weeds. Compacted soil makes it hard for plant roots to spread out, while sandy soil doesn't allow enough water to be absorbed. Using a rake, hoe or tiller, turn the soil over several times. Mixing in organic nutrients will prepare and loosen compacted soil while binding sandy soil. Make sure that all weeds are removed from the bed. This can be accomplished by hand or with an herbicide. Once that's done, apply fertilizer according to the directions on the package. Planting Annuals Some gardeners appreciate the challenge of growing annuals from seed, but the most ideal approach is to utilize transplants. For one reason, it's easier to envision how the bed will ultimately look when using transplants. Secondly, seeds take time to grow, but transplants appeal to the instant gratification lover in all of us. In advance of actually putting plants into the ground, draw a picture of the bed as you intend it to look. Use the drawing as a planting guide, almost as a map. "Zinnias go here. Some marigolds go here and there, and way over there..." When shopping for transplants, seek those with rich green leaves and tight, compact growth. Don't worry about a transplant's height. It will grow as tall as it's supposed to. Also, don't give in to the temptation to buy annuals that are already flowering. They're the quickest to suffer transplant shock, and because they're already blooming, may not last as long. Plants without buds are the way to go, as they'll be less vulnerable to transplant shock and will grow quickly once in the soil. Keeping Weeds at Bay Once annuals are in the ground, one of the greatest threats they can face is an onslaught of weeds. A homeowner who hasn't dealt with this problem before it starts could find himself with ravaged plants and hours spent unnecessarily trying to rectify the situation. All it takes to enjoy a summer of weed-free gardening is a good weed preventer and few extra minutes spent right after the annuals have been planted. A product such as Preen will effectively deter weed growth. Preen comes in an easy-to-use, refillable canister that allows granules to be poured -- much like salt from a shaker. Simply sprinkle Preen evenly around the bed, then gently water the area. Follow the package instructions for maximum effectiveness. A single application will last for three months, at which time Preen can be applied again. Those homeowners who want to make the task of caring for annuals even easier may want to use Preen 'n Green. Preen 'n Green prevents weed growth while providing vital nutrients. It's easy to turn your yard into a work of art. Just think of the garden bed as a canvas and annuals as a selection of colorful paints, and go to it!

Friday, January 19, 2007

Caring for Camellias

Camellias love acidic soil! General practices for growing camellias are similar to those for rhododendrons, azaleas, and hollies. Camellias do not require heavy feeding, so fertilizer should be used sparingly. An acidic fertilizer may be applied in early spring and followed by a second light application in June. Yardiac.com recommends mixing in an organic material called "Holly Tone" to the root zone of your Camellia. Then, feed with a good acid based, water- soluble, fertilizer. Here are some more tips: Planting Careful planting is the single most crucial factor in ensuring success. In northerly areas, where the plants will be near the limit of their cold tolerance, spring planting is best. The site should afford protection in winter from strong winds, and morning sun. When planting, add a generous amount of humus such as compost, leaf mold, or coarse peat, to the soil. Be careful not to plant too deeply; as with azaleas and rhododendrons, the base of the stem should be slightly higher than the surrounding soil. Moisture A two-to four-inch layer of mulch is important to help the soil retain moisture, and to minimize alternate freezing and thawing in winter. During its first season, water a new plant thoroughly once a week, unless there has been at least one inch of rain. If the winter is a dry one, watering may also be necessary during mild spells. Pruning Plants may be pruned to remove weak or dead branches, to control size or leggy growth, or to renew the vigor of older plants. Heavy pruning is best done in spring, before the plants have begun to produce new growth.