Showing posts with label fertilizing tips. Show all posts

Tuesday, January 05, 2010

Start Planting Seeds Indoors Today

Indoor GrowingGrowing plants from seeds can be exciting. If you decide in late winter or early spring that you want to try this, follow the charts and directions on the seed packets. This can be a time consuming process, because you will have to nurture the sees in an indoor setting or cold frame, but it does give you a head start on the season. You will need starting trays, flats, a special seed starting mix, a mister, lots of light, and proper temperatures. Most people's Hot House Growing Systemwindowsills do not offer sufficient light or heat, and some plants require what is called bottom heating, provided by coils, or a heat mat to encourage germination. Artificial lights, such as those used with houseplant work well with seedlings. Remember to keep the lights just a few inches above your seed trays. The First Step Sowing Your Seeds Fill your pots or flats, with your potting mixture, up to 1/4 inch of the top. Then, level the surface. (It's ideal to water the soil and allow it to drain thoroughly before sowing the seeds.) Use a pencil to make a hole for each seed, keeping in mind that most seeds will need to be planted four times as deep as the width of the seed. For fine seeds, cover them with a fine layer of soil. Planting SeedlingsWhat About Humidity and Moisture Potting soil should be kept evenly moist, but not soggy. Soggy soil will cause the seeds to rot. Use a fine sprayer to water freshly planted seeds or seedlings. Watering from the bottom is ideal. To keep the humidity and moisture levels even, slip your pots and flats into plastic bags. It will also reduce the frequency of watering. Another great idea is a mini greenhouse. It's the perfect way to protect, and nurture, your plants. It will also enable you to regulate the temperature, and limit exposure to the immediate environment. Lighting Some seeds require more light than others, to germinate. Read the label on your seed packet, to guide you. Once germination is complete, all seedlings need lighting to grow into healthy plants. Supplemental light can be helpful. SeedlingsTake Care of Those Seedlings Caring for your seedlings in the weeks following germination is critical to their . Remember, keep the soil moist, but not soggy. Small pots and flats dry quickly, so be sure to check it frequently. If your seedlings are growing in the light of a window, turn them often, to encourage straight stems. The first two leaves you will see on the plant are not true leaves. They are food storage cells, called cotyledons. Once the first true leaves have developed, it's time to start fertilizing. Choose a good organic fertilizer and use a weak solution once a week.

Wednesday, July 01, 2009

Worm Composting Is Easy & Productive

Worm composting is an incredibly efficient way to convert kitchen scraps into nutrient-rich compost for your garden. Most 'Master Gardeners' consider worm castings to be the very best compost available. Your plants will thrive with this all-natural compost. Sorting out the undigested scraps can be a messy, inconvenient chore with ordinary worm composters. Yardiac offers a .Worm composting binthat automatically separates food scraps from finished compost. Simply fill the bottom tray with red wiggler worms, bedding and food scraps. As the worms finish digesting, they will migrate upward into the tray above, leaving rich castings behind. It couldn't be easier or cleaner. No mess. No unpleasant odors. In full operation, the Worm Factory houses 10,000 to 12,000 worms, consumes 5 to 8 pounds of food a day, allowing you to harvest a full tray of nutrient rich castings every month. Each Worm Factory comes with full instructions and everything you need to get started. Yardiac's worm bin is made in the U.S.A., constructed from high quality recycled plastic, with a limited 5 year warranty on materials and workmanship. It is very simple to assemble and can be stored in or outside Click here to learn more about .Worm Composting.

Thursday, April 09, 2009

What the Heck is GreenSand?

Espoma Greensand We get this question everyday and never grow weary answering it. The reason is simple we love Greensand. If you have never used the product (or never heard of it) Greensand is a mineral called glauconite, which is found on the ocean floor and mined for use as an organic fertilizer and soil conditioner. Greensand supplies marine potash, silica, iron oxide, magnesia, lime, phosphoric acid, and 22 trace minerals. Greensand works great on Southern “hard as a rock” clay soil this spring, to help improve its texture, and enrich the nutrient content of my soil without using chemicals. Greensand is one of the oldest and most generally useful tools in the organic gardening tool box. Greensand has been used since the eighteenth century as a soil amendment and slow-releasing fertilizer (0-0-3). It is one of the best certified organic sources of potassium. It comes from sandy rock or sediment containing a high percentage of the mineral glauconite (greenish-black to blue-green). It contains potash, magnesium, iron, silica and can contain as many as 30 other trace minerals. The recommended usage is to broadcast 50 to 100 lbs. per 1,000 square feet. It improves plant health in general and is also be used to loosen heavy, clay soils. It will also improve the moisture retention of sandy soils. Greensand is OMRI listed for organic use. Every Yardiac Should Have a Bag

Monday, April 06, 2009

Give Your Compost Pile a Jump Start

There are several ways to activate a new compost pile. Some of the most effective products contain billions of beneficial microorganisms to aid in the breakdown of organic material. These bacteria are kept in a dormant state, usually in a kelp or bran medium, until applied to the compost pile and watered. Using a bio-activator product is the surest way to get your compost pile off to a quick start. Turns grass clippings, leaves and waste into healthy soil-enriching humus. University-tested BioActivator contains billions of hard-working beneficial organisms to break down and recycle the toughest organic waste quickly. Just sprinkle onto compost raw materials and follow label directions. Highly Active Micro-Organisms A specially formulated blend of highly active micro-organisms, nutrients, and special enzyme systems that will synergistically accelerate the natural compost degradation cycle. One pound can usually treat up to one ton of compost. So just a sprinkle into your composter should get you started. Good Luck Yardiac's! If you have any questions please feel free to contact us anytime Visit our Garden Center !

Wednesday, March 18, 2009

Natural Fertilizers vs Organic Fertilizers

OMRI CERTIFIED FERTILIZERS

There is a major difference between products labeled as "Natural Fertilizers" as opposed to truly "Organic" fertilizers. Natural Fertilizers are NOT the same as Organic. "Natural Fertilizers" are made from natural synthetics that include non-organic elements that are manufactured in order to increase the N-P-K. From a marketing standpoint, some manufacturers strive to make their N-P-K numbers look bigger than their competitors' numbers. This is often confusing to consumers trying to compare both products sitting side by side on the shelf in the garden center.

Organic Plant food

Another thing to be mindful of is price. At first glance most organic fertilizers appear to be more expensive than natural fertilizers and chemical fertilizers. Upon further inspection you will discover that a little bit of organic product goes a long way!Organic Fertilizers feed slower and last longer so you will require fewer applications and build a stronger foundation.

Furthermore organics deliver an even-balanced and nutritional feed while replacing the organic micro organisms instantly back into the soil. Natural/Chemical fertilizers only feed for 10 to 14 days on average, while sterilizing and robbing the soil of all the natural trace elements and micro organisms. Click Here to view the Organic Fertilizers recommended by Yardiac.

Tuesday, March 17, 2009

Corn Gluten - The Natural Herbicide

Safe For Your Vegetables, Flowers and Lawn In 1985, a research project began at Iowa State University, by award winning scientist Dr. Nick Christians. His experiments led to the development of Concern Weed Prevention Plus, a natural product for weed control made from 100% corn gluten meal. Corn gluten meal is a by-product of the wet-milling process and is sold as a feed material for cattle, poultry, and other livestock. It has been used in fish food, for commercial fish production, and is also a primary ingredient in many dog food products. Corn gluten meal is produced as a fine yellow powder and is pelletized for easier application to the soil. Here's How It Works The corn gluten meal in Concern Weed Prevention Plus inhibits root formation of germinating weeds. Without roots, the weed plants cannot get water, and soon die. Learn Why We Call It Plus Corn gluten meal is composed of 10% nitrogen. Nitrogen is a valuable plant nutrient responsible for the vivid green color of healthy plants. The nitrogen in Weed Prevention Plus is in a natural slow-release form. This means it becomes available to the plants over an extended period of time, so it will not burn your plants. Applying Weed Prevention Plus not only controls weeds, but contributes to healthier plants and soil. Plants need a complete, and complex, range of nutrients for optimum growth. Use your regular fertilizer along with Weed Prevention Plus without fear of overfeeding. RESEARCH DATA Dr. Christians' original project was designed to study the effects of a fungal pathogen on grasses. Corn gluten meal was combined with a fungus organism and then applied to the soil of a new golf course green at the field research area. At the same time, adjacent field areas were treated with the same amount of corn meal without the fungus. The study area was then seeded with creeping bentgrass.While the fungal organism/corn meal combination did not have the reducing effect on the grass that was anticipated, the control plots that received only raw corn gluten meal did have very thin grass stands. Close observation showed that something in the gluten meal stopped normal root formation at the time of germination while shoot tissue developed normally. When the soil surface dried, plants that had not developed a root system simply died.Field tests established that corn gluten meal could be used to inhibit the establishment of annual weeds, such as crabgrass, that germinate into turf. In July 1991, U.S. Patent No. 5,030,268 was issued on the use of corn gluten meal as a natural preemergence herbicide, on turf. Following submission of new data resulting from new research, the original patent was reissued in April 1994 as U.S. Patent Re. 34594. This reissue expands the original claims to include uses in field crops, gardens, and other agricultural areas. SPECIES AFFECTED Twenty-two plants species have been screened for susceptibility to corn gluten meal: black medic, black nightshade, buckhorn plantain, catchweed bedstraw, common lambsquarters, curly dock, dandelion, purslane, redroot pigweed, velvetleaf, annual bluegrass, barnyardgrass, creeping bentgrass, giant foxtail, green foxtail, large crabgrass, orchardgrass, quackgrass, shattercane, smooth crabgrass, wooly cupgrass, and yellow foxtail. Corn gluten meal significantly reduced plant survival, shoot length, and root development of all tested species. EFFECTIVENESS Applied at a rate of 20 lbs. per 1000 sq. ft. in both the spring and fall, corn gluten meal reduced crabgrass by 86% at the end of the first year; 98% at the end of the second year. Dandelion infestation was reduced 100% in plots treated for four years at the 20 lbs. per sq. ft. rate when applied in the spring and fall.There is no postemergence effect of corn gluten meal on weeds, grasses or plants. For optimum control apply Concern Weed Prevention Plus a few weeks before germination. Water in if there is no rain. Weeds without an established roots system need a drying out period of 2-3 days, in order to effectively kill the emerging weed.

Monday, March 02, 2009

Understanding Plant Nutrition

Eighteen elements are considered essential for plant growth. Carbon, hydrogen, and oxygen are primarily supplied by air and water. Plant roots absorb the remaining 15 elements from the surrounding soil. These elements are divided into three groups based on their relative abundance in plants: Primary Nutrients (or Major Nutrients), Secondary Nutrients (or Minor Nutrients), and Trace Nutrients (or Micronutrients). Although the Major Nutrients are needed in the greatest quantities, a deficiency of any one nutrient can prevent plant growth, or reduce it to unsatisfactory levels. Even though some soils may already contain these nutrients, they may not be in a form available for plant growth. The best way to ensure that all of the nutrients are available in the soil is through regular applications of plant foods. Table 1 provides more information on each nutrient, its deficiency symptoms, and possible plant foods to cure the deficiency.
PrimaryNutrients Function Deficiency Symptoms *Solutions

Nitrogen

Vigorous growth & dark greencolor

Light green leaves; stuntedgrowth

Dried Blood, Garden Manure, Cottonseed Meal,Ammonium Sulfate, Urea

Phosphorus

Root development &flowering

Smaller yields of seeds & fruit; purplishleaves, stems & branches;

Rock Phosphate, Bone Meal, SingleSuperphosphate, Triple Superphosphate

Potassium

Overall hardiness & diseaseresistance

Reduced yields; Spotted or curled leaves;Weak root system

Sulfate of Potash, Sulfate of PotashMagnesia, Muriate of Potash, Greensand

SecondaryNutrientsFunctionDeficiencySymptoms*Solutions

Calcium

Plant vigor; Aids in uptake of nutrients

Deformed terminal leaves; Poor root growth

Garden Lime, Garden Gypsum

Magnesium

Essential part of chlorophyll

Yellowing of older leaves

Garden Lime, Sulfate of Potash Magnesia

Sulfur

Dark green color; Seed production

Yellow leaves; Stunted, spindly plants

Garden Sulfur, Sulfate of Potash, Gypsum

TraceNutrientsFunctionDeficiencySymptoms*Solutions

Boron

Increases flowering & fruit development

Terminal buds die; Less flowers & fruit develop

Garden Manure, Bone Meal

Chlorine

Helps control water loss & moisture stress

Plants wilt; yellow leaves

Muriate of Potash, Garden Manure, Greensand

Cobalt

Improves growth & transpiration

Reduced growth and yellowing of foliage

Greensand, Kelp, Cottonseed Meal

Copper

Helps produce chlorophyll

Yellow, wilted leaves; Lack of flowering

Garden Manure, Greensand

Iron

Promotes dark green leaves

Yellow leaves

Greensand, Garden Manure, Cottonseed Meal

Manganese

Helps produce chlorophyll

Intervenous chlorosis in younger leaves

Garden Manure, Greensand

Molybdenum

Essential in some enzyme systems

Pale green, rolled or cupped leaves

Greensand, Lime (makes it more available)

Sodium

Aids water regulation & photosynthesis

Plants wilt

Kelp, Garden Manure, Bone Meal, Greensand

Zinc

Enzyme & growth hormone production

Yellow leaves, Rosetted (clustered) leaves

Garden Manure, Greensand, Cottonseed Meal

Wednesday, October 29, 2008

All Season Clean Up Tonic

Jerry Baker is a prominent master gardener and has some great tips for cleaning up your garden soil.  It is simple and very effective.  Keeping your garden's soil fall garden clean upclean keeps disease and pests to a minimum.  You can do this when the gardening season is over, and about every two weeks, in season.  Try it, and let us know how well it worked for you!  It will make a real difference.  You know what they say:  "An ounce of prevention....."

1 cup liquid dish soap, 1 cup antiseptic mouthwash, and 1 cup tobacco tea*.

Mix all of these ingredients in a 20-gallon hose-end sprayer, and give your plants and lawn a good shower. sprayer

*To make tobacco tea, wrap half a handful of chewing tobacco in a panty hose toe or a piece of cheesecloth. Soak it in 1 gallon of hot water until the water turns dark brown. Pour the liquid into a glass container with a tight lid for storage.

Friday, October 03, 2008

Controling Root & Stem Rots

Pythium and   are among the most damaging pathogens in horticulture causing widespread root and stem rots in seedlings and young ornamental plants. These diseases can occur in any growing operation, causing significant economic loss. Both Pythium and Phytophthora genera are algae-like Oomycete fungi. In addition to using the right control product, good hygiene is a must, in disease, and fungi prevention.

Banrot is a broad spectrum fungicide for the control of soil borne diseases. It contains the active ingredient of Truban plus a systemic fungicide. It may be used as a soil drench at the time of seeding and transplanting as well as a periodic drench throughout the plant's life cycle for the control of problem fungi in greenhouses and outdoors.

Unfortunately, Pythium, and others, have developed a resistance to some control products. This is what sets Banrot apart. Resistance to Banrot is minimal.  For more than 20 years, growers have relied on Banrot to control diseases in ornamental and nursery crops. Scotts makes it simple to use by eliminating risky tank mixing and increasing the residual effect, which means it can be applied less frequently than other brands. Insist on Banrot, from Scotts.

Friday, December 07, 2007

Planting & Caring for Evergreens

A single specimen evergreen tree provides a stately focal point in your landscape. A screen of them provides a permanent year-round windbreak and can obscure an unwanted view. When deciduous trees are barren during the winter months, evergreen trees provide color.
When choosing the location for any tree, remember that it is just that - a tree. White Pines, Spruce, and Hemlock are charming as your plants, but space that will be necessary in the future should be taken into consideration.
It is important to remember that evergreens do not like 'wet feet'. Plant evergreens in an area with ample drainage.
Planting
Evergreens can be safely planted anytime from March through November in most areas. Spring and Fall are the most ideal planting times. Check your local nursery, to be sure about what time is best for your area.
Upkeep
Water your evergreen tree 2-3 times a week during its first year. Water whenever the soil feels dry. During the next few years, supplemental watering will also be needed, although not as often. Do not forget to water during dry spells. Water thoroughly when you do water, allowing the moisture to penetrate to a 2-3" depth. A light watering encourages the tree roots to grow near the soil surface only. The tree will not survive a hot dry summer with only surface roots.
Fertilizing
Apply a general purpose (10-10-10) or tree fertilizer each Spring or Fall. Always follow the product label and never apply more fertilizer than is recommended.

Tuesday, October 23, 2007

Organic Fertilizer

There is a lot to learn about organic fertilizing. It can be very intimidating for someone who is new to the idea. Most occasional gardeners probably visit their local hardware store, and and come back with whatever they see on the end of the row. If you dig into the subject a little deeper, you will find that there are some very good reasons to look a little further. You may even have to visit a specialty garden center, but the results will be unparallelled.
Here's a good example. This is Don Young, from Ohio. He came in second, for the world record, in pumpkin growing, with a 1,662 pound pumpkin. He uses Neptune's Harvest, OMRI approved, organic fertilizers. There are three varieties: Hydrolyzed Fish Fertilizer, Organic Seaweed Fertilizer, and Fish and Seaweed Blend.
You may wonder how to tell what is organic, and what is not. You may also ask yourself why you should be concerned with organic fertilizing. Well, there are lots of good reasons, but we will try to keep it simple, here. Do a little researching, an you will find a wealth of knowledge, on the subject. Many gardeners post their finding, on blogs, like this one, for others to see. There is a lot to learn. Organic fertilizer is made of organic matter, such as kelp, cotton, bone, or manure. Chemical fertilizers are mostly derived from things like petroleum, or some other non-renewable resources. Continued application of chemicals have reduced much of the biological life that contributes to the efficient use of many plant nutrients.
Neptune's Harvest Fish Hydrolysate is made from made from fresh North Atlantic fish, in a cold process that protects the vitamins, amino acids, enzymes and growth hormones. Because no oils or proteins are removed, the nutrients remain in the soil longer. It rebuilds soil and gives excellent plant growth with increased yields. You can see the results of this, in the pictures. Neptune's Harvest Seaweed Plant Food contains over 60 nutrients and amino acids. This gives your plants a color booster, and also allows them to be more resistant to early frost, extreme heat, and dry conditions. Use it when germinating to accelerate development of a healthy root system. It is a great addition to any fertilizer program.
Neptune's Harvest Organic Fish/Seaweed Blend Fertilizer blends
both products into one. Fish and Seaweed are known to build the natural sugar in plants. Flowers and foliage will be stronger and more colorful. Blooms will be more plentiful, fragrant and longer lasting.
Neptune's Harvest is very meticulously filtered, so that you will be able to apply it with a sprayer, with ease. Hopefully this will spark your interest, in organic gardening, and inspire you. It is a great way to make contribution to our environment. If you are a member of a garden club, it is a great topic of discussion. Share your ideas with us!

Monday, October 08, 2007

Bahia Grass

Many communities across the country are asking homeowners to conserve water, and power, throughout the Summer season. In addition to that, we have an increasingly environmentally conscious country, which is a great thing. There are many great ways to conserve energy. Everyone is familiar with the Compact Fluorescent light bulbs, but have you ever considered switching grasses? Bahia grass is a warm grass and is typically found across the Southeast, and in Southern California. It is known for it's drought resistance, and low maintenance. It's a great seed starter. Bahia grass is a perennial grass that lasts indefinitely. Another popular feature is high disease and insect resistance. In addition, it survives in a variety of soils, from sandy to clay. Bahia grass is very resilient, to close grazing and traffic wear. It will grow thick enough to compete with weeds, and respond well to nitrogen applications, creating the coveted green lawn. Disadvantages include yellowing in the Spring, and Fall. However, this is easily overcome with a product like Ironite. Another thing to watch out for is an open growth habit over time, or thinning spaces. You can control this with good lawn aeration. There are several way to do this. You can use a machine that you pull, or push, or you can just use aeration shoes, as you mow. One other obstacle that you may encounter is weed control. Just like most other Southern grasses, it is not tolerant of weed control products. It is in the weed family, itself. You will need to mow, and fertilize the grass, and be careful of over watering, to avoid having an infestation of undesirable growth, just like St.Augustine, or other Southern varieties. If you do have a problem, you will want to spot treat. Bahia grass can have a coarse texture, and is not suitable for high PH soils. There are three varieties. Argentine is preferred by homeowners in Florida. Pensacola is noted for it's resilience in the transitional regions; And, Tifton 9 is enjoyed by cows, and horses across the Southeast. It's perfect for a pasture. Bahia grass should be mowed at three to four inches, at intervals of seven to seventeen days. You will find that a rotary mower works best. Be sure to post your suggestions, and experiences, good or bad, with Bahia grass. Let's all learn from each other!

Thursday, September 20, 2007

Organic Gardening Tips & FAQs

Frequently asked questions Can you recommend any "vegetarian" fertilizers that do not contain animal by-products? There are a number of excellent plant-based fertilizers you can try. These include alfalfa pellets (5-1-2); kelp meal (1.5-.5-2.5); and seaweed liquid (.1-.1-1.0). The numbers in parenthesis after each product name indicate its nitrogen-phosphorus-potassium (N-P-K) ratio. How can I improve my clay soil? Soil preparation is very important to a successful garden or landscape. In clay or heavy soil it is advisable to add lots of well-rotted compost to help break up heavy soil particles, introduce microbial activity, add nutrients, and improve drainage. To sustain these positive benefits, you will need to amend your soil regularly throughout the life of the garden. Making your own compost is a good way to keep a supply on hand year-round. You can also improve clay soil by planting cover crops, also known as green manures, in the winter. Alfalfa, buckwheat, and white clover are all cover crops that loosen and add nitrogen to the soil. Rather than working with your existing soil, you might also consider constructing raised beds and filling them with a good-quality, all-purpose potting mix. Whichever method you try, do not work with clay soil when it is wet as this forces the particles closer together. Compaction restricts proper gas exchange, the percolation of moisture and the normal growth of roots. Are there any harmful side effects to using newspaper as a mulch? Any risks from the slight amount of heavy metals present in the ink of daily newspapers are extremely remote. In fact, one environmentalist stated that to have any ill effect at all, you would have to eat twelve complete Sunday newpapers in one sitting! Newspapers are a great way to mulch your garden for weed control. Use a thick layer (no slick inserts) under your mulch and you will eliminate weed problems. Any that do appear are very easy to pull. The paper will break down over time, adding organic material to your soil. The following tips will help you maintain a healthy garden Ensure that plants are healthy before adding them to your garden beds to avoid introducing pests or disease spores. Water wisely Avoid overhead watering to prevent disease spores from washing onto healthy foliage. Using drip irrigation equipment not only prevents the spread of disease, but also helps to conserve water. Allow the soil to dry slightly between waterings to prevent fungal infections. Do not work among plants when they are wet to avoid the spread of water-borne diseases. Remove and destroy severely infected plants or plant parts to avoid spreading diseases to healthy plants. Do not compost infected material. Clean your cutting tools with rubbing alcohol or a weak bleach solution between cuts when pruning diseased foliage. Space plants widely to allow good air circulation. Crowded plants also tend to be weak and spindly, making them targets for pests and diseases. Incorporate compost into the soil to introduce beneficial soil organisms and improve drainage. Fertilize properly Nutrient deficiencies and imbalances make plants more attractive to pests. Overfertilization with nitrogen can cause lush, tender growth that attracts sucking pests such as aphids. Controlling pests and diseases Despite your best efforts to prevent pests and diseases, infections and infestations may sometimes occur. The least harmful way to combat these intruders is through physical controls. Install barriers, such as floating row covers, fences, netting, cutworm collars, and copper barrier tape, to protect your plants from future infestation or infection. Traps and repellents are other low-impact options for foiling insect and animal invaders. If mechanical methods do not solve the problem, the next option is biological control. There are a number of biological control options available to the home gardener. Attract beneficial insects by creating a diverse ecosystem. Plant small-flowered nectar plants such as alyssum and dill to provide an additional food source for beneficials. Attract pest-eating birds, by placing birdhouses, birdbaths and feeders near your garden. Bacillus thuringiensis (Bt) is a naturally occurring bacterium that acts as a stomach poison when consumed by certain pests, but it is harmless to beneficial insects. Milky spore is a bacterial disease that specifically targets Japanese beetle larvae. Beneficial nematodes, microscopic soil-dwelling organisms, parasitize many harmful insect larvae. The adage "An ounce of prevention is worth a pound of cure" also holds true in the garden. With proper maintenance, you can virtually eliminate pest and disease problems before they start.

Thursday, July 05, 2007

Successful Seedlings

Why won't my seeds germinate? There are a number of possible factors which may interfere with germination. Use the following checklist to ensure that conditions are right for successful seed starting.

Provide adequate moisture. Seeds need a uniform supply of moisture during germination and seedling development. Excessive amounts may cause damage or damping off.

Regulate temperature. Most plants need temperatures of 65-75°F to sprout. Check requirements for individual plants.

Check planting depth. Small seeds are frequently covered too deep. Very fine seeds need little or no covering. Air is as essential as heat and moisture for germination.

Control harmful insects. Small, tender seedlings are easily destroyed by insects and need to be protected from them. Insecticidal soap is a safe, gentle product for controlling most insect pests.

Guard against damping off. Seedlings grown indoors are subject to damping off. This disease is favored by overwatering, too much heat, not enough space, or too little light and is characterized by the rot and collapse of seedlings at ground level. This soil-borne virus is one of the biggest causes of seedling loss. Using a sterile medium and a good fungicide can prevent seedlings from contracting this disease.

Check your growing conditions. When seeds sprout, move them to a spot where temperatures are moderate. The most vigorous plants are usually grown at about 60-65 ° F. Use heat mats, in early Spring, where necessary. Plants need 10 to 12 hours of good sunlight each day or they will become spindly.

There are a number of factors that affect seed germination. Check the seed packet to determine if all the requirements for temperature and light were met. If the soil was cold and excessively wet, the seeds may have rotted. Dig up one of the seeds and examine it. If it is swollen and soft, the seed has rotted and you'll need to start over. If the soil was too dry, the seeds may not have germinated or may have sprouted and then dried up.

Plants grow tall and leggy when there is insufficient light. If possible move your seedlings to a sunnier location or use grow lights. You can also lower the temperature in the room and reduce the fertilizer to slow the plants' growth.

  1. Mold is an indication that the soil or growing medium is too wet and won't harm your plants as long as you can improve the growing conditions right away. Withhold water for a few days and try to increase the air circulation around the containers by adding a small fan or opening a door. You can also scrape some of the mold off or try transplanting into fresh growing medium.

Monday, March 19, 2007

RolyPig Composting

Here's a 'fresh' design, for composters! The RolyPig composter is the easy and fun way to make compost. Compact and completely enclosed, the RolyPig Composter aerates effortlessly and continuously for faster decomposition. New waste is "fed" via the RolyPig's snout. When the first compartment is full (about 3 weeks) you roll your RolyPig onto its next two flat sides, aerating all the contents automatically. Simple, back-saving, and no complicated mechanisms. 12-15 weeks later, your plant-friendly compost appears from (you guessed it) your RolyPig's. 'bottom'. Because material flows from one internal compartment to the next and finally into the rear discharge drawer, the RolyPig never becomes full. 'What makes the RolyPig Composter Special', you ask? Patent-Pending Continuous Flow System The first of it's kind, these patented designed continuous flow chambers mean no more compost batches. You can feed your RolyPig every day. Four compartments, designed with paddle deflectors, enable this screw design to work with gravity to process your waste cleanly and efficiently. Effortless Cycles No more batches After about 3 weeks of feeding RolyPig , the first compartment will be full, and you roll RolyPig to move the waste from the first compartment to the second compartment. After 12-15 weeks the original waste will be in the last compartment, and you can remove the from the (you guessed it) rear bucket. The compost should be ready, but if not, just feed it to RolyPig and run through the Continuous Flow System again. Children Love Feeding the RolyPig Your children will be enthusiastic about taking kitchen waste to feed RolyPig. RolyPig is (no way around this) cute and because of its size conjures up an image of a loveable farm yard animal. Every time your children see RolyPig, chances are they will smile. You will too. Children treat RolyPig like a new pet. While it is not a toy, children genuinely enjoy feeding RolyPig because it is a clean, easy, and fun chore. Turn Your Kitchen Waste into Garden Gold Never again will you dump organic kitchen waste into the garbage to be expensively transported to the landfill site where it would be expensively monitored for years to come. Just think how much fossil fuel energy is wasted in this way to bury a potentially useful garden fertilizer. Completely Enclosed Pest free Unwanted pests can’t get at kitchen waste in the RolyPig Compster. The design of RolyPig’s fiberglass head and rear bucket do not allow for pests to get at the vegetable waste. The head needs to be lifted in order to feed RolyPig. While a child can do this easily, it’s much too heavy for pests to move. The fiberglass rear bucket is designed to fit snuggly so pests cannot enter RolyPig from either end. Many cities now ban or are considering banning open compost piles because of the pest control (e.g. rats, mice, raccoons and insects). The RolyPig allows residents of these area to continue composting. Durable Materials & Five Year Warranty Made of high quality lightweight materials. RolyPig Composter has been manufactured using the highest quality, long life, UV protected plastic and hand crafted fiberglass. These pieces are bolted to aluminum struts which give RolyPig strength and long lasting performance while keeping RolyPig relatively light and easy to move. This composter carries a 5 year warranty! How Do I feed by RolyPig?? Although the Rolypig will work satisfactorily when fed organic matter of most types, best results are obtained by observing the following tips: Wet But Not Soggy :: Moisture & Microbes 101 The most effective microbes for converting organic wastes to high-quality compost are aerobic microbes. "Aerobic" means they consume oxygen. A soggy compost pile does not have enough oxygen to support your microbes. A long way of saying, add your kitchen wastes "wet but not soggy" and you will have active microbes (which also prevent foul odors). Not sure what "wet" means? Think lightly moist, like a wrung-out sponge. Soak up excess moisture in your kitchen waste bucket by placing a layer of torn-up newspaper or even computer paper in the bottom of the bucket and empty this newspaper into the Rolypig with the rest of the waste. Conversely, excessively dry materials should be well wetted. Chop chop chop: For Faster Microorganisms Digestion Chopped or shredded material will degrade much quicker. Adding unchopped whole fruit items or sticks of wood will slow digestion. (sawdust when wetted is fine) Mix any large lots of any one kind of waste (i.e. lawn trimmings) with other more structured waste to aid aeration. For example, larger amounts of lawn clippings can be well utilized by temporary stacking and then feeding to the Rolypig over a more extended period to produce useful compost. Other wastes: The Rolypig Composter will compost newspaper and large paper based directories when shredded or torn up and thoroughly wetted then mixed in with normal kitchen and garden waste. This is a good way of retaining the plant nutrients present in newspapers and directories for use in your garden. Additives: Give nature a little boost Give your RolyPig a good start by introducing the microbes necessary to begin “cooking” your compost. This can be as simple as adding some aged manure or good topsoil with the first few feedings of raw materials. Other good nitrogen-rich starters are aged manure, alfalfa meal, cottonseed meal, or blood meal. These will help jump-start the microbes responsible for breaking down organic matter into compost. Add hydrated lime to maintain a neutral pH for best digestion and low odor. Lime is also highly desirable in the composting process to reduce disease spread. Earthworms: Red earthworms, commonly inhabit composters under favorable conditions. These worms are normally present in your garden. Specially reared earthworms can be introduced and may have a beneficial effect on the quality of compost produced and also may speed up the process. Such worms may not always breed successfully and so an annual top-up of worms will almost always be required. And remember, your kids will love to add the worms! Compost activator can also be added to speed up the decomposition process. Temperature: Warmer = Faster Place your RolyPig in full sun for faster composting. Keep your compost cooking during the winter by placing in your RolyPig in direct sunlight. If extremely cold weather persists, do insulate the Rolypig with the Rolypig cover blanket (available soon) or hay bales, as this helps maintain correct temperature.

Tuesday, February 20, 2007

Understanding Pre-Emergent Herbicides

Pre-emergent herbicides prevent emergence of weeds. These products must be applied prior to germination which could occur.  Yardiac.com recommends applying Pre-emergent herbicidejust as the Forsythia begins to bloom.  The earlier you apply in the active germination period the better.  Proper application will make the herbicide effective all season. It is essential to apply these products early in spring prior to germination. Often, pre-emergence herbicides are combined with fertilizers. Since fertilization should be minimized in the spring, purchase products with most of the nitrogen in slow release forms. Example:Greenview Fairway Formula Spring Fertilizer with Crabgrass Preventer. One application, of This pre-emergent product, in the spring prevents crabgrass and kills dandelions, clover, viney weeds, and other broadleaf weeds, as it fertilizes. Do not use these products on new seedlings or before seeding an area. It will not allow grass seeds to germinate. To be most effective, these products need to be watered- in after application. Refer to the label for specific instructions of each product. Examples of Pre-emergents:Corn Gluten Weed Prevention Plus(Safe For Vegetables, Flowers and Lawn) Ornamec bermuda greass killer Need help identifying weeds - check out our Weed Identification Page

Monday, January 22, 2007

Establishing the Ideal Vegetable Garden

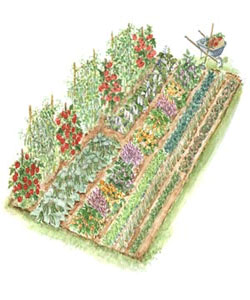
Step1 Choose an area in which will receive 5-7 hours of sunlight per day.

Step 2 Remove grass, weeds debris from the proposed site. This should be done by good old fashion blood, sweat and tears (digging, raking and hoeing). It is a good idea to uses a systemic grass and weed killer such as Round-Up, before cultivating. This will take a few weeks to kill all the vegetation, but it does do a good job, without contaminating the soil.

Step 3 Work the soil to a depth of 10-12" using a shovel or roto-tiller. Step 4 Now its time to improve the soil condition. We recommend using a 2 part mix of of which 1 part consisting of an equal combination of Peat Moss, Perlite, Vermiculite and the other part being the existing soil.

Step 5 Wet the soil for 3 days prior to planting to allow the conditioning to take affect. Do not skip this step.

Step 6 Now its time to plant. We recommend staggering planting times. This will allow you to harvest crops over a longer period of time.

Step 7 Fertilize every two weeks with Jack's Classic Water Soluble Fertilizer

Step 8 It is a good idea to add lime in the fall at the rate of 6- 8 lbs. per 100 sq. ft., to rejuvenate the soil.

Wednesday, January 10, 2007

Benefits of Natural Organics

Organic plant foods outperform other fertilizers in many ways:Method and Rate of Release Most plant foods are water soluble. They go into solution quickly and the nutrients are either taken up by the plants or lost, because of leaching. Natural organics, however, are water insoluble. Their release is dependent upon three factors; moisture, temperature, and soil microbes. This microbial release is a slow process. The soil microbes digest the organic materials, releasing the nutrients. Water is required by these microbes to sustain their life, as well as to keep nutrients flowing into the plants root zone. Temperature is critical because, when soil temperature falls below 52 degrees, these microbes go dormant and no nutrients are released. When this happens, the plant food stays in the soil, to be released when soil temperature again rises. The rate of microbe activity and, therefore, the rate of nutrient release, increases as soil temperature rises; this rate of release -- governed by soil temperature -- mimics the plant's nutrient requirements. In other words, organic nutrients are released as the plants need them. All this means that natural organics break down and feed slowly for an extended period of time. The nutrients are released as the plants need them, rather than all at once. Safer for Your Plants Most simple chemical plant foods have a much higher salt index than natural organics. Over-application of some of these chemical products can burn by causing an over abundance of salts in the soil. This imbalance forces water to move from the plant to the soil, causing dehydration and the eventual death of the plant. Natural organics have a much lower salt index, making them much safer to use. Non-Leaching Because simple chemical plant foods are water soluble, they are often washed or "leached" out of the root zone. However, since natural organics release their nutrients slowly, by microbial activity, leaching is not a problem. Nutrients stay in the root zone for the plants to use. Better Value Plant foods formulated with natural organic ingredients appear to be somewhat higher in cost. However, when you consider that it often takes three or more applications of simple chemical plant foods to equal one application of natural organics, you see that the value of the natural organics is far superior to simple chemical blends. Soil Conditioning By adding humus, and encouraging soil microbes, natural organic plant foods can actually improve the overall soil structure. No other kind of plant food can make this claim. If you are interested in a organic fertilizer for your yard, visit Yardiac.com for our recommendations!

Friday, January 05, 2007

Lawn Aeration 101

Create the Greenest Lawn on the Block!! Fall is the most beneficial time to aerate your lawn! Aeration benefits your lawn in several ways. First, it allows oxygen, water, and nutrients to penetrate further into the soil, encouraging deeper root growth. Second, it reduces soil compaction. Both of these effects will contribute to a healthier and more vigorous lawn. A power aerator is the fastest and most efficient way to aerate your lawn. Slightly overlap each pass until the entire lawn has been aerated. Another quick, and easy, way to aerate your lawn is to use, Yardiac recommended, Lawn Aeration Shoes. All you have to do is walk across your lawn. There's no heavy machinery to pull! After you finish aerating your lawn, any cores left lying on the grass should be removed. The most effective way to do this is with old fashioned hard work, and a rake. Another idea is to drag a piece of chain-link fencing around your lawn behind a mower, or by hand. The fencing will break up the cores into very small pieces. Another approach is to simply set the blade on your mower a little lower than normal, then mow over the cores. A third option, which works great for large areas, is the Lawn Vacuum. Immediately seed and fertilize your lawn. (Don't miss out on our applicators!) Cover any bare spots with your favorite "compost" and re-seed. Thoroughly water your lawn for seven days! Continue to water your lawn until temperature are consistently below 40 degrees . Sit back and wait for Spring and the Greenest Lawn on the block!

Lawn Spreader Fertilization Tips

Avoid Those Unsightly "Fertilizer Lines" Tens of thousands of Americans are guilty of producing undesirable fertilizer lines each year. This occurs when the entire surface area is not evenly treated. Fertilizer application is only effective if you ensure uniform coverage. There are two basic types of spreaders: broadcast spreaders and drop spreaders. In general, we recommend the use a broadcast spreader to apply fertilizer or seed over a large area. Broadcast spreaders shoot the desired material out and away from the machine in a wide arc covering a larger area. However they are limited -- Broadcast spreaders will not work with dense, heavy material such as compost or mulch.

FERTILIZER APPLICATION

  1. Read the label completely before using.
  2. Remove debris, toys, etc from the lawn.
  3. Use a good broadcast spreader with an accurate flow setting.
  4. Wash and lubricate spreader after use.
  5. Fill the spreader on the drive or walk and not on the lawn.
  6. Sweep up spilt fertilizer. (Could Stain)
  7. Shut off the spreader when stopping or turning.
  8. Apply half of the required fertilizer in one direction on the lawn (i.e. north/south).

Apply the remaining fertilizer across the lawn (i.e. east/west). This will help to provide even coverage and prevent streaking from missed spots and overlap.

  • Store any remaining fertilizer in a cool dry place.
  • Wash hands after using fertilizer.

HOW TO CALIBRATE YOUR FERTILIZER SPREADER

If your spreader's setting is not listed on the bag, you can determine which setting to use by conducting this simple test:

  1. Read all directions and precautions on the bag.
  2. Weigh out enough of the fertilizer to cover 100m2 and put it in the spreader. (Bathroom scales will help you do this.)
  3. Set your spreader on a low setting. (Usually one quarter of the way open is a good starting point.)
  4. Spread the material you put in the spreader over 100m2 (10m x 10m) [1076 sq. ft. (33 ft x 33 ft)].
  5. Ideally the product will run out when you get to the end of the 100m2 area. If you have a little left over. Increase the setting slightly. If you don't have enough to cover the full 100m2, reduce the setting slightly.
  6. Write the setting and product name on a piece of tape and apply to the spreader for future reference. Browse our Lawn Spreader Department