 This is a common question - here a Yardiac's viewpoint:
Seeds vary in size from large ones like avocado and some beans, to the very minute seeds of lettuces and pansies. Small seeds must be placed on the surface of the seed-raising mix because if they are covered too thickly they will not germinate. Other seeds like sweet corn are planted at twice the depth of the thickness of the seed itself, and that is the basic rule to follow with all seeds.
There are several options when planting seeds in the ground. Some seed companies are supplying a length of tape that is impregnated with seed such as radish that is evenly spaced. The tape is laid out in a straight line as a row, and the seeds will germinate at regular intervals.
Happy Planting!
This is a common question - here a Yardiac's viewpoint:
Seeds vary in size from large ones like avocado and some beans, to the very minute seeds of lettuces and pansies. Small seeds must be placed on the surface of the seed-raising mix because if they are covered too thickly they will not germinate. Other seeds like sweet corn are planted at twice the depth of the thickness of the seed itself, and that is the basic rule to follow with all seeds.
There are several options when planting seeds in the ground. Some seed companies are supplying a length of tape that is impregnated with seed such as radish that is evenly spaced. The tape is laid out in a straight line as a row, and the seeds will germinate at regular intervals.
Happy Planting!
Showing posts with label bulbs and seeds. Show all posts
Showing posts with label bulbs and seeds. Show all posts
Friday, January 29, 2010
How Deep Do I Plant My Seeds?
This is a common question - here a Yardiac's viewpoint:
Seeds vary in size from large ones like avocado and some beans, to the very minute seeds of lettuces and pansies. Small seeds must be placed on the surface of the seed-raising mix because if they are covered too thickly they will not germinate. Other seeds like sweet corn are planted at twice the depth of the thickness of the seed itself, and that is the basic rule to follow with all seeds.
There are several options when planting seeds in the ground. Some seed companies are supplying a length of tape that is impregnated with seed such as radish that is evenly spaced. The tape is laid out in a straight line as a row, and the seeds will germinate at regular intervals.
Happy Planting!


Thursday, January 28, 2010
Sow, Sow, Sow, Your Seeds!
 If you are going to grow directly from seeds, it is just about time to get started. You will need light, growing media,and a heat mat.
Many who try to start seeds in a sunny window end up disappointed. You are much better off and can grow a whole garden's worth - hundreds of plants - under a 40-inch Grow –Light fluorescent fixture.
It works best if it’s suspended on chains, very close to the seed cups so the plants don't become spindly reaching for the light. The chains allow you to adjust that height as the plants grow. You can purchase fancy tiered racks or light tables, but any table will do.
We always recommend using heating pads to encourage root growth, though that isn't necessary for a beginner.
A seed-starter kit, which includes a dome that creates a greenhouse effec. It offers two ventilation points on its top, a UL Listed Waterproof Heat Mat, 11 inch by 22 inch Watertight Base Tray, 72-Cell Seedling Insert, 48 seed cups, and markers.
Now you just need to determine How many seeds do you plant? If you want just six tomato plants, do you plant six seeds?
If you are going to grow directly from seeds, it is just about time to get started. You will need light, growing media,and a heat mat.
Many who try to start seeds in a sunny window end up disappointed. You are much better off and can grow a whole garden's worth - hundreds of plants - under a 40-inch Grow –Light fluorescent fixture.
It works best if it’s suspended on chains, very close to the seed cups so the plants don't become spindly reaching for the light. The chains allow you to adjust that height as the plants grow. You can purchase fancy tiered racks or light tables, but any table will do.
We always recommend using heating pads to encourage root growth, though that isn't necessary for a beginner.
A seed-starter kit, which includes a dome that creates a greenhouse effec. It offers two ventilation points on its top, a UL Listed Waterproof Heat Mat, 11 inch by 22 inch Watertight Base Tray, 72-Cell Seedling Insert, 48 seed cups, and markers.
Now you just need to determine How many seeds do you plant? If you want just six tomato plants, do you plant six seeds?
Wednesday, January 20, 2010
Protect your Spring Bulbs from Critters!
 Between the squirrels, moles, deer and rabbits, having a successful spring bulb display can be challenging and frustrating. But there are several steps you can take to outwit these critters.
Some gardeners have had success with repellents such as mothballs or blood meal. However, the best trick we have found is to dip the bulbs in a product called Tree Guard before planting them.
Between the squirrels, moles, deer and rabbits, having a successful spring bulb display can be challenging and frustrating. But there are several steps you can take to outwit these critters.
Some gardeners have had success with repellents such as mothballs or blood meal. However, the best trick we have found is to dip the bulbs in a product called Tree Guard before planting them.
 Tree Guard's latex based formula resists water and keeps working for an entire season. A unique latex polymer carries the active ingredient, Bitrex, and holds it to the surface of the plant, resisting rain, and wash-off for up to 100 days is what makes TREE GUARD different. Tree Guard has a foul taste and smell that critters know to stay away from! It really does work.
Then, cover the bulbs with a few handfuls of a sharp gravel as a good deterrent because it hurts the squirrels' feet. And if you can't get the squirrels to leave your tulips alone, try planting daffodils. they don't like them.
Click Here to Order Tree Guard or to see our full line of critter ridders!
Tree Guard's latex based formula resists water and keeps working for an entire season. A unique latex polymer carries the active ingredient, Bitrex, and holds it to the surface of the plant, resisting rain, and wash-off for up to 100 days is what makes TREE GUARD different. Tree Guard has a foul taste and smell that critters know to stay away from! It really does work.
Then, cover the bulbs with a few handfuls of a sharp gravel as a good deterrent because it hurts the squirrels' feet. And if you can't get the squirrels to leave your tulips alone, try planting daffodils. they don't like them.
Click Here to Order Tree Guard or to see our full line of critter ridders!
Tuesday, January 05, 2010
Start Planting Seeds Indoors Today
 Growing plants from seeds can be exciting. If you decide in late winter or early spring that you want to try this, follow the charts and directions on the seed packets. This can be a time consuming process, because you will have to nurture the sees in an indoor setting or cold frame, but it does give you a head start on the season.
You will need starting trays, flats, a special seed starting mix, a mister, lots of light, and proper temperatures. Most people's
Growing plants from seeds can be exciting. If you decide in late winter or early spring that you want to try this, follow the charts and directions on the seed packets. This can be a time consuming process, because you will have to nurture the sees in an indoor setting or cold frame, but it does give you a head start on the season.
You will need starting trays, flats, a special seed starting mix, a mister, lots of light, and proper temperatures. Most people's  windowsills do not offer sufficient light or heat, and some plants require what is called bottom heating, provided by coils, or a heat mat to encourage germination. Artificial lights, such as those used with houseplant work well with seedlings. Remember to keep the lights just a few inches above your seed trays.
The First Step Sowing Your Seeds
Fill your pots or flats, with your potting mixture, up to 1/4 inch of the top. Then, level the surface. (It's ideal to water the soil and allow it to drain thoroughly before sowing the seeds.) Use a pencil to make a hole for each seed, keeping in mind that most seeds will need to be planted four times as deep as the width of the seed. For fine seeds, cover them with a fine layer of soil.
windowsills do not offer sufficient light or heat, and some plants require what is called bottom heating, provided by coils, or a heat mat to encourage germination. Artificial lights, such as those used with houseplant work well with seedlings. Remember to keep the lights just a few inches above your seed trays.
The First Step Sowing Your Seeds
Fill your pots or flats, with your potting mixture, up to 1/4 inch of the top. Then, level the surface. (It's ideal to water the soil and allow it to drain thoroughly before sowing the seeds.) Use a pencil to make a hole for each seed, keeping in mind that most seeds will need to be planted four times as deep as the width of the seed. For fine seeds, cover them with a fine layer of soil.
 What About Humidity and Moisture
Potting soil should be kept evenly moist, but not soggy. Soggy soil will cause the seeds to rot. Use a fine sprayer to water freshly planted seeds or seedlings. Watering from the bottom is ideal. To keep the humidity and moisture levels even, slip your pots and flats into plastic bags. It will also reduce the frequency of watering. Another great idea is a mini greenhouse. It's the perfect way to protect, and nurture, your plants. It will also enable you to regulate the temperature, and limit exposure to the immediate environment.
Lighting
Some seeds require more light than others, to germinate. Read the label on your seed packet, to guide you. Once germination is complete, all seedlings need lighting to grow into healthy plants. Supplemental light can be helpful.
What About Humidity and Moisture
Potting soil should be kept evenly moist, but not soggy. Soggy soil will cause the seeds to rot. Use a fine sprayer to water freshly planted seeds or seedlings. Watering from the bottom is ideal. To keep the humidity and moisture levels even, slip your pots and flats into plastic bags. It will also reduce the frequency of watering. Another great idea is a mini greenhouse. It's the perfect way to protect, and nurture, your plants. It will also enable you to regulate the temperature, and limit exposure to the immediate environment.
Lighting
Some seeds require more light than others, to germinate. Read the label on your seed packet, to guide you. Once germination is complete, all seedlings need lighting to grow into healthy plants. Supplemental light can be helpful.
 Take Care of Those Seedlings
Caring for your seedlings in the weeks following germination is critical to their . Remember, keep the soil moist, but not soggy. Small pots and flats dry quickly, so be sure to check it frequently. If your seedlings are growing in the light of a window, turn them often, to encourage straight stems.
The first two leaves you will see on the plant are not true leaves. They are food storage cells, called cotyledons. Once the first true leaves have developed, it's time to start fertilizing. Choose a good organic fertilizer and use a weak solution once a week.
Take Care of Those Seedlings
Caring for your seedlings in the weeks following germination is critical to their . Remember, keep the soil moist, but not soggy. Small pots and flats dry quickly, so be sure to check it frequently. If your seedlings are growing in the light of a window, turn them often, to encourage straight stems.
The first two leaves you will see on the plant are not true leaves. They are food storage cells, called cotyledons. Once the first true leaves have developed, it's time to start fertilizing. Choose a good organic fertilizer and use a weak solution once a week.
Friday, September 18, 2009
Buying and Placing a Toad House
 A good toad house should be airy and provide shade and cooling to the toad. It shouldn’t be a "hot box". The house should ideally have no bottom, so the toads can burrow into the soil under the house if they'd like to. If it is a house with a bottom, you can bury the bottom of the house into the dirt a bit, so at least they will sit in dirt and not on resin or clay, but since toads like to burrow, they might find such a house less attractive than an open bottomed one.
 The toad house should be placed in a shady place, not in the middle of a garden that gets direct sun for 6 hours straight. It would be wise to set the house in the middle of lots of plants or under a bush, that way, its in the garden where the toad can eat all the insects, but its not out in the middle of nowhere with the sun beating it. Remember, toads are nocturnal and avoid sun to avoid dehydration. Also, the house should be near water of some kind, even if you provide the water dish yourself, which is what we do. Toads just like to soak in the water, not swim, so it doesn’t need to be deep but it does need to be refilled often. It will also help if your garden has lots of worms and crickets and other insencts in abundance
Sunday, September 13, 2009
Seed Balls - Good For Your Garden -Better for Your Community
Seed balls (AKA SeedBallZ)were historically sown by Native Americans to prevent  birds from gobbling up their valuable seeds, but they are now made in the USA in work supportive programs for developmentally disabled workers. There are easy to plant; Just toss on prepared soil and keep watered! Seed balls can be stored in a dry, cool place for up to 3 years before planting.
Press SeedBallz into the ground, pots, or scatter in fields (8 to 10 inches apart, or closer for a more compact look). 8 SeedBallz (per package) is enough to cover approx. 8 sq. ft. or 1 sq. ft. per ball. Each one of the SeedBallz contains approximately a whole packet of seeds, depending on the seed size. Germination time is approximately 7 to 45 days. Store SeedBallz in a cool, dry place.
Here is a nice video on how to plant Seed Ballz
birds from gobbling up their valuable seeds, but they are now made in the USA in work supportive programs for developmentally disabled workers. There are easy to plant; Just toss on prepared soil and keep watered! Seed balls can be stored in a dry, cool place for up to 3 years before planting.
Press SeedBallz into the ground, pots, or scatter in fields (8 to 10 inches apart, or closer for a more compact look). 8 SeedBallz (per package) is enough to cover approx. 8 sq. ft. or 1 sq. ft. per ball. Each one of the SeedBallz contains approximately a whole packet of seeds, depending on the seed size. Germination time is approximately 7 to 45 days. Store SeedBallz in a cool, dry place.
Here is a nice video on how to plant Seed Ballz
birds from gobbling up their valuable seeds, but they are now made in the USA in work supportive programs for developmentally disabled workers. There are easy to plant; Just toss on prepared soil and keep watered! Seed balls can be stored in a dry, cool place for up to 3 years before planting.
Press SeedBallz into the ground, pots, or scatter in fields (8 to 10 inches apart, or closer for a more compact look). 8 SeedBallz (per package) is enough to cover approx. 8 sq. ft. or 1 sq. ft. per ball. Each one of the SeedBallz contains approximately a whole packet of seeds, depending on the seed size. Germination time is approximately 7 to 45 days. Store SeedBallz in a cool, dry place.
Here is a nice video on how to plant Seed Ballz
Tuesday, March 17, 2009
Corn Gluten - The Natural Herbicide
Safe For Your Vegetables, Flowers and Lawn
In 1985, a research project began at Iowa State University, by award winning scientist Dr. Nick Christians. His experiments led to the development of Concern Weed Prevention Plus, a natural product for weed control made from 100% corn gluten meal.
Corn gluten meal is a by-product of the wet-milling process  and is sold as a feed material for cattle, poultry, and other livestock. It has been used in fish food, for commercial fish production, and is also a primary ingredient in many dog food products. Corn gluten meal is produced as a fine yellow powder and is pelletized for easier application to the soil.
Here's How It Works
The corn gluten meal in Concern Weed Prevention Plus inhibits root formation of germinating weeds. Without roots, the weed plants cannot get water, and soon die.
Learn Why We Call It Plus
Corn gluten meal is composed of 10% nitrogen. Nitrogen is a valuable plant nutrient responsible for the vivid green color of healthy plants. The nitrogen in Weed Prevention Plus is in a natural slow-release form. This means it becomes available to the plants over an extended period of time, so it will not burn your plants. Applying Weed Prevention Plus not only controls weeds, but contributes to healthier plants and soil. Plants need a complete, and complex, range of nutrients for optimum growth. Use your regular fertilizer along with Weed Prevention Plus without fear of overfeeding.
RESEARCH DATA
Dr. Christians' original project was designed to study the effects of a fungal pathogen on grasses. Corn gluten meal was combined with a fungus organism and then applied to the soil of a new golf course green at the field research area. At the same time, adjacent field areas were treated with the same amount of corn meal without the fungus. The study area was then seeded with creeping bentgrass.While the fungal organism/corn meal combination did not have the reducing effect on the grass that was anticipated, the control plots that received only raw corn gluten meal did have very thin grass stands. Close observation showed that something in the gluten meal stopped normal root formation at the time of germination while shoot tissue developed normally. When the soil surface dried, plants that had not developed a root system simply died.Field tests established that corn gluten meal could be used to inhibit the establishment of annual weeds, such as crabgrass, that germinate into turf. In July 1991, U.S. Patent No. 5,030,268 was issued on the use of corn gluten meal as a natural preemergence herbicide, on turf. Following submission of new data resulting from new research, the original patent was reissued in April 1994 as U.S. Patent Re. 34594. This reissue expands the original claims to include uses in field crops, gardens, and other agricultural areas.
SPECIES AFFECTED
Twenty-two plants species have been screened for susceptibility to corn gluten meal: black medic, black nightshade, buckhorn plantain, catchweed bedstraw, common lambsquarters, curly dock, dandelion, purslane, redroot pigweed, velvetleaf, annual bluegrass, barnyardgrass, creeping bentgrass, giant foxtail, green
and is sold as a feed material for cattle, poultry, and other livestock. It has been used in fish food, for commercial fish production, and is also a primary ingredient in many dog food products. Corn gluten meal is produced as a fine yellow powder and is pelletized for easier application to the soil.
Here's How It Works
The corn gluten meal in Concern Weed Prevention Plus inhibits root formation of germinating weeds. Without roots, the weed plants cannot get water, and soon die.
Learn Why We Call It Plus
Corn gluten meal is composed of 10% nitrogen. Nitrogen is a valuable plant nutrient responsible for the vivid green color of healthy plants. The nitrogen in Weed Prevention Plus is in a natural slow-release form. This means it becomes available to the plants over an extended period of time, so it will not burn your plants. Applying Weed Prevention Plus not only controls weeds, but contributes to healthier plants and soil. Plants need a complete, and complex, range of nutrients for optimum growth. Use your regular fertilizer along with Weed Prevention Plus without fear of overfeeding.
RESEARCH DATA
Dr. Christians' original project was designed to study the effects of a fungal pathogen on grasses. Corn gluten meal was combined with a fungus organism and then applied to the soil of a new golf course green at the field research area. At the same time, adjacent field areas were treated with the same amount of corn meal without the fungus. The study area was then seeded with creeping bentgrass.While the fungal organism/corn meal combination did not have the reducing effect on the grass that was anticipated, the control plots that received only raw corn gluten meal did have very thin grass stands. Close observation showed that something in the gluten meal stopped normal root formation at the time of germination while shoot tissue developed normally. When the soil surface dried, plants that had not developed a root system simply died.Field tests established that corn gluten meal could be used to inhibit the establishment of annual weeds, such as crabgrass, that germinate into turf. In July 1991, U.S. Patent No. 5,030,268 was issued on the use of corn gluten meal as a natural preemergence herbicide, on turf. Following submission of new data resulting from new research, the original patent was reissued in April 1994 as U.S. Patent Re. 34594. This reissue expands the original claims to include uses in field crops, gardens, and other agricultural areas.
SPECIES AFFECTED
Twenty-two plants species have been screened for susceptibility to corn gluten meal: black medic, black nightshade, buckhorn plantain, catchweed bedstraw, common lambsquarters, curly dock, dandelion, purslane, redroot pigweed, velvetleaf, annual bluegrass, barnyardgrass, creeping bentgrass, giant foxtail, green  foxtail, large crabgrass, orchardgrass, quackgrass, shattercane, smooth crabgrass, wooly cupgrass, and yellow foxtail. Corn gluten meal significantly reduced plant survival, shoot length, and root development of all tested species.
EFFECTIVENESS
Applied at a rate of 20 lbs. per 1000 sq. ft. in both the spring and fall, corn gluten meal reduced crabgrass by 86% at the end of the first year; 98% at the end of the second year. Dandelion infestation was reduced 100% in plots treated for four years at the 20 lbs. per sq. ft. rate when applied in the spring and fall.There is no postemergence effect of corn gluten meal on weeds, grasses or plants. For optimum control apply Concern Weed Prevention Plus a few weeks before germination. Water in if there is no rain. Weeds without an established roots system need a drying out period of 2-3 days, in order to effectively kill the emerging weed.
foxtail, large crabgrass, orchardgrass, quackgrass, shattercane, smooth crabgrass, wooly cupgrass, and yellow foxtail. Corn gluten meal significantly reduced plant survival, shoot length, and root development of all tested species.
EFFECTIVENESS
Applied at a rate of 20 lbs. per 1000 sq. ft. in both the spring and fall, corn gluten meal reduced crabgrass by 86% at the end of the first year; 98% at the end of the second year. Dandelion infestation was reduced 100% in plots treated for four years at the 20 lbs. per sq. ft. rate when applied in the spring and fall.There is no postemergence effect of corn gluten meal on weeds, grasses or plants. For optimum control apply Concern Weed Prevention Plus a few weeks before germination. Water in if there is no rain. Weeds without an established roots system need a drying out period of 2-3 days, in order to effectively kill the emerging weed.
 and is sold as a feed material for cattle, poultry, and other livestock. It has been used in fish food, for commercial fish production, and is also a primary ingredient in many dog food products. Corn gluten meal is produced as a fine yellow powder and is pelletized for easier application to the soil.
Here's How It Works
The corn gluten meal in Concern Weed Prevention Plus inhibits root formation of germinating weeds. Without roots, the weed plants cannot get water, and soon die.
Learn Why We Call It Plus
Corn gluten meal is composed of 10% nitrogen. Nitrogen is a valuable plant nutrient responsible for the vivid green color of healthy plants. The nitrogen in Weed Prevention Plus is in a natural slow-release form. This means it becomes available to the plants over an extended period of time, so it will not burn your plants. Applying Weed Prevention Plus not only controls weeds, but contributes to healthier plants and soil. Plants need a complete, and complex, range of nutrients for optimum growth. Use your regular fertilizer along with Weed Prevention Plus without fear of overfeeding.
RESEARCH DATA
Dr. Christians' original project was designed to study the effects of a fungal pathogen on grasses. Corn gluten meal was combined with a fungus organism and then applied to the soil of a new golf course green at the field research area. At the same time, adjacent field areas were treated with the same amount of corn meal without the fungus. The study area was then seeded with creeping bentgrass.While the fungal organism/corn meal combination did not have the reducing effect on the grass that was anticipated, the control plots that received only raw corn gluten meal did have very thin grass stands. Close observation showed that something in the gluten meal stopped normal root formation at the time of germination while shoot tissue developed normally. When the soil surface dried, plants that had not developed a root system simply died.Field tests established that corn gluten meal could be used to inhibit the establishment of annual weeds, such as crabgrass, that germinate into turf. In July 1991, U.S. Patent No. 5,030,268 was issued on the use of corn gluten meal as a natural preemergence herbicide, on turf. Following submission of new data resulting from new research, the original patent was reissued in April 1994 as U.S. Patent Re. 34594. This reissue expands the original claims to include uses in field crops, gardens, and other agricultural areas.
SPECIES AFFECTED
Twenty-two plants species have been screened for susceptibility to corn gluten meal: black medic, black nightshade, buckhorn plantain, catchweed bedstraw, common lambsquarters, curly dock, dandelion, purslane, redroot pigweed, velvetleaf, annual bluegrass, barnyardgrass, creeping bentgrass, giant foxtail, green
and is sold as a feed material for cattle, poultry, and other livestock. It has been used in fish food, for commercial fish production, and is also a primary ingredient in many dog food products. Corn gluten meal is produced as a fine yellow powder and is pelletized for easier application to the soil.
Here's How It Works
The corn gluten meal in Concern Weed Prevention Plus inhibits root formation of germinating weeds. Without roots, the weed plants cannot get water, and soon die.
Learn Why We Call It Plus
Corn gluten meal is composed of 10% nitrogen. Nitrogen is a valuable plant nutrient responsible for the vivid green color of healthy plants. The nitrogen in Weed Prevention Plus is in a natural slow-release form. This means it becomes available to the plants over an extended period of time, so it will not burn your plants. Applying Weed Prevention Plus not only controls weeds, but contributes to healthier plants and soil. Plants need a complete, and complex, range of nutrients for optimum growth. Use your regular fertilizer along with Weed Prevention Plus without fear of overfeeding.
RESEARCH DATA
Dr. Christians' original project was designed to study the effects of a fungal pathogen on grasses. Corn gluten meal was combined with a fungus organism and then applied to the soil of a new golf course green at the field research area. At the same time, adjacent field areas were treated with the same amount of corn meal without the fungus. The study area was then seeded with creeping bentgrass.While the fungal organism/corn meal combination did not have the reducing effect on the grass that was anticipated, the control plots that received only raw corn gluten meal did have very thin grass stands. Close observation showed that something in the gluten meal stopped normal root formation at the time of germination while shoot tissue developed normally. When the soil surface dried, plants that had not developed a root system simply died.Field tests established that corn gluten meal could be used to inhibit the establishment of annual weeds, such as crabgrass, that germinate into turf. In July 1991, U.S. Patent No. 5,030,268 was issued on the use of corn gluten meal as a natural preemergence herbicide, on turf. Following submission of new data resulting from new research, the original patent was reissued in April 1994 as U.S. Patent Re. 34594. This reissue expands the original claims to include uses in field crops, gardens, and other agricultural areas.
SPECIES AFFECTED
Twenty-two plants species have been screened for susceptibility to corn gluten meal: black medic, black nightshade, buckhorn plantain, catchweed bedstraw, common lambsquarters, curly dock, dandelion, purslane, redroot pigweed, velvetleaf, annual bluegrass, barnyardgrass, creeping bentgrass, giant foxtail, green  foxtail, large crabgrass, orchardgrass, quackgrass, shattercane, smooth crabgrass, wooly cupgrass, and yellow foxtail. Corn gluten meal significantly reduced plant survival, shoot length, and root development of all tested species.
EFFECTIVENESS
Applied at a rate of 20 lbs. per 1000 sq. ft. in both the spring and fall, corn gluten meal reduced crabgrass by 86% at the end of the first year; 98% at the end of the second year. Dandelion infestation was reduced 100% in plots treated for four years at the 20 lbs. per sq. ft. rate when applied in the spring and fall.There is no postemergence effect of corn gluten meal on weeds, grasses or plants. For optimum control apply Concern Weed Prevention Plus a few weeks before germination. Water in if there is no rain. Weeds without an established roots system need a drying out period of 2-3 days, in order to effectively kill the emerging weed.
foxtail, large crabgrass, orchardgrass, quackgrass, shattercane, smooth crabgrass, wooly cupgrass, and yellow foxtail. Corn gluten meal significantly reduced plant survival, shoot length, and root development of all tested species.
EFFECTIVENESS
Applied at a rate of 20 lbs. per 1000 sq. ft. in both the spring and fall, corn gluten meal reduced crabgrass by 86% at the end of the first year; 98% at the end of the second year. Dandelion infestation was reduced 100% in plots treated for four years at the 20 lbs. per sq. ft. rate when applied in the spring and fall.There is no postemergence effect of corn gluten meal on weeds, grasses or plants. For optimum control apply Concern Weed Prevention Plus a few weeks before germination. Water in if there is no rain. Weeds without an established roots system need a drying out period of 2-3 days, in order to effectively kill the emerging weed.
Friday, December 07, 2007
Planting & Caring for Evergreens
A single specimen evergreen tree provides a stately focal point in your landscape. A screen of them provides a permanent year-round windbreak and can obscure an unwanted view. When deciduous trees are barren during the winter months, evergreen trees provide color.
 When choosing the location for any tree, remember that it is just that - a tree. White Pines, Spruce, and Hemlock are charming as your plants, but space that will be necessary in the future should be taken into consideration.
When choosing the location for any tree, remember that it is just that - a tree. White Pines, Spruce, and Hemlock are charming as your plants, but space that will be necessary in the future should be taken into consideration.It is important to remember that evergreens do not like 'wet feet'. Plant evergreens in an area with ample drainage.
Planting
Evergreens can be safely planted anytime from March through November in most areas. Spring and Fall are the most ideal planting times. Check your local nursery, to be sure about what time is best for your area.
Upkeep

Water your evergreen tree 2-3 times a week during its first year. Water whenever the soil feels dry. During the next few years, supplemental watering will also be needed, although not as often. Do not forget to water during dry spells. Water thoroughly when you do water, allowing the moisture to penetrate to a 2-3" depth. A light watering encourages the tree roots to grow near the soil surface only. The tree will not survive a hot dry summer with only surface roots.
Fertilizing
Apply a general purpose (10-10-10) or tree fertilizer each Spring or Fall. Always follow the product label and never apply more fertilizer than is recommended.
Tuesday, November 27, 2007
Plant Your Holland Bulbs
Select large, firm bulbs. Small nicks and loose skins will not affect the bulbs' growth or flowers.

Store the bulbs in a cool (under 65 degrees), dry place until you are ready to plant. Put bulbs into the ground when the soil temperature falls below 60 degrees (late September to early November).
Good soil drainage is crucial! To assure good drainage, dig out the planting area to a depth of 10". If your soil is heavy with clay, mix in a composted manure up to 50% in volume.
Return a 2" layer of conditioned soil to the bottom of the planting area. Mix in either Bone Meal or Bulb food into the conditioned soil  following directions on the package.
following directions on the package.Position tulips, daffodils and other large bulbs 8" deep from the bulb base to ground level. Space the bulbs 4-6" apart. Smaller bulbs, such as crocuses, can be planted 5" deep, spaced 2-3" apart.
Cover the bulbs with half the dug out soil. Water the area thoroughly. Fill the planting area with the remaining soil and water  the area again.
the area again.
Cover the planted area with a 2-3" layer of shredded hardwood mulch.
After the flowers have bloomed, and the petals have faded, cut off the flower heads with scissors.
Allow the leaves and stems to die down naturally. During this period they are manufacturing food to produce new flowers for the following Spring.
Monday, October 08, 2007
Bahia Grass
Many communities across the country are asking homeowners to conserve water, and power, throughout the Summer season. In addition to that, we have an increasingly environmentally conscious country, which is a great thing. There are many great ways to conserve energy.  Everyone is familiar with the Compact Fluorescent light bulbs, but have you ever considered switching grasses?
Bahia grass is a warm grass and is typically found across the Southeast, and in Southern California. It is known for it's drought resistance, and low maintenance. It's a great seed starter. Bahia grass is a perennial grass that lasts indefinitely. Another popular feature is high disease and insect resistance. In addition, it survives in a variety of soils, from sandy to clay. Bahia grass is very resilient, to close grazing and traffic wear. It will grow thick enough to compete with weeds, and respond well to nitrogen applications, creating the coveted green lawn.
Disadvantages include yellowing in the Spring, and Fall. However, this is easily overcome with a product like Ironite. Another thing to watch out for is an open growth habit over time, or thinning spaces. You can control this with good lawn aeration. There are several way to do
Everyone is familiar with the Compact Fluorescent light bulbs, but have you ever considered switching grasses?
Bahia grass is a warm grass and is typically found across the Southeast, and in Southern California. It is known for it's drought resistance, and low maintenance. It's a great seed starter. Bahia grass is a perennial grass that lasts indefinitely. Another popular feature is high disease and insect resistance. In addition, it survives in a variety of soils, from sandy to clay. Bahia grass is very resilient, to close grazing and traffic wear. It will grow thick enough to compete with weeds, and respond well to nitrogen applications, creating the coveted green lawn.
Disadvantages include yellowing in the Spring, and Fall. However, this is easily overcome with a product like Ironite. Another thing to watch out for is an open growth habit over time, or thinning spaces. You can control this with good lawn aeration. There are several way to do  this. You can use a machine that you pull, or push, or you can just use aeration shoes, as you mow. One other obstacle that you may encounter is weed control. Just like most other Southern grasses, it is not tolerant of weed control products. It is in the weed family, itself. You will need to mow, and fertilize the grass, and be careful of over watering, to avoid having an infestation of undesirable growth, just like St.Augustine, or other Southern varieties. If you do have a problem, you will want to spot treat. Bahia grass can have a coarse texture, and is not suitable for high PH soils.
There are three varieties. Argentine is preferred by homeowners in Florida. Pensacola is noted for it's resilience in the transitional regions; And, Tifton 9 is enjoyed by cows, and horses across the Southeast. It's perfect for a pasture.
this. You can use a machine that you pull, or push, or you can just use aeration shoes, as you mow. One other obstacle that you may encounter is weed control. Just like most other Southern grasses, it is not tolerant of weed control products. It is in the weed family, itself. You will need to mow, and fertilize the grass, and be careful of over watering, to avoid having an infestation of undesirable growth, just like St.Augustine, or other Southern varieties. If you do have a problem, you will want to spot treat. Bahia grass can have a coarse texture, and is not suitable for high PH soils.
There are three varieties. Argentine is preferred by homeowners in Florida. Pensacola is noted for it's resilience in the transitional regions; And, Tifton 9 is enjoyed by cows, and horses across the Southeast. It's perfect for a pasture.
 Bahia grass should be mowed at three to four inches, at intervals of seven to seventeen days. You will find that a rotary mower works best.
Be sure to post your suggestions, and experiences, good or bad, with Bahia grass. Let's all learn from each other!
Bahia grass should be mowed at three to four inches, at intervals of seven to seventeen days. You will find that a rotary mower works best.
Be sure to post your suggestions, and experiences, good or bad, with Bahia grass. Let's all learn from each other!
Everyone is familiar with the Compact Fluorescent light bulbs, but have you ever considered switching grasses?
Bahia grass is a warm grass and is typically found across the Southeast, and in Southern California. It is known for it's drought resistance, and low maintenance. It's a great seed starter. Bahia grass is a perennial grass that lasts indefinitely. Another popular feature is high disease and insect resistance. In addition, it survives in a variety of soils, from sandy to clay. Bahia grass is very resilient, to close grazing and traffic wear. It will grow thick enough to compete with weeds, and respond well to nitrogen applications, creating the coveted green lawn.
Disadvantages include yellowing in the Spring, and Fall. However, this is easily overcome with a product like Ironite. Another thing to watch out for is an open growth habit over time, or thinning spaces. You can control this with good lawn aeration. There are several way to do this. You can use a machine that you pull, or push, or you can just use aeration shoes, as you mow. One other obstacle that you may encounter is weed control. Just like most other Southern grasses, it is not tolerant of weed control products. It is in the weed family, itself. You will need to mow, and fertilize the grass, and be careful of over watering, to avoid having an infestation of undesirable growth, just like St.Augustine, or other Southern varieties. If you do have a problem, you will want to spot treat. Bahia grass can have a coarse texture, and is not suitable for high PH soils.
There are three varieties. Argentine is preferred by homeowners in Florida. Pensacola is noted for it's resilience in the transitional regions; And, Tifton 9 is enjoyed by cows, and horses across the Southeast. It's perfect for a pasture.
Bahia grass should be mowed at three to four inches, at intervals of seven to seventeen days. You will find that a rotary mower works best.
Be sure to post your suggestions, and experiences, good or bad, with Bahia grass. Let's all learn from each other!
Thursday, September 06, 2007
Dividing & Supporting Your Peonies
Dividing peonies Peonies grow happily for years without being disturbed, getting bigger and better with each passing year. However, they can grow too big and overcrowd other plants. Peonies eventually need to be divided, because they simply get  too large for their own good--if you don’t divide them, they’ll stop blooming. In order to keep your peonies in top shape, divide them once they stop blooming (usually the third year) or if they begin to overcrowd other plants. Divide peony plants in the fall.

too large for their own good--if you don’t divide them, they’ll stop blooming. In order to keep your peonies in top shape, divide them once they stop blooming (usually the third year) or if they begin to overcrowd other plants. Divide peony plants in the fall.
There are just a few easy steps to peony division. Dig area around the plant with a sharp spade. You are going to sever some roots. It’s okay--the plant will survive. Gently remove the clump from the ground and set on a drop cloth or hauling bag. Place two forks, back-to-back, in the center of the clump. Pry apart the clump into two pieces. Continue dividing each of the pieces, making sure each division section has a shoot to grow upward and roots to grow downward. (Or you can plant larger divisions, for bigger plants.) Each division should have at least three eyes.
Remove any dead or woody parts of the plant. Also, clip back about half of the foliage on the plant so that it doesn’t compete with the root system for growth. Immediately plant the divisions. You can place the mother plant back in the spot she was occupying before the division.
Water and foliar fertilize each division well. In areas that receive frost, mulch around the base of the plant with shredded bark or leaves. Continue to water well (to help roots grow strong) until the ground freezes.
Supporting peonies Because peonies grow so quickly, they need a little additional support. Give them a helping hand with plant supports to help keep the bush upright, rather than flopping onto the ground. As peonies come into full-blown bloom, the weight of each blossom can bow stems to the ground. Keep your top-heavy peonies from flopping by inserting traditional peony rings or grow-through supports into soil when stems emerge in spring. For peonies drooping under the weight of rain-heavy blossoms, simply insert y-stakes to bring stems to an erect position.
Growing Picture Perfect Peonies
Peonies are late spring's most wonderful surprise. With embarrassingly little work, these plentiful perennials produce armloads of flowers whose heady fragrance can be detected nearl y anywhere in the garden. These beautiful blooms also bridge the gap between fading late-spring borders and the blooms of summer. Peonies only require a sunny, well-protected area to grow and bloom happily for decades.
There are many types to choose from. Hybrid peonies typically bloom early in the season often in shades of pink and red. Foliage is light to medium green.
y anywhere in the garden. These beautiful blooms also bridge the gap between fading late-spring borders and the blooms of summer. Peonies only require a sunny, well-protected area to grow and bloom happily for decades.
There are many types to choose from. Hybrid peonies typically bloom early in the season often in shades of pink and red. Foliage is light to medium green.
y anywhere in the garden. These beautiful blooms also bridge the gap between fading late-spring borders and the blooms of summer. Peonies only require a sunny, well-protected area to grow and bloom happily for decades.
There are many types to choose from. Hybrid peonies typically bloom early in the season often in shades of pink and red. Foliage is light to medium green.
Lactiflora peonies are commonly found in the United States and usually have larger flowers and darker colored foliage than hybrid peonies.
Japanese peonies commonly have a colorful grouping of sterile stamens surrounded by one or two rows of petals. Single peonies have single-petaled flowers. Double peonies consist primarily of all petals. Anemone and Semi-double peonies are between Japanese and Double peonies in form.
Planting your peonies
Peonies are easy to plant and the buds are obvious, so it's easy to get them right side up! Remember to soak roots in a bucket or trash can of water to keep them from drying out while you dig the planting hole. Never let hair roots dry out. Do not soak for more than 8 hours.
 Dig in! Dig a hole large enough to accommodate the roots without bending or crowding--about 20 to 24 inches wide and deep. Keep this topsoil in a separate pile for refilling the hole. Then scratch the sides of the hole so roots can penetrate easily. The sides of the hole should be 4 inches away from the tips of the roots when the roots are spread out in the hole. Avoid crowding the root system. (If drainage is poor, add 2 inches of gravel to the bottom of the hole.) Remember to space holes according to recommended plant spacing.
Eyes up! Remove the plant from the container of water. With sharp shears, prune any broken or damaged roots. Then place the peony plant in the hole, making sure that the red buds (which are called the "eyes") are about 1 1/2 to 2 inches below the soil’s surface. (Don’t plant too deeply or your peony may not bloom in the spring.) Spread the roots so they are not kinked or crossed. In warmer climates, plant peonies in late fall (October or November)--no more than 1 inch deep.
Watering in. Fill the hole and cover the roots with the soil from the hole. Pack the soil lightly around the roots to remove any air pockets. Water well. It’s important to provide enough water for your newly-planted peony so that the plant’s root system establishes itself well before winter. Deep waterings every 7 to 10 days are far superior to frequent light waterings. Plants need at least 1 inch of moisture each week, whether from natural rainfall or from irrigation. Try to water in the mornings.
Dig in! Dig a hole large enough to accommodate the roots without bending or crowding--about 20 to 24 inches wide and deep. Keep this topsoil in a separate pile for refilling the hole. Then scratch the sides of the hole so roots can penetrate easily. The sides of the hole should be 4 inches away from the tips of the roots when the roots are spread out in the hole. Avoid crowding the root system. (If drainage is poor, add 2 inches of gravel to the bottom of the hole.) Remember to space holes according to recommended plant spacing.
Eyes up! Remove the plant from the container of water. With sharp shears, prune any broken or damaged roots. Then place the peony plant in the hole, making sure that the red buds (which are called the "eyes") are about 1 1/2 to 2 inches below the soil’s surface. (Don’t plant too deeply or your peony may not bloom in the spring.) Spread the roots so they are not kinked or crossed. In warmer climates, plant peonies in late fall (October or November)--no more than 1 inch deep.
Watering in. Fill the hole and cover the roots with the soil from the hole. Pack the soil lightly around the roots to remove any air pockets. Water well. It’s important to provide enough water for your newly-planted peony so that the plant’s root system establishes itself well before winter. Deep waterings every 7 to 10 days are far superior to frequent light waterings. Plants need at least 1 inch of moisture each week, whether from natural rainfall or from irrigation. Try to water in the mornings.
 Mulch for protection. Mulch around the plant with 2 to 4 inches straw, wood chips, lawn clippings, or other organic material to reduce evaporation and maintain moisture. Keep the area weed free!
NOTE: Within a week to 10 days, your plant should begin to show new growth. Dormancy sometimes lasts longer than anticipated; so it may take longer to see any new growth. As a general rule, it is not necessary to fertilize until new growth has begun. It is normal for young peonies to yield only a few short flower stems the first year of growth. In subsequent years, flower number and form will improve.
Mulch for protection. Mulch around the plant with 2 to 4 inches straw, wood chips, lawn clippings, or other organic material to reduce evaporation and maintain moisture. Keep the area weed free!
NOTE: Within a week to 10 days, your plant should begin to show new growth. Dormancy sometimes lasts longer than anticipated; so it may take longer to see any new growth. As a general rule, it is not necessary to fertilize until new growth has begun. It is normal for young peonies to yield only a few short flower stems the first year of growth. In subsequent years, flower number and form will improve.
Dig in! Dig a hole large enough to accommodate the roots without bending or crowding--about 20 to 24 inches wide and deep. Keep this topsoil in a separate pile for refilling the hole. Then scratch the sides of the hole so roots can penetrate easily. The sides of the hole should be 4 inches away from the tips of the roots when the roots are spread out in the hole. Avoid crowding the root system. (If drainage is poor, add 2 inches of gravel to the bottom of the hole.) Remember to space holes according to recommended plant spacing.
Eyes up! Remove the plant from the container of water. With sharp shears, prune any broken or damaged roots. Then place the peony plant in the hole, making sure that the red buds (which are called the "eyes") are about 1 1/2 to 2 inches below the soil’s surface. (Don’t plant too deeply or your peony may not bloom in the spring.) Spread the roots so they are not kinked or crossed. In warmer climates, plant peonies in late fall (October or November)--no more than 1 inch deep.
Watering in. Fill the hole and cover the roots with the soil from the hole. Pack the soil lightly around the roots to remove any air pockets. Water well. It’s important to provide enough water for your newly-planted peony so that the plant’s root system establishes itself well before winter. Deep waterings every 7 to 10 days are far superior to frequent light waterings. Plants need at least 1 inch of moisture each week, whether from natural rainfall or from irrigation. Try to water in the mornings.
Mulch for protection. Mulch around the plant with 2 to 4 inches straw, wood chips, lawn clippings, or other organic material to reduce evaporation and maintain moisture. Keep the area weed free!
NOTE: Within a week to 10 days, your plant should begin to show new growth. Dormancy sometimes lasts longer than anticipated; so it may take longer to see any new growth. As a general rule, it is not necessary to fertilize until new growth has begun. It is normal for young peonies to yield only a few short flower stems the first year of growth. In subsequent years, flower number and form will improve. Thursday, July 05, 2007
Successful Seedlings
Why won't my seeds germinate? There are a number of possible factors which may interfere with germination. Use the following checklist to ensure that conditions are right for successful seed starting.

Provide adequate moisture. Seeds need a uniform supply of moisture during germination and seedling development. Excessive amounts may cause damage or damping off.
Regulate temperature. Most plants need temperatures of 65-75°F to sprout. Check requirements for individual plants.
Check planting depth. Small seeds are frequently covered too deep. Very fine seeds need little or no covering. Air is as essential as heat and moisture for germination.
Control harmful insects. Small, tender seedlings are easily destroyed by insects and need to be protected from them. Insecticidal soap is a safe, gentle product for controlling most insect pests.
Guard against damping off. Seedlings grown indoors are subject to damping off. This disease is favored by overwatering, too much heat, not enough space, or too little light and is characterized by the rot and collapse of seedlings at ground level. This soil-borne virus is one of the biggest causes of seedling loss. Using a sterile medium and a good fungicide can prevent seedlings from contracting this disease.
Check your growing conditions. When seeds sprout, move them to a spot where temperatures are moderate. The most vigorous plants are usually grown at about 60-65 ° F. Use heat mats, in early Spring, where necessary. Plants need 10 to 12 hours of good sunlight each day or they will become spindly.
There are a number of factors that affect seed germination. Check the seed packet to determine if all the requirements for temperature and light were met. If the soil was cold and excessively wet, the seeds may have rotted. Dig up one of the seeds and examine it. If it is swollen and soft, the seed has rotted and you'll need to start over. If the soil was too dry, the seeds may not have germinated or may have sprouted and then dried up.
Plants grow tall and leggy when there is insufficient light. If possible move your seedlings t o a sunnier location or use grow lights. You can also lower the temperature in the room and reduce the fertilizer to slow the plants' growth.
- Mold is an indication that the soil or growing medium is too wet and won't harm your plants as long as you can improve the growing conditions right away. Withhold water for a few days and try to increase the air circulation around the containers by adding a small fan or opening a door. You can also scrape some of the mold off or try transplanting into fresh growing medium.
Thursday, June 07, 2007
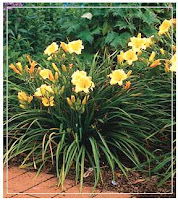
Dividing Daylilies
Daylilies are a wonderful and almost essential part of the summer garden. They provide a long season of colorful blossoms and attractive foliage, and ask little in return. Few perennials are as tough, long-lived, or pest-free.  Daylilies do, however, benefit from being dug up and divided every few years, a process their natural toughness allows them to endure with aplomb.
A clump of daylilies is formed of one or more fans—small plants made up of fibrous roots, a growing point (crown), and foliage. Each fan can reproduce itself each year, and before long a clump can increase into a sizable mass of plants. After five or six years, this mass becomes overgrown, producing fewer flowers each season. Dividing the clump and replanting newly separated fans rejuvenates the plants and rewards your efforts with a renewed flush of flowers the following summer.
Of course, you can divide your daylilies before they become overcrowded. You may want to do so to increase your supply of plants, for example, or to slow down those clumps that are
Daylilies do, however, benefit from being dug up and divided every few years, a process their natural toughness allows them to endure with aplomb.
A clump of daylilies is formed of one or more fans—small plants made up of fibrous roots, a growing point (crown), and foliage. Each fan can reproduce itself each year, and before long a clump can increase into a sizable mass of plants. After five or six years, this mass becomes overgrown, producing fewer flowers each season. Dividing the clump and replanting newly separated fans rejuvenates the plants and rewards your efforts with a renewed flush of flowers the following summer.
Of course, you can divide your daylilies before they become overcrowded. You may want to do so to increase your supply of plants, for example, or to slow down those clumps that are  threatening to overpower less robust neighbors in the garden. A large clump of daylilies will yield enough new plants to repopulate the original site, start a new bed, and provide extras to give away to friends.
The best time to divide and replant daylilies is after they have finished blooming, in late summer or early fall. This way the transplants will have time to become established before the first hard frost. In areas with short growing seasons, it is safer to wait until spring to divide daylilies; gardeners in mild climates can divide through the winter.
threatening to overpower less robust neighbors in the garden. A large clump of daylilies will yield enough new plants to repopulate the original site, start a new bed, and provide extras to give away to friends.
The best time to divide and replant daylilies is after they have finished blooming, in late summer or early fall. This way the transplants will have time to become established before the first hard frost. In areas with short growing seasons, it is safer to wait until spring to divide daylilies; gardeners in mild climates can divide through the winter.
Daylilies do, however, benefit from being dug up and divided every few years, a process their natural toughness allows them to endure with aplomb.
A clump of daylilies is formed of one or more fans—small plants made up of fibrous roots, a growing point (crown), and foliage. Each fan can reproduce itself each year, and before long a clump can increase into a sizable mass of plants. After five or six years, this mass becomes overgrown, producing fewer flowers each season. Dividing the clump and replanting newly separated fans rejuvenates the plants and rewards your efforts with a renewed flush of flowers the following summer.
Of course, you can divide your daylilies before they become overcrowded. You may want to do so to increase your supply of plants, for example, or to slow down those clumps that are threatening to overpower less robust neighbors in the garden. A large clump of daylilies will yield enough new plants to repopulate the original site, start a new bed, and provide extras to give away to friends.
The best time to divide and replant daylilies is after they have finished blooming, in late summer or early fall. This way the transplants will have time to become established before the first hard frost. In areas with short growing seasons, it is safer to wait until spring to divide daylilies; gardeners in mild climates can divide through the winter.
-
PREPARE A NEW DAYLILY BED Preparing the soil for a new daylily bed before digging the old clump allows you to get the divisions into the ground without delay, before their roots become dried and damaged from exposure to the open air. Remove any weeds from the chosen spot and work the soil to a depth of a foot or so, incorporating several inches of compost, well-rotted manure, or damp peat moss to make the soil more friable and moisture-retentive. Daylily divisions planted in well-prepared soil will begin to grow quickly and become established before the onset of winter.
- DIG THE CLUMP Cut back the clump's long outer leaves to about six inches to make it easier to handle. Try not to damage the new inner leaves growing in the center of each fan. With a spading fork, loosen the soil all around the clump. Work around the perimeter several times to free as many of the roots from the soil as possible. Because daylilies develop extensive root systems, it may be necessary to dig down 10 to 12 inches. Don't worry if you accidentally break a few of the longer roses—new ones will grow when the divisions are replanted.
Next, use the fork to pry the entire clump out of the ground. Shake or wash excess soil off the roots so you can see the individual fans.
Monday, June 04, 2007
Summer & Fall Blooming Bulbs
No other plants give the gardener more beauty, or a wider range of variety, color and flowering times than flowering bulbs. They produce flowers of incredible colors from one end of the growing season to the other. No other plant rewards you with so much pleasure for so little effort.
Summer-blooming bulbs
By planting heat-loving, summer-blooming bulbs such a s begonia, canna, calla lily, dahlia, and gladiolus, you can enjoy the beauty of the tropics and open your borders to the exotic flowers and foliage of South Africa, Mexico, and other equatorial locales without leaving your own backyard
Most summer-blooming bulbs are tender bulbs, which means, in areas with sustained frost, they require lifting from the ground and storage indoors for the winter. However, you can easily use some of the inexpensive bulbs as annuals and replace them each year with other bulb varieties and colors, if you don't want to dig them up each fall. Click here for specific planting and care information for popular summer bulb varieties.
Fall-blooming bulbs
Although spring-blooming bulbs receive lots of glory and fame, a fall garden merits its own attention. Fall-blooming bulbs are unexpected, colorful additions to your garden. Grown with a backdrop of seasonal trees, fall-bloomers create a spectacular and exhilarating autumn landscape. Enjoy resurrecting your garden's brilliance with our fall-blooming varieties.
Choosing a site
Light requirements
s begonia, canna, calla lily, dahlia, and gladiolus, you can enjoy the beauty of the tropics and open your borders to the exotic flowers and foliage of South Africa, Mexico, and other equatorial locales without leaving your own backyard
Most summer-blooming bulbs are tender bulbs, which means, in areas with sustained frost, they require lifting from the ground and storage indoors for the winter. However, you can easily use some of the inexpensive bulbs as annuals and replace them each year with other bulb varieties and colors, if you don't want to dig them up each fall. Click here for specific planting and care information for popular summer bulb varieties.
Fall-blooming bulbs
Although spring-blooming bulbs receive lots of glory and fame, a fall garden merits its own attention. Fall-blooming bulbs are unexpected, colorful additions to your garden. Grown with a backdrop of seasonal trees, fall-bloomers create a spectacular and exhilarating autumn landscape. Enjoy resurrecting your garden's brilliance with our fall-blooming varieties.
Choosing a site
Light requirements
 When choosing a site for your bulbs bear in mind their preference for warmth and sunlight. Some bulbs such as caladiums prefer shade while others such as gladiolus and dahlias prefer sunny spots. Make sure to match your bulbs to the light conditions that allow them to perform their best. For light specifications, please see the plant tag or search for your plant on our site and review its "quick stats."
Soil requirements
Two of the most desirable qualities are good drainage and an abundance of organic matter (humus). You may have to promote drainage, especailly if a puddle of water stands on the site of your bed. To help determine your soil type, scoop up a handful of soil and squeeze it. If it retains the shape of your hand, you have soil with a high proportion of clay and you need to add organic matter to promote drainage. If your soil is mostly composed of clay, it may be necessary to build raised beds. If the soil doesn't hold together at all, your soil is sandy and will need organic matter to help hold moisture. The addition of organic matter and humus will be quite beneficial to the success of growing bulbs.
Garden planning
Color and time of bloom are two of the most important elements to consider when planning your bulb and garden planting. It's helpful to make a sketch of your garden before planting. Choose which bulbs to plant and their locations based on their height, color, and blooming time. In areas with sustained frost periods, keep in mind that most summer bulbs planted in spring are tender and must be dug up and stored before cold weather sets in. Mixing summer-blooming bulbs with other plants of different textures and colors gives interest in the garden beyond the blooming period.
Bulbs also need a site that is protected from the north and west winds, if possible. Wind protection will make your blooms last longer. Make sure to plant tall blooming bulbs in a protected area to prevent wind damage or plan on staking plants upright.
Determining bulb quantities
One you've chosen a site, you will need to calculate how many bulbs you will n
When choosing a site for your bulbs bear in mind their preference for warmth and sunlight. Some bulbs such as caladiums prefer shade while others such as gladiolus and dahlias prefer sunny spots. Make sure to match your bulbs to the light conditions that allow them to perform their best. For light specifications, please see the plant tag or search for your plant on our site and review its "quick stats."
Soil requirements
Two of the most desirable qualities are good drainage and an abundance of organic matter (humus). You may have to promote drainage, especailly if a puddle of water stands on the site of your bed. To help determine your soil type, scoop up a handful of soil and squeeze it. If it retains the shape of your hand, you have soil with a high proportion of clay and you need to add organic matter to promote drainage. If your soil is mostly composed of clay, it may be necessary to build raised beds. If the soil doesn't hold together at all, your soil is sandy and will need organic matter to help hold moisture. The addition of organic matter and humus will be quite beneficial to the success of growing bulbs.
Garden planning
Color and time of bloom are two of the most important elements to consider when planning your bulb and garden planting. It's helpful to make a sketch of your garden before planting. Choose which bulbs to plant and their locations based on their height, color, and blooming time. In areas with sustained frost periods, keep in mind that most summer bulbs planted in spring are tender and must be dug up and stored before cold weather sets in. Mixing summer-blooming bulbs with other plants of different textures and colors gives interest in the garden beyond the blooming period.
Bulbs also need a site that is protected from the north and west winds, if possible. Wind protection will make your blooms last longer. Make sure to plant tall blooming bulbs in a protected area to prevent wind damage or plan on staking plants upright.
Determining bulb quantities
One you've chosen a site, you will need to calculate how many bulbs you will n eed to plant to fill the space. Remember that bulbs look best in groups: A single bulb is a lonely bulb. A good rule of thumb is to plant small bulbs 4" apart (9 bulbs per square foot) and larger ones about 6" apart (4 bulbs per square foot). Therefore, to cover 25 square feet you will need approximately 225 small bulbs or 100 large ones; to cover 50 square feet you will need approximately 500 small bulbs or 200 large ones.
Planting your summer-and fall-blooming bulbs
Planting your bulbs in the garden
1. Prepare your soil. Good soil preparation is the first step to successful bulb gardening. Make sure the soil is loose and porous. Well-drained soil is a must or bulbs will rot. Turn the soil over and work organic matter such as peat moss or compost through to allow good root formation.
2. Space your bulbs. Spacing depends largely on the effect you are trying to achieve. An effective planting technique is to plant bulbs in groups or clusters rather than in individual lines. Space bulbs according to color with the softer colors in the front and the more vibrant colors in the background. Group bulbs according to height and in sequential bloom pattern for a long-lasting show of color. Also, consider how much growth is expected for larger species and give them plenty of room to avoid the task of dividing as they mature. You can also achieve a naturalized planting look by taking a handful of bulbs and tossing them in your planting area. Plant them where they land rather than in exact spaces.
3. Dig planting holes. A bulb planter makes this job a snap. The planting depth for bulbs depends on their size. A good rule of thumb is that the depth should be three times the diameter of the bulb. Cover small bulbs with 1 to 2 inches of soil; plant large bulbs 6 to 8 inches deep. (See bulb specifics on package, or your local garden center, for recommended planting depths.)
4. Work bulb food, bone meal or rock phosphate into the planting area or hole to encourage blooms and root development. Work well-rotted compost into the soil rather than directly touching the bulbs when planting.
5. Plant bulbs firmly in the soil, pointed end up, and avoid damaging fleshy roots, if present. If you are unsure which end to point up, plant the bulb sideways and it will grow in the right
eed to plant to fill the space. Remember that bulbs look best in groups: A single bulb is a lonely bulb. A good rule of thumb is to plant small bulbs 4" apart (9 bulbs per square foot) and larger ones about 6" apart (4 bulbs per square foot). Therefore, to cover 25 square feet you will need approximately 225 small bulbs or 100 large ones; to cover 50 square feet you will need approximately 500 small bulbs or 200 large ones.
Planting your summer-and fall-blooming bulbs
Planting your bulbs in the garden
1. Prepare your soil. Good soil preparation is the first step to successful bulb gardening. Make sure the soil is loose and porous. Well-drained soil is a must or bulbs will rot. Turn the soil over and work organic matter such as peat moss or compost through to allow good root formation.
2. Space your bulbs. Spacing depends largely on the effect you are trying to achieve. An effective planting technique is to plant bulbs in groups or clusters rather than in individual lines. Space bulbs according to color with the softer colors in the front and the more vibrant colors in the background. Group bulbs according to height and in sequential bloom pattern for a long-lasting show of color. Also, consider how much growth is expected for larger species and give them plenty of room to avoid the task of dividing as they mature. You can also achieve a naturalized planting look by taking a handful of bulbs and tossing them in your planting area. Plant them where they land rather than in exact spaces.
3. Dig planting holes. A bulb planter makes this job a snap. The planting depth for bulbs depends on their size. A good rule of thumb is that the depth should be three times the diameter of the bulb. Cover small bulbs with 1 to 2 inches of soil; plant large bulbs 6 to 8 inches deep. (See bulb specifics on package, or your local garden center, for recommended planting depths.)
4. Work bulb food, bone meal or rock phosphate into the planting area or hole to encourage blooms and root development. Work well-rotted compost into the soil rather than directly touching the bulbs when planting.
5. Plant bulbs firmly in the soil, pointed end up, and avoid damaging fleshy roots, if present. If you are unsure which end to point up, plant the bulb sideways and it will grow in the right  direction. Cover bulbs with soil.
6. Water well. If the weather is dry, water the bulbs regularly during the growing period.
7. Label your bulbs as you plant them. Use labels that are big enough so that two to three inches of the label is below the soil level. Labeling is a great way to remember which varieties you planted.
8. Mulch with shredded leaves or bark to conserve moisture, maintain soil temperature, and suppress weeds.
Planting your bulbs in containers
A patio, deck, balcony or entryway can provide enough space for a productive, attractive bulb display. Summer-blooming bulbs such as gladiolus, begonia, and dahlia are suited for container gardening. Fall-blooming colchicums sprout and flower easily on a sunny windowsill. If combining bulbs in one container, remember to combine only those that have similar cultural requirements. Enjoy the fun of creating a signature look for your patio, terrace, deck, balcony or entryway with container gardening!
NOTE: To overwinter tender bulbs grown in containers, leave the bulbs in the containers they grew in over the summer. Store them where the temperature will remain between 50-65° F, until new growth commences in the spring. Keep the soil slightly damp. When the bulb is dormant, or resting, it doesn't require as much water as during its active growing season. (Overwatering may cause bulbs to rot.)
direction. Cover bulbs with soil.
6. Water well. If the weather is dry, water the bulbs regularly during the growing period.
7. Label your bulbs as you plant them. Use labels that are big enough so that two to three inches of the label is below the soil level. Labeling is a great way to remember which varieties you planted.
8. Mulch with shredded leaves or bark to conserve moisture, maintain soil temperature, and suppress weeds.
Planting your bulbs in containers
A patio, deck, balcony or entryway can provide enough space for a productive, attractive bulb display. Summer-blooming bulbs such as gladiolus, begonia, and dahlia are suited for container gardening. Fall-blooming colchicums sprout and flower easily on a sunny windowsill. If combining bulbs in one container, remember to combine only those that have similar cultural requirements. Enjoy the fun of creating a signature look for your patio, terrace, deck, balcony or entryway with container gardening!
NOTE: To overwinter tender bulbs grown in containers, leave the bulbs in the containers they grew in over the summer. Store them where the temperature will remain between 50-65° F, until new growth commences in the spring. Keep the soil slightly damp. When the bulb is dormant, or resting, it doesn't require as much water as during its active growing season. (Overwatering may cause bulbs to rot.)
s begonia, canna, calla lily, dahlia, and gladiolus, you can enjoy the beauty of the tropics and open your borders to the exotic flowers and foliage of South Africa, Mexico, and other equatorial locales without leaving your own backyard
Most summer-blooming bulbs are tender bulbs, which means, in areas with sustained frost, they require lifting from the ground and storage indoors for the winter. However, you can easily use some of the inexpensive bulbs as annuals and replace them each year with other bulb varieties and colors, if you don't want to dig them up each fall. Click here for specific planting and care information for popular summer bulb varieties.
Fall-blooming bulbs
Although spring-blooming bulbs receive lots of glory and fame, a fall garden merits its own attention. Fall-blooming bulbs are unexpected, colorful additions to your garden. Grown with a backdrop of seasonal trees, fall-bloomers create a spectacular and exhilarating autumn landscape. Enjoy resurrecting your garden's brilliance with our fall-blooming varieties.
Choosing a site
Light requirements
When choosing a site for your bulbs bear in mind their preference for warmth and sunlight. Some bulbs such as caladiums prefer shade while others such as gladiolus and dahlias prefer sunny spots. Make sure to match your bulbs to the light conditions that allow them to perform their best. For light specifications, please see the plant tag or search for your plant on our site and review its "quick stats."
Soil requirements
Two of the most desirable qualities are good drainage and an abundance of organic matter (humus). You may have to promote drainage, especailly if a puddle of water stands on the site of your bed. To help determine your soil type, scoop up a handful of soil and squeeze it. If it retains the shape of your hand, you have soil with a high proportion of clay and you need to add organic matter to promote drainage. If your soil is mostly composed of clay, it may be necessary to build raised beds. If the soil doesn't hold together at all, your soil is sandy and will need organic matter to help hold moisture. The addition of organic matter and humus will be quite beneficial to the success of growing bulbs.
Garden planning
Color and time of bloom are two of the most important elements to consider when planning your bulb and garden planting. It's helpful to make a sketch of your garden before planting. Choose which bulbs to plant and their locations based on their height, color, and blooming time. In areas with sustained frost periods, keep in mind that most summer bulbs planted in spring are tender and must be dug up and stored before cold weather sets in. Mixing summer-blooming bulbs with other plants of different textures and colors gives interest in the garden beyond the blooming period.
Bulbs also need a site that is protected from the north and west winds, if possible. Wind protection will make your blooms last longer. Make sure to plant tall blooming bulbs in a protected area to prevent wind damage or plan on staking plants upright.
Determining bulb quantities
One you've chosen a site, you will need to calculate how many bulbs you will need to plant to fill the space. Remember that bulbs look best in groups: A single bulb is a lonely bulb. A good rule of thumb is to plant small bulbs 4" apart (9 bulbs per square foot) and larger ones about 6" apart (4 bulbs per square foot). Therefore, to cover 25 square feet you will need approximately 225 small bulbs or 100 large ones; to cover 50 square feet you will need approximately 500 small bulbs or 200 large ones.
Planting your summer-and fall-blooming bulbs
Planting your bulbs in the garden
1. Prepare your soil. Good soil preparation is the first step to successful bulb gardening. Make sure the soil is loose and porous. Well-drained soil is a must or bulbs will rot. Turn the soil over and work organic matter such as peat moss or compost through to allow good root formation.
2. Space your bulbs. Spacing depends largely on the effect you are trying to achieve. An effective planting technique is to plant bulbs in groups or clusters rather than in individual lines. Space bulbs according to color with the softer colors in the front and the more vibrant colors in the background. Group bulbs according to height and in sequential bloom pattern for a long-lasting show of color. Also, consider how much growth is expected for larger species and give them plenty of room to avoid the task of dividing as they mature. You can also achieve a naturalized planting look by taking a handful of bulbs and tossing them in your planting area. Plant them where they land rather than in exact spaces.
3. Dig planting holes. A bulb planter makes this job a snap. The planting depth for bulbs depends on their size. A good rule of thumb is that the depth should be three times the diameter of the bulb. Cover small bulbs with 1 to 2 inches of soil; plant large bulbs 6 to 8 inches deep. (See bulb specifics on package, or your local garden center, for recommended planting depths.)
4. Work bulb food, bone meal or rock phosphate into the planting area or hole to encourage blooms and root development. Work well-rotted compost into the soil rather than directly touching the bulbs when planting.
5. Plant bulbs firmly in the soil, pointed end up, and avoid damaging fleshy roots, if present. If you are unsure which end to point up, plant the bulb sideways and it will grow in the right  direction. Cover bulbs with soil.
6. Water well. If the weather is dry, water the bulbs regularly during the growing period.
7. Label your bulbs as you plant them. Use labels that are big enough so that two to three inches of the label is below the soil level. Labeling is a great way to remember which varieties you planted.
8. Mulch with shredded leaves or bark to conserve moisture, maintain soil temperature, and suppress weeds.
Planting your bulbs in containers
A patio, deck, balcony or entryway can provide enough space for a productive, attractive bulb display. Summer-blooming bulbs such as gladiolus, begonia, and dahlia are suited for container gardening. Fall-blooming colchicums sprout and flower easily on a sunny windowsill. If combining bulbs in one container, remember to combine only those that have similar cultural requirements. Enjoy the fun of creating a signature look for your patio, terrace, deck, balcony or entryway with container gardening!
NOTE: To overwinter tender bulbs grown in containers, leave the bulbs in the containers they grew in over the summer. Store them where the temperature will remain between 50-65° F, until new growth commences in the spring. Keep the soil slightly damp. When the bulb is dormant, or resting, it doesn't require as much water as during its active growing season. (Overwatering may cause bulbs to rot.)
direction. Cover bulbs with soil.
6. Water well. If the weather is dry, water the bulbs regularly during the growing period.
7. Label your bulbs as you plant them. Use labels that are big enough so that two to three inches of the label is below the soil level. Labeling is a great way to remember which varieties you planted.
8. Mulch with shredded leaves or bark to conserve moisture, maintain soil temperature, and suppress weeds.
Planting your bulbs in containers
A patio, deck, balcony or entryway can provide enough space for a productive, attractive bulb display. Summer-blooming bulbs such as gladiolus, begonia, and dahlia are suited for container gardening. Fall-blooming colchicums sprout and flower easily on a sunny windowsill. If combining bulbs in one container, remember to combine only those that have similar cultural requirements. Enjoy the fun of creating a signature look for your patio, terrace, deck, balcony or entryway with container gardening!
NOTE: To overwinter tender bulbs grown in containers, leave the bulbs in the containers they grew in over the summer. Store them where the temperature will remain between 50-65° F, until new growth commences in the spring. Keep the soil slightly damp. When the bulb is dormant, or resting, it doesn't require as much water as during its active growing season. (Overwatering may cause bulbs to rot.)
Wednesday, May 16, 2007
All About Annuals
Annual flowers provide a rewarding and simple way to achieve color in a landscape. For a modest price, they can instantly enhance the beauty of your grounds. With correct conditions,  many annuals can last from just after the last spring frost until the first autumn frost. Every year, you can plant different annuals and experience a charming new look with different colors, sizes, beauty and form.

many annuals can last from just after the last spring frost until the first autumn frost. Every year, you can plant different annuals and experience a charming new look with different colors, sizes, beauty and form.
You can locate annuals in a variety of different places. Often, they are planted in a bed of their own or mixed with summer bulbs and perennials. Gardeners use annual beds and borders not only to add aesthetic value, but also to highlight or camouflage areas that are bare. When bulbs fade, but before perennials are at their peak, annuals fill those empty spaces perfectly. With increased interest in cut flowers inside the home, old-fashioned cutting gardens -- comprised mostly of annuals -- are becoming more and more popular!
You can also position annuals just about anywhere you want to add color, including outdoor window boxes, containers and hanging baskets. Container planting is an effective way to bring color into your landscape.
Whether for beds, borders, cutting or containers, you can create an eye-pleasing palette of color with annuals. Enjoy!
Choosing a site
Soil requirements Most annuals prefer slightly acid to neutral soil with a pH of 5.5 to 7.0. To check your pH, perform a soil test or contact your local County Extension Service. You can use lime to raise pH or add sulfur to lower pH. Your annuals will perform best in nutrient-rich, well-draining soil that crumbles easily.
You can improve wet, poorly drained clay soils, and dry, sandy soils by  incorporating organic matter, such as compost or well-rotted manure, into the soil. After the first year, add more compost to the bed before planting. If you cannot work the soil, such as in a mixed border, top-dress the area with compost after setting in your annuals.
Light requirements Most annuals perform best in full sun (6 to 8 hours); however, some prefer shade or partial shade. Make sure to provide your annuals with their required light conditions.
Location and spacing requirements The location of your planting area depends upon the effect you want to achieve. You may want to plan the planting bed first so you can effectively create your colorful world with varying shapes and sizes. Be sure to check the a planting guide, or search for your plant online, to determine proper plant spacing when planning your annual garden.
Planting your annuals
Preparing the site The first step to successful growing is proper soil preparation. Prepare your growing area the previous fall or just prior to planting your annuals in the spring.
Prior to planting, remove all grass, weeds, stones and other debris from the flower bed.
Incorporate organic matter into the top few inches of the soil using a spade or tiller. Adding organic matter such as peat moss, leaf mold or well-rotted garden compost improves moisture retention and drainage. Fertilize with a slow-release, all-purpose fertilizer at this time as well.
Mix well with a garden fork until uniform and then level off.
When to plant annuals
The second step to successful growing of annuals is proper planting. Remember, many annuals are not tolerant of frost (though some are). For precise information about frost dates in your area, contact your local cooperative extension service. You can plant in the ground or in containers.
Your plants will suffer much less trauma if transplanted in the evening or on an overcast day. Avoid the heat of the midday sun.
Planting your annuals in the garden bed
Prepare the soil, if you haven't done so already.
Water the area well. Ideally, your garden bed should be watered the day before planting so soil is moist but not muddy. However, if the soil is dry, add water to the hole before planting the transplant. Mark the bed with small stakes or sticks based on specified planting distances. Lightly water your plants in their containers. Moist plants are easier to remove from containers without disturbing the root ball.
 Carefully release your plant from its container. Gently squeeze the container and slide the plant out onto your palm. Keep the root ball intact to avoid damage. Dig a planting hole with a trowel. The hole should be slightly (about 1½ times) larger than the root ball. Set the plant in place at the same level at which it was growing in its shipping container. Carefully firm the soil around the roots. Do not compact the soil.
 Water the soil well and fertilize with a starter fertilizer. Keep the foliage dry during watering. Add a 2-3 inch layer of mulch to reduce weeds, conserve moisture and keep the roots cool.
Planting your annuals in containers
Select a container large enough to hold the medium and the plants. It must also have good drainage holes. Fill the new container with potting soil. Fill to about 1-2 inches from the top of the container. Lightly water your plants in their shipping containers. Moist plants are easier to remove from containers without disturbing the root ball. Place the annual at the same soil depth as it was in its original container. For a fuller effect, plant annuals closer together than you would in the ground. Fill the excess space with more potting soil. Water immediately. Allow the water to drain, and add more soil if necessary. Water daily for the first week, then as necessary. Containers tend to dry out quickly; check the soil daily and water to keep the soil moist, but not soggy. Hot sun and strong wind will dry the soil even more quickly; mulch can help keep the plant moist. Fertilize with a soluble plant food according to label directions.
Place your container in a location suitable for your annual selections. Most containerized annuals need to receive at least six hours of direct sun, good air circulation, and shelter from strong winds. For sun requirements, check with your local nursury. You will find many books on the subject, as well. Rotate the container occasionally to make sure your plants grow symmetrically. Annual care tips
 Watering
Water well after planting and then water frequently until your plants are established and new growth has started. Annuals need about one inch of water a week. Generally, deep, infrequent watering is better than frequent, light applications. Soaker hoses and drip irrigation work best. If you are using an overhead sprinkler, water as early in the day as possible so foliage will dry off before night. Make sure to water more frequently during windy, dry periods. Make sure the soil isn't soggy or overly wet.
Watering
Water well after planting and then water frequently until your plants are established and new growth has started. Annuals need about one inch of water a week. Generally, deep, infrequent watering is better than frequent, light applications. Soaker hoses and drip irrigation work best. If you are using an overhead sprinkler, water as early in the day as possible so foliage will dry off before night. Make sure to water more frequently during windy, dry periods. Make sure the soil isn't soggy or overly wet.
Fertilizing Most annuals do not require high levels of fertilizer. We suggest a slow-release fertilizer to furnish adequate nutrients. Mix this in when preparing the soil. Additional fertilizer may be necessary to jump start those annuals suffering from a summer slump.
Staking Top-heavy or tall annuals may require staking. Loosely tie your plant to a sturdy stake with plant ties or old panty hose. Avoid pinching or damaging the stem. Also, consider placing garden stakes adjacent to those plants that lean over when they mature. Stake early in the season so plants camouflage the support.
Pruning  For most annuals, pinch off ("deadhead") faded flowers to prevent plants from setting seed and to encourage additional blooms.
Mulching After planting, add a 2-to 3-inch layer of mulch to reduce weeds, conserve moisture, and keep the roots cool. Organic choices include bark chips, pine needles, and shredded leaves. In the following year, you can incorporate mulch into the soil before planting. Occasionally, weeds may appear even though you applied mulch; be sure to remove weeds as soon as possible so they do not compete for water and nutrients. Remove weeds carefully (by hand, if possible), especially when the annuals are young, so you do not disturb their roots. As your annuals grow and fill in, weeding will become less time-consuming.
Reseeding Some annuals will reseed from one year to the next. The seedlings may not be identical to the parent; they can differ in flower color and can be less vigorous. For maximum effect, replant with fresh annuals each year. For those seedlings that are desired, thin to their appropriate plant spacing when plants are small to allow them to reach their maximum potential.
Garden clean-up Some gardeners prefer to remove annuals in the fall when the foliage fades and after frost has blackened the tops. You can compost your pulled annuals to reduce insect and disease problems next season. In some areas of the country, annual beds are replanted with different selections in the fall for yet another season of beautiful blooms.
Friday, March 09, 2007
Troubleshooting with Annuals
What should I do to get rid of the unsightly spent blossoms on my annuals? 
The best way to deal with old and withered flowers is to deadhead the plants. Deadheading can be done at any time of year, by cutting or pinching dead buds. You can use any hand tool, pruning shears, or even scissors- just be sure to avoid new buds and blooms. Deadheading will freshen the appearance of your garden, as well as promote longer-lasting and more abundant blooms.
Why won't my annual flowers bloom? A common reason why flowering plants refuse to bloom is an overdose of nitrogen. Many commercial fertilizers are extremely high in nitrogen. While nitrogen is an essential element for vigorous plant growth, too much nitrogen encourages leafy growth at the expense of blooms. Try supplementing your soil with a balanced organic fertilizer for blooming plants. You might also consider having your soil tested through your local county extention agency. This testing will provide you with valuable soil improvement suggestions.
How can I protect my annuals from infection by diseases?
The best control for plant diseases is prevention. Here are a few  simple steps to help stop the spread of disease before it starts:
1. Remove and destroy severely infected plants or plant parts to avoid spreading diseases to healthy plants. Do not compost infected material.
2. Space plants widely to allow good air circulation.
3. Allow soil to dry out between waterings to avoid stem and root rot.
4. Incorporate compost into the soil to introduce beneficial soil organisms and improve drainage.
5. Do not work among plants when they are wet to avoid the spread of water-borne diseases.
6. Mulch to prevent the splashing of fungi-infested mud onto plants.
7. Sterilize hands and tools after working around infected plants  by washing well with soap or applying rubbing alcohol.
8. Remove and compost garden debris so diseases cannot overwinter in the garden.
9. Water early in the day. This will allow plants to dry by nightfall. Fungal diseases thrive in cool, damp conditions.
10. Control insect pests. Insects can carry disease from infected plants to healthy ones.
11. Maintain a good schedule of watering and fertilization. Plants that are healthy and stress-free are better able to resist pest and disease infestation.
Is weeding really that important? Weeds compete with your plants for moisture and nutrients and they frequently win if they're not controlled. Weed early or late in the day -- avoid midday heat, which will quickly weaken your resolve. Weed often -- don't let the weeds get big and definitely do not let them set seed. After weeding, a 3-4" mulch of shredded pine bark or another light material will keep new weeds from sprouting.
 How can I safely control pests on my annuals?
Insects carry diseases from infected to healthy plants, so it is very important to keep insect populations in check. You can prevent insects from reaching your tender seedlings by covering them with floating row covers. If infestation has already occurred, don't worry; there are several safe, organic measures for insect control. Small insects such as aphids, mealybugs, and whiteflies can be knocked off the seedlings using a strong spray of water. For more severe infestations, apply insecticidal soap according to label directions. Larger pests, such as beetles and caterpillars, can be controlled by handpicking and destroying the insects. Applying Bt (Bacillus thuringiensis) and/or beneficial nematodes to the soil will also control many of these insects and their larvae without harming beneficial insects. You can purchase and release beneficial insects, such as ladybugs, parasitic wasps, and praying mantids or attract them to your garden by planting small-flowered nectar plants, such as alyssum and dill, near your garden. Attract pest-eating birds to your garden by placing bird houses, bird baths and feeders in your yard.
How can I safely control pests on my annuals?
Insects carry diseases from infected to healthy plants, so it is very important to keep insect populations in check. You can prevent insects from reaching your tender seedlings by covering them with floating row covers. If infestation has already occurred, don't worry; there are several safe, organic measures for insect control. Small insects such as aphids, mealybugs, and whiteflies can be knocked off the seedlings using a strong spray of water. For more severe infestations, apply insecticidal soap according to label directions. Larger pests, such as beetles and caterpillars, can be controlled by handpicking and destroying the insects. Applying Bt (Bacillus thuringiensis) and/or beneficial nematodes to the soil will also control many of these insects and their larvae without harming beneficial insects. You can purchase and release beneficial insects, such as ladybugs, parasitic wasps, and praying mantids or attract them to your garden by planting small-flowered nectar plants, such as alyssum and dill, near your garden. Attract pest-eating birds to your garden by placing bird houses, bird baths and feeders in your yard. 
For more information, visit our Organic Solutions Department online or contact Yardiac.com Customer Solutions at 1.866.927.3422.
Is there a safe, nontoxic way to control slugs and snails? These pests can be controlled with slug bait, plastic traps, copper barriers, or homemade beer traps. To make beer traps, simply sink paper cups, or small metal cans with the tops cut off, into the ground until tops are level with the soil surface. Fill about halfway full with beer. The slugs are attracted to the beer, fall in, and drown. Empty the traps and refill twice a week. Space the traps at about 3- to 10-foot intervals.
Saturday, January 20, 2007
Paint Your Garden With Annuals
Never look at a neighbor's yard in total envy, because their garden beds exploded into a rainbow of red, orange, blue, yellow and purple, while yours had all the color of a black and white photo! 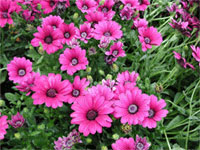 Creating that palette of color is easy, easier than one might imagine. All it takes is some time, know-how and a few well-placed annual plants. Here are some suggestions for adding instant color to the yard.
Selecting Annuals
Annuals are flowers that experience their entire life cycle in one growing season. Essentially, they grow, blossom and die, allowing the homeowner to create a new and varied garden every year. Some of the most popular annuals include zinnias, marigolds, inpatients and rose periwinkles. Zinnias come in a wide variety of colors. Marigolds are known for their bright, gold appearance. Rose periwinkles bloom in a white hue with a flush of pink. Make sure you select the plants that will work with your local weather conditions -- heat, drought, frost, etc.
Preparing the Planting Site
The next step is to select a planting site. Bear in mind that most annuals thrive best with full exposure to the sun's rays. Now it's time to prepare the soil. The goal is to have soil that is well-drained, full of nutrients and free of weeds. Compacted soil makes it hard for plant roots to spread out, while sandy soil doesn't allow enough water to be absorbed. Using a rake, hoe or tiller, turn the soil over several times. Mixing in organic nutrients will prepare and loosen compacted soil while binding sandy soil. Make sure that all weeds are removed from the bed. This can be accomplished by hand or with an herbicide. Once that's done, apply fertilizer according to the directions on the package.
Planting Annuals
Some gardeners appreciate the challenge of growing annuals from seed, but the most ideal approach is to utilize transplants. For one reason, it's easier to envision how the bed will ultimately look when using transplants. Secondly, seeds take time to grow, but transplants appeal to the instant gratification lover in all of us. In advance of actually putting plants into the ground, draw a picture of the bed as you intend it to look. Use the drawing as a planting guide, almost as a map. "Zinnias go here. Some marigolds go here and there, and way over there..."
When shopping for transplants, seek those with rich green leaves and tight, compact growth. Don't worry about a transplant's height. It will grow as tall as it's supposed to. Also, don't give in to the temptation to buy annuals that are already flowering. They're the quickest to suffer transplant shock, and because they're already blooming, may not last as long. Plants without buds are the way to go, as they'll be less vulnerable to transplant shock and will grow quickly once in the soil.
Keeping Weeds at Bay
Once annuals are in the ground, one of the greatest threats they can face is an onslaught of weeds. A homeowner who hasn't dealt with this problem before it starts could find himself with ravaged plants and hours spent unnecessarily trying to rectify the situation. All it takes to enjoy a summer of weed-free gardening is a good weed preventer and few extra minutes spent right after the annuals have been planted. A product such as Preen will effectively deter weed growth. Preen comes in an easy-to-use, refillable canister that allows granules to be poured -- much like salt from a shaker.
Creating that palette of color is easy, easier than one might imagine. All it takes is some time, know-how and a few well-placed annual plants. Here are some suggestions for adding instant color to the yard.
Selecting Annuals
Annuals are flowers that experience their entire life cycle in one growing season. Essentially, they grow, blossom and die, allowing the homeowner to create a new and varied garden every year. Some of the most popular annuals include zinnias, marigolds, inpatients and rose periwinkles. Zinnias come in a wide variety of colors. Marigolds are known for their bright, gold appearance. Rose periwinkles bloom in a white hue with a flush of pink. Make sure you select the plants that will work with your local weather conditions -- heat, drought, frost, etc.
Preparing the Planting Site
The next step is to select a planting site. Bear in mind that most annuals thrive best with full exposure to the sun's rays. Now it's time to prepare the soil. The goal is to have soil that is well-drained, full of nutrients and free of weeds. Compacted soil makes it hard for plant roots to spread out, while sandy soil doesn't allow enough water to be absorbed. Using a rake, hoe or tiller, turn the soil over several times. Mixing in organic nutrients will prepare and loosen compacted soil while binding sandy soil. Make sure that all weeds are removed from the bed. This can be accomplished by hand or with an herbicide. Once that's done, apply fertilizer according to the directions on the package.
Planting Annuals
Some gardeners appreciate the challenge of growing annuals from seed, but the most ideal approach is to utilize transplants. For one reason, it's easier to envision how the bed will ultimately look when using transplants. Secondly, seeds take time to grow, but transplants appeal to the instant gratification lover in all of us. In advance of actually putting plants into the ground, draw a picture of the bed as you intend it to look. Use the drawing as a planting guide, almost as a map. "Zinnias go here. Some marigolds go here and there, and way over there..."
When shopping for transplants, seek those with rich green leaves and tight, compact growth. Don't worry about a transplant's height. It will grow as tall as it's supposed to. Also, don't give in to the temptation to buy annuals that are already flowering. They're the quickest to suffer transplant shock, and because they're already blooming, may not last as long. Plants without buds are the way to go, as they'll be less vulnerable to transplant shock and will grow quickly once in the soil.
Keeping Weeds at Bay
Once annuals are in the ground, one of the greatest threats they can face is an onslaught of weeds. A homeowner who hasn't dealt with this problem before it starts could find himself with ravaged plants and hours spent unnecessarily trying to rectify the situation. All it takes to enjoy a summer of weed-free gardening is a good weed preventer and few extra minutes spent right after the annuals have been planted. A product such as Preen will effectively deter weed growth. Preen comes in an easy-to-use, refillable canister that allows granules to be poured -- much like salt from a shaker.  Simply sprinkle Preen evenly around the bed, then gently water the area. Follow the package instructions for maximum effectiveness. A single application will last for three months, at which time Preen can be applied again. Those homeowners who want to make the task of caring for annuals even easier may want to use Preen 'n Green. Preen 'n Green prevents weed growth while providing vital nutrients.
It's easy to turn your yard into a work of art. Just think of the garden bed as a canvas and annuals as a selection of colorful paints, and go to it!
Simply sprinkle Preen evenly around the bed, then gently water the area. Follow the package instructions for maximum effectiveness. A single application will last for three months, at which time Preen can be applied again. Those homeowners who want to make the task of caring for annuals even easier may want to use Preen 'n Green. Preen 'n Green prevents weed growth while providing vital nutrients.
It's easy to turn your yard into a work of art. Just think of the garden bed as a canvas and annuals as a selection of colorful paints, and go to it!
 Creating that palette of color is easy, easier than one might imagine. All it takes is some time, know-how and a few well-placed annual plants. Here are some suggestions for adding instant color to the yard.
Selecting Annuals
Annuals are flowers that experience their entire life cycle in one growing season. Essentially, they grow, blossom and die, allowing the homeowner to create a new and varied garden every year. Some of the most popular annuals include zinnias, marigolds, inpatients and rose periwinkles. Zinnias come in a wide variety of colors. Marigolds are known for their bright, gold appearance. Rose periwinkles bloom in a white hue with a flush of pink. Make sure you select the plants that will work with your local weather conditions -- heat, drought, frost, etc.
Preparing the Planting Site
The next step is to select a planting site. Bear in mind that most annuals thrive best with full exposure to the sun's rays. Now it's time to prepare the soil. The goal is to have soil that is well-drained, full of nutrients and free of weeds. Compacted soil makes it hard for plant roots to spread out, while sandy soil doesn't allow enough water to be absorbed. Using a rake, hoe or tiller, turn the soil over several times. Mixing in organic nutrients will prepare and loosen compacted soil while binding sandy soil. Make sure that all weeds are removed from the bed. This can be accomplished by hand or with an herbicide. Once that's done, apply fertilizer according to the directions on the package.
Planting Annuals
Some gardeners appreciate the challenge of growing annuals from seed, but the most ideal approach is to utilize transplants. For one reason, it's easier to envision how the bed will ultimately look when using transplants. Secondly, seeds take time to grow, but transplants appeal to the instant gratification lover in all of us. In advance of actually putting plants into the ground, draw a picture of the bed as you intend it to look. Use the drawing as a planting guide, almost as a map. "Zinnias go here. Some marigolds go here and there, and way over there..."
When shopping for transplants, seek those with rich green leaves and tight, compact growth. Don't worry about a transplant's height. It will grow as tall as it's supposed to. Also, don't give in to the temptation to buy annuals that are already flowering. They're the quickest to suffer transplant shock, and because they're already blooming, may not last as long. Plants without buds are the way to go, as they'll be less vulnerable to transplant shock and will grow quickly once in the soil.
Keeping Weeds at Bay
Once annuals are in the ground, one of the greatest threats they can face is an onslaught of weeds. A homeowner who hasn't dealt with this problem before it starts could find himself with ravaged plants and hours spent unnecessarily trying to rectify the situation. All it takes to enjoy a summer of weed-free gardening is a good weed preventer and few extra minutes spent right after the annuals have been planted. A product such as Preen will effectively deter weed growth. Preen comes in an easy-to-use, refillable canister that allows granules to be poured -- much like salt from a shaker.
Creating that palette of color is easy, easier than one might imagine. All it takes is some time, know-how and a few well-placed annual plants. Here are some suggestions for adding instant color to the yard.
Selecting Annuals
Annuals are flowers that experience their entire life cycle in one growing season. Essentially, they grow, blossom and die, allowing the homeowner to create a new and varied garden every year. Some of the most popular annuals include zinnias, marigolds, inpatients and rose periwinkles. Zinnias come in a wide variety of colors. Marigolds are known for their bright, gold appearance. Rose periwinkles bloom in a white hue with a flush of pink. Make sure you select the plants that will work with your local weather conditions -- heat, drought, frost, etc.
Preparing the Planting Site
The next step is to select a planting site. Bear in mind that most annuals thrive best with full exposure to the sun's rays. Now it's time to prepare the soil. The goal is to have soil that is well-drained, full of nutrients and free of weeds. Compacted soil makes it hard for plant roots to spread out, while sandy soil doesn't allow enough water to be absorbed. Using a rake, hoe or tiller, turn the soil over several times. Mixing in organic nutrients will prepare and loosen compacted soil while binding sandy soil. Make sure that all weeds are removed from the bed. This can be accomplished by hand or with an herbicide. Once that's done, apply fertilizer according to the directions on the package.
Planting Annuals
Some gardeners appreciate the challenge of growing annuals from seed, but the most ideal approach is to utilize transplants. For one reason, it's easier to envision how the bed will ultimately look when using transplants. Secondly, seeds take time to grow, but transplants appeal to the instant gratification lover in all of us. In advance of actually putting plants into the ground, draw a picture of the bed as you intend it to look. Use the drawing as a planting guide, almost as a map. "Zinnias go here. Some marigolds go here and there, and way over there..."
When shopping for transplants, seek those with rich green leaves and tight, compact growth. Don't worry about a transplant's height. It will grow as tall as it's supposed to. Also, don't give in to the temptation to buy annuals that are already flowering. They're the quickest to suffer transplant shock, and because they're already blooming, may not last as long. Plants without buds are the way to go, as they'll be less vulnerable to transplant shock and will grow quickly once in the soil.
Keeping Weeds at Bay
Once annuals are in the ground, one of the greatest threats they can face is an onslaught of weeds. A homeowner who hasn't dealt with this problem before it starts could find himself with ravaged plants and hours spent unnecessarily trying to rectify the situation. All it takes to enjoy a summer of weed-free gardening is a good weed preventer and few extra minutes spent right after the annuals have been planted. A product such as Preen will effectively deter weed growth. Preen comes in an easy-to-use, refillable canister that allows granules to be poured -- much like salt from a shaker.  Simply sprinkle Preen evenly around the bed, then gently water the area. Follow the package instructions for maximum effectiveness. A single application will last for three months, at which time Preen can be applied again. Those homeowners who want to make the task of caring for annuals even easier may want to use Preen 'n Green. Preen 'n Green prevents weed growth while providing vital nutrients.
It's easy to turn your yard into a work of art. Just think of the garden bed as a canvas and annuals as a selection of colorful paints, and go to it!
Simply sprinkle Preen evenly around the bed, then gently water the area. Follow the package instructions for maximum effectiveness. A single application will last for three months, at which time Preen can be applied again. Those homeowners who want to make the task of caring for annuals even easier may want to use Preen 'n Green. Preen 'n Green prevents weed growth while providing vital nutrients.
It's easy to turn your yard into a work of art. Just think of the garden bed as a canvas and annuals as a selection of colorful paints, and go to it!
Subscribe to:
Posts (Atom)


